Film Photography

We shoot film. . . doesn’t everyone?

COVER YOUR BACK?

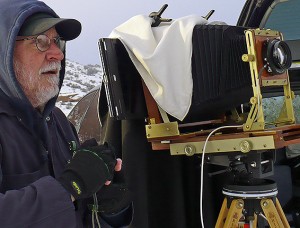
COVER YOUR BACKDo you cover the back of your view camera with the darkcloth before you pull the darkslide? I certainly do!

Have you ever experienced these pesky little light leaks along the edge of the film that seem to come from nowhere? Gremlins?CLIP Not really. They are caused by any number of things that can go wrong in LF. A holder that has a small leak only when the slide is out, one that does not fit tight in the camera back, a light trap that is worn, or maybe you stress the holder as you remove or replace the darkslide. Thing is, it always seems to show up on that one piece of film you really want to print. Light leaks were seldom a problem as long as we were shooting 4×5, but when we moved to larger film sizes it became more evident. I will say, without reservation, as the film size goes up, the problems multiply exponentially!
The good news. . . the solution is simple, and for us, solved 99% of the light leak problems. Leave the darkcloth on the back of the camera while exposing the film. This way, even if there is a problem with the holder seating or the light seal being broken when removing or replacing the slide, you greatly reduce the probability of a leak.

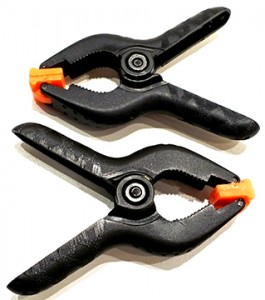
It has become a habit to clip the darkcloth to the camera back once it is setup, and it remains there till the exposure is finished and the darkslide is back in the holder. We both use small, inexpensive, plastic spring clamps available at the local hardware store, to clip the darkcloth to the camera back. Simple, quick, easy. . . and. . . it works!

JB

Posted by JB Harlin in Film, How-To, Photography

PHOTO EQUIPMENT FOR SALE

FOR SALEWhat are you looking for? A new camera? Pieces and parts? A new lens? We are cleaning out our equipment closet and it is time for some things to go to someone that can use them. The excess equipment we no longer need may be just what you are looking for.
Drop by the new area on our web site FOR SALE and take look. There just may be something you really need. And you will be helping us with our spring cleaning!

JB

Posted by JB Harlin in Photography

WHERE DO I START?

The question comes up every now and again about getting started processing and printing B&W film in the wet darkroom. Seems that as more and more people come to photography via the digi-snapper route, they eventually become interested in that antiquated art form known as Film. I have said this so many times, have been cursed and belittled by some for my comments, but here it is again. Digital is not a replacement for film. It is simply another art form. There I have said it one more time. If you don’t get it, too bad. Get over it.Do It In The Dark

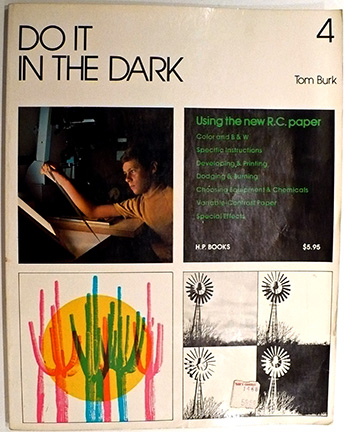
Now, back to the subject for today, how to get started processing and printing film in the wet darkroom. The question is, where and how do I start? What do I need? Is it hard to do? There are many answers to these questions. You can take a class, find a workshop, or study with someone that is willing to teach you. Or, my favorite method of doing anything. . . find a good book and learn on your own.

If you choose my method the next question is, what book? There are many good books on getting started with film. Also, there are a lot of good web sites on the Internet that will help you. My recommendation is to start where I did over thirty years ago. I found a great book that is geared to the rank beginner. This book does not outline anything that is set in concrete, but if you follow it you will process a roll of film and make prints. Wherever you go from there is up to you. This is where I started and I can say it worked the first time and though I do not use much of the techniques or materials in the book anymore, this was the launching pad for me to move to more advanced techniques. Some of the materials and chemicals are no longer available, specifically the chapters on color, but the basic B&W techniques still apply. This book is a bare-bones, get you started text.

OK. . . enough of my book review, time to get down to brass tacks. First I have to say that the book I recommend is long out of print. But, the good news is the title is readily available on the used market and it is not expensive. I found several copies on the Internet for $1.00! If you are interested in getting started in the wet darkroom, here is a good place to begin. It worked for me, I am sure it will work for you also. Here it is;

“DO IT IN THE DARK”
by Tom Burk
H. P. Books 1975
ISBN 0-912656-28-X

This is one place to start. . .

JB

Posted by JB Harlin in Darkroom, Film, How-To, Photography

THE VARIABLE CONTRAST COLD LIGHT

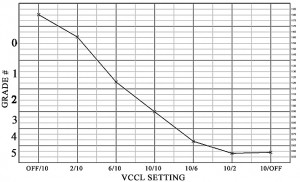
PAPER GRADEThe dual grid, Variable Contrast Cold Light head (VCCL), is a great device for your enlarger if you print on black & white VC papers. These heads allow you to dial in any contrast grade your VC paper is capable of producing. You have continuously variable contrast at your fingertips. And, yes they do work. The trouble is, every paper is different. Setting the dial on the head to any random equal setting may or may not produce a grade #2 contrast. Worse yet, what two settings should you choose?

When you start using a new VCCL head you are now faced with a quandary. How do you calibrate this thing so you have some idea what paper grade you are actually getting? Did you know you can calibrate a VCCL head to a known standard? You can know what settings of the blue and green grid will give you an equivalent grade #2, or #3, or anything within the range of the paper!

Yes you can calibrate a VCCL head, and here is how it can be done. Look at the article “USING BTZS TO CALIBRATE YOUR VARIABLE CONTRAST COLD LIGHT HEAD” originally published in the Sep/Oct 2007 issue of View Camera Magazine in the ARTICLES area of our web site.

Posted by JB Harlin in Darkroom, How-To, Photography

THE ART IN PHOTOGRAPHY?

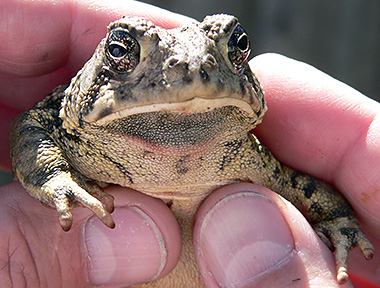
Mr. Frog

I was recently asked to comment and then was drawn into a discussion on the art of photography and the influence of competition. Specifically, how people’s artistic creativity is swayed by making photographs for the purpose of competing against each other for the satisfaction of winning a blue ribbon.

I am very much against being a member of any large club or organization. Why? Because I feel there is too much of a tendency to become trapped in an endless loop of trying to fit into someone else’s idea of what art should be. Creating images for the sole purpose of winning some contest, for me at least, is a recipe for killing creativity, imagination and individuality, thus turning you into just another ho-hum shutter clicker.

Art is a very personal thing. You cannot please everyone, so why even try to please anyone? You need to please yourself first and foremost. Your art is an expression of what you see and feel. It has nothing to do with what anyone else likes or dislikes. So, why torture yourself by trying to entertain someone else’s idea of what your image should contain, or not contain? Especially if the only reward is a sixty cent ribbon!

It is very important to hone and understand the craft of photography. This is the easy part. You have to understand the craft of your chosen medium. This is true of any creative activity, from wood carving to painting. If you do not understand how to use your equipment and you are not able to learn the ins and outs on your own, by all means, take a class, join a club or group. But, once you attain a basic mastery of the craft, get as far away from external artistic influence as you possibly can. Yes, you also need to learn a few artistic basics. You need to study art theory and understand a few fundamental concepts concerning composition and the artistic view. But, you do not need an endless influence molding you into what someone else views as art. Edward Weston said something to the effect that, “composition is only the best way of seeing.” The creation of art has no hard and fast rules. What suits you is the only thing that matters.

Another reason that I steer away from large clubs and organizations is because they tend to be obsessed with equipment. Remember, amateurs talk about equipment. . . artists talk about art. Learn the craft as quickly as possible, then get on using, and improving that craft in order to create your art. Also remember, a poor craftsman always blames his tools. And speaking of tools, keep in mind that a poor craftsman makes poor images no matter how good the equipment. A well rounded craftsman can make admirable, even stunning images with the worst of equipment. You should own the finest hardware you can afford, but never forget, the camera does not make the photo, you do! Get the equipment and craft of photography out of the way as quickly as possible and get on with making your art! The only thing that matters is the finished image.

And speaking of the finished image, personally I could care less if anyone likes any one of my photographs. Any image I make is not created for anyone but me first and foremost. My photography is mine, and mine alone. If you don’t like it, then don’t bother. If you do like it, then why not do all of us a favor and buy it, and hang it on your wall?

JB

Posted by JB Harlin in Commentary, Photography

*NEWS*: 2010 ANNUAL ULF FILM ORDERING WINDOW NOW OPEN

The ILFORD PHOTO annual ULF film ordering window for 2010 is now open.

This annual campaign allows ULF photographers the opportunity to order special sizes of ILFORD sheet film with no minimum order quantity.

Photographers have until Friday 11th June 2010 to place their orders with Authorised Dealers. The factory at Mobberley, Cheshire, England, expect to have the finished items with Dealers in the UK during August, and USA during September.

To download a full list of the items available in this campaign and for a list of Authorised Dealers Click here

Posted by JB Harlin in Events, Photography

ILFORD PHOTO ENSURES A FUTURE FOR BLACK AND WHITE

We Support Ilford
ILFORD PHOTO ENSURES A FUTURE FOR BLACK AND WHITE
12th March 2010

Iconic black and white brand underlines commitment to existing product range

9 March 2010: ILFORD PHOTO has issued a commitment to all black and white photography enthusiasts that despite other brands’ products becoming discontinued elsewhere in the industry, it will continue to support its existing range of mono photographic products for the foreseeable future.

Numerous black and white specialist products have been discontinued by other manufacturers in recent months and as the only dedicated black and white photographic brand, ILFORD PHOTO issued the following statement today reassuring customers that it has no plans for downsizing its product range.

Steven Brierley, Marketing Director for ILFORD PHOTO commented: “Over the course of our 130 year heritage, ILFORD PHOTO has become more than just another photographic company – many of our customers see us as the custodians of the future of black and white photography.

“Due to recent news from many parts of the industry that some black and white products are being discontinued, we have had a number of queries from anxious customers asking about the future of our own range. As such, we want to confirm that we have no plans to reduce our range in any way.”

ILFORD PHOTO, through its parent company HARMAN technology, has pioneered a number of campaigns in the past to demonstrate its commitment to the future of black and white analogue photography, including the ‘Defend the Darkroom’ programme and its calendar of photo education materclasses.

JB

Posted by JB Harlin in Photography

WHY MODIFY THE CAMERA

Why on earth would someone take a new, perfectly good, working camera and make numerous modifications to the original design? Maybe more to the point, who would do such a thing? Well, I would! Especially if it makes the functionality of the device more easily fit my mode and way of working.

I have said this many times and I will repeat it here; I want the hardware involved in the process of making a photograph to be as transparent as possible. By transparent, I mean that the equipment should not be a distraction when out in the field making an image. I want the hardware to fit my way of working so well that I do not have to concentrate on working with it. I do not want to have to fumble with the camera and be distracted by some aspect of its operation that is not fluid in its use.

The way I make my cameras as transparent as possible is to modify them to whatever extent necessary to make them fit me. Yes, this requires I disassemble the camera and make modifications. I would rather do this now, in my shop, where I can work out these things so they do not hamper me later in the field.

What is all of this about? Well, I just acquired a new K.B. Canham 8×10 camera and in order to make it fit me better, I had to make a few modifications. If you are interested in seeing what I did, take a look at NOTHING HERE REMAINS THE SAME; PERSONALIZING MY K.B. CANHAM 8X10 for a look at what I did.

Have fun reading this account, but remember kids. . . you may not want to try this at home!
JB Harlin

Posted by JB Harlin in DIY, Photography

DON’T SCRATCH YOUR SINK

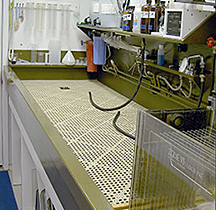
Darkroom SinkIf you build you own darkroom sink or use a commercially available unit, you need something to protect the floor of the sink from scratches and abrasions. It has been a common practice to construct wooden Duck Boards for the bottom of the darkroom sink. These work well, they protect the sink, and allow water to drain, but wood is hard to waterproof and keep from warping.
I have heard of people using plastic lighting grids or plastic rods in the sink, but I have never tired them. I have constructed and used the usual wooden Duck Boards for years. Then I found something even better.

Dri-Dek® is sold as an anti-fatigue flooring for use in commercial work areas such as industrial manufacturing or commercial kitchens. It comes in 12” interlocking squares or rolls. This is a soft, flexible Vinyl that is perfect for the floor of a darkroom sink.

We installed Dri-Dek® in our sink two years ago and it has been an excellent investment. Water easily runs through and under the lattice work, it protects the sink floor, and it provides a soft, yet firm surface on which to work. Note, that the Vinyl does stain when exposed to some chemicals, like Amidol and Pyro, but it has remained flexible and I would not hesitate to recommend it to replace those old, warped wooden Duck Boards.

For more information about Dri-Dek® click HERE.

JB

Posted by JB Harlin in Darkroom, How-To, Photography

WHERE, WHEN & HOW

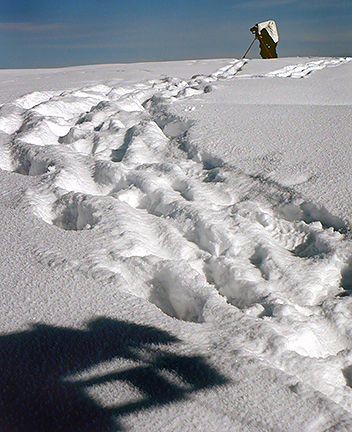
Snow UtahThey say one image is worth a thousand words, or something like that. I have been asked numerous times to describe the making of some of my photographs. It is strange that I can remember a lot of the details of the moment. I can recall the feel of the place, and the excitement of being there in my mind’s eye. This coupled with my field notes detailing the date, time, and technical information, recreates a somewhat in depth story of the making of a photograph.

I have just started what I plan to be an ongoing project. I will take selected photographs and try my best to tell the story of how the completed interpretation was created. Hopefully there will be something of interest for everyone interested in all aspects of photography. Each installment will cover the making of one photograph, both artistically and technically.

I invite you to stop by the new WHERE, WHEN & HOW: The Creative Interpretation area of our web site.

Enjoy,

JB

Posted by JB Harlin in How-To, Photography