View Camera

EDWARD WESTON AND HIS DAYBOOKS

The Daybooks of Edward WestonHave you ever wondered what the life of an artist would be like?  Edward Weston was not only an artist, he was obsessed by his art.  Every day before everyone else was awake, Edward would write in his Daybook.  His journal has become a classic of photographic literature.  At one point he destroyed some of his daybooks, but those that remained were eventually transcribed and published.

Weston was a towering figure in twentieth-century photography, whose restless quest for beauty and the mystical presence behind it resulted in a body of work unrivaled in the medium. John Szarkowski observes that “It was as though the things of everyday experience had been transformed… into organic sculptures, the forms of which were both the expression and the justification of the life within… He had freed his eyes of conventional expectation, and had taught them to see the statement of intent that resides in natural form.”

This is a fascinating and informative read.  A look into the life of a dedicated artist.  If you are serious about your photography. . . if you think you are serious about your photography. . . read “The Daybooks of Edward Weston” and see how you compare.

 
JB

Posted by JB Harlin in Commentary, Photography

THANK YOU

Goodrich Gallery We would like to thank everyone that took the time to see our exhibition “A B&W INTERPRETATION OF NATURE”  that ran the month of March at the Goodrich Gallery in Dallas.  We had a lot of comments, met many new people and heard a lot of encouraging remarks.  The reception was great fun and we appreciate everyone that stopped by.

We would also like to thank the Goodrich Gallery, their committee, and staff for their support and grand hospitality.   Everyone was very knowledgeable and helpful and were key to the success of this exhibition.

Again, thanks to everyone for your continued support.

JB & Susan

Posted by JB Harlin in Commentary, Events, Photography

CALIFORNIA & UTAH 2012-2013 TRIP

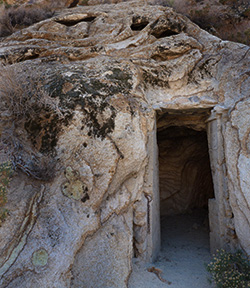
Mine ShaftWe went on another December and early January expedition to the Southwest again this year.  This time we trekked to California and the Eastern Sierra, then backtracked to Utah to visit some of our favorite places to photograph.  We saw mild weather and very cold weather on our journey.  We had blue skies, cloudy skies, rain and snow.  Susan and I shot a lot of film, and now it is time to get the notes in order and begin the darkroom work.
We photographed 20 days of the 30 days we were out.  We drove 4,102 miles and made a lot of snapshots.  HERE is our latest trip album. . . enjoy!

JB

Posted by JB Harlin in Film, Photography, Travel

CONTROL IS SIMPLE

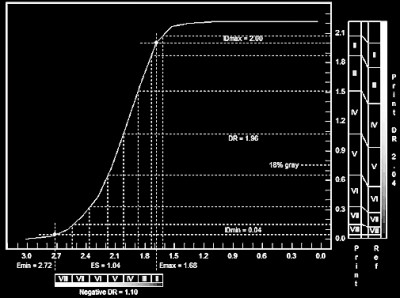
Transfer GraphLet me begin by qualifying what I am about to discuss by saying that I am a traditional B&W photographer.  I shoot film and print in a wet darkroom using traditional materials and techniques.  Whenever I talk about photography, I am talking about traditional B&W.  I know little about color photography and even less about digital.

I have often heard the argument that traditional B&W is so complicated.  I actually heard that from several old-time wet darkroom color photographers.  The truth is, working with traditional B&W, wet darkroom materials is very simple.  But, there is sometimes a complex deception in simplicity.  Keep in mind that the most complex machine, or procedure ever devised is little more than a lot of simple things all working together to create a seemingly complex outcome.  True, as you add more steps, each step can interact with the others, but if you break each piece of the greater puzzle into less complex, bite-size pieces, it is understandable and controllable.

When it comes to traditional B&W photography, you only have four basic controls to worry about.  There are only four simple things that have power over the major aspects of the end product. . . the B&W photograph.

  1. Film Exposure

  2. Film Development

  3. Print Exposure

  4. Print Development

1.  Film Exposure:  This is the first, and is a very important aspect of photography.  You can manipulate how a scene is captured through the way you meter and expose the film.  There are numerous manipulations you can employ, including zone placements and filters. 

2.  Film Development:  The tonal range captured on the film at the time of exposure can be further manipulated by development.  Different developers and times will yield different results, but so far as the film goes, this is all you can do.

3.  Print Exposure:  Next comes the process of printing.  You can vary the way in which the paper is exposed.  Matters not whether you are enlarging or contact printing.  You can further manipulate print exposure by dodging and/or burning, and you can adjust the paper contrast, either by paper grades or by using VC papers. 

4.  Print Development:  The only other control you have during printing is the choice of developer, dilution, time, and maybe some additives.   But in reality, these are the only two fundamental controls available for making prints.

Certainly there are numerous smaller adjustments and techniques that can be employed in B&W photography, but these four major areas are where you start.  Anyone that tells you traditional B&W photography is difficult, simply does not have a good understanding of the process.   If you are interested in delving into traditional photography, do not be intimidated.  It is not that difficult.  What is difficult is learning the subtleties that make the process beautiful.  

You need to begin with the fundamental steps.  You can only learn by doing.  Fred Picker said, “ you can learn to talk about something by talking about it, but you can only learn to do something by doing it.”  These four basic areas are where you start.  Then proceed to fine-tune your technique as necessary.  You will soon find that you can easily control the basic processes and develop a photographic approach that suits your vision.

JB

Posted by JB Harlin in Commentary, How-To, Photography

D/FW LF GROUP OUTING TO CEDAR HILL STATE PARK

Finally got in a fall outing, but it didn’t really feel like fall.  The day started out nice, but by afternoon the humidity and heat were back.  But, we made the best of it.  Had a good group to start the day, but by noon Susan and I were the only ones left.  We visited the Fall Festival that was going on in the park and stayed for the day.  We finally caught up with Michael, who had another photography engagement for the first half of the day, and had a late lunch about 3:00.

The light as the sun rose above the horizon was really nice on the old barns and wood, but it was even better toward sunset.  We made several photos, I with my 8×10 and Susan was testing some new 4×10 holders.  Got to check out Mike’s Ritter 7×11 camera, a new format for me, and Robert was exercising his, new-to-him, 8×10.  We had a lot of the usual photo chat and talk, showed some photos, and I believe everyone had a great day.  We didn’t get home till nearly 8:00pm.

It was a fun, but hot day, and might just have a couple of keepers!

JB

Posted by JB Harlin in D/FW LF GROUP, Events, Photography

SELENIUM TONING

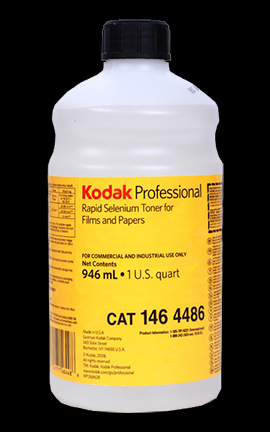
SELENIUM TONEREveryone has their personal way of doing most anything.   I have sorted through what works for me and it may not be the only way to do things, but it is the way I have refined and standardized my working habits.  (I hate the term ‘workflow’ sounds way too digital for me.)  What I have tried to do is explain how I work in the darkroom.  You can use my methods as a starting point and determine what works best for you.

Selenium toning of finished prints is a given for what we do.  Every print is toned in selenium, for permanence, a slight shift in print color, and to enhance tonal range.  We have used numerous dilutions of toner and what works for one paper and developer combination, may not work for another.  When it comes to the dilution and time, you have to experiment.

Here is how we selenium tone prints.  Not sure exactly where all of this came from.  Some from Ansel Adams, others from Fred Picker.  Never the less, here is our standard procedure.

Prints are developed, stopped in acid stop, then fixed in an acid sodium thiosulfate fixer for four (4:00) minutes.  The finished prints are rinsed in running water for five (5:00) minutes or so, then transferred to an archival washer.   The washer is used as a holding bath during a printing session that may last all day.

Once printing is finished, each print is evaluated and may receive further processing by some selective bleaching.  After bleaching, the prints are washed again in running water and again end up in the archival washer for storage.

At this point it is time to start toning.  We use three trays when selenium toning.  The first contains plain hypo (Hypo), the second selenium toner at some predetermined dilution (Toner), and the third tray is hypo clearing agent (HCA).

Prints are removed two at a time and placed, back to back, in the Hypo tray for about four (4:00) minutes.   This is your second fix.  The Hypo is an alkaline fix and is necessary to prevent stains, since any acid in the toning solution will result in undesirable stain.  If you use an acid first fix as we do, be sure to wash well before placing into the Hypo.  You do not want to carry any acid into the alkaline Hypo.

After the plain Hypo, prints are drained and transferred to the Toner tray.  Start the timer. . . Toning times vary.  We adjust the Toner dilution to yield a Toning time between two (2:00) to about four (4:00) minutes.   The Toner tray requires continuous agitation by tipping front to back and side to side.  As soon as the prints are in the Toner tray, two more prints from the washer are added to the Hypo tray.  The prints in the Hypo tray are used as a reference to judge the amount of change that is happening in the Toner tray.

When the prints in the Toner tray have reached the desired tone, they are drained and moved to the HCA tray.  The prints in the Hypo are moved to the Toner and two new prints are added to the Hypo.  When the HCA tray gets its second set of prints, the set that has been in the longest are rinsed in running water, then moved back to the washer.

This is a daisy chain process that continues until all of the prints have been process and are back in the washer.  The idea is to fix the prints for about four (4:00) minutes in the Hypo. . . Tone for two to four (2:00-4:00) minutes. . . then about four (4:00) minutes in the HCA.  These times may vary, and is not that critical.  You need to second fix, in Hypo, for no less than three (3:00) minutes and HCA for the same amount of time.

Once all of the prints are back in the washer, wash as usual. For us, our tested time is about one hour.  Be sure to test your washer for optimum wash time.  You will find the mixtures we use posted in the FORMULAS page here on this BLOG.

This is a whole lot more complicated to explain than to actually do.  It is a rhythm you pick up as you work through the prints and is really quick and easy.  One word of caution; once you begin to selenium tone your prints, you will never be satisfied if you don’t.

JB

Posted by JB Harlin in Darkroom, How-To, Photography

OLD TIME CAMERA PHOTO SHOOT

JB Harlin with 4x5 view cameraSee why these film cameras could help you with your photography skills as well.  Metering, composing, keystoning, and hyperfocusing will be discussed and demonstrated.  It will be a fun morning!
Come out and see some of the ancestors of your digital camera that still produce magical images.  There will be a few of the Large Format cameras – You know the ones with the cape you pull over your head, tripods that could hold a truck, yep those cameras.  They will be out and taking photos and explaining how they work for anyone that wants to know.

You will also see some medium format film cameras as well.  These cameras still produce 145MB digital scans with more detail than the largest dSLR!

Although the Large Format cameras are a work of art in themselves, the Nash Farm is also a very beautiful farm that’s just great for a day out. Farm buildings, tools, even a small cemetery are all on the grounds of this city park.

When:  Saturday, September 22, 2012, 8:30 AM to 11:45 AM

Where:  Nash Farm, Grapevine, Texas  Google Map

Parking: Park on the side street – Homestead Drive – Stay on the Farm side of the street – DON’T park in front of someone’s home.  Please don’t pull into the farm.  Take a look at the parking map.

Posted by JB Harlin in D/FW LF GROUP, Events, Film, Photography

D/FW LF GROUP OUTING; Cedar Hill State Park, Sat 10/20/2012

It’s been a long HOT summer. . . Time to break out the cameras. . .  Let’s go back to Cedar Hill State Park!

Cedar Hill State Park

NOW, IF I CAN JUST REMEMBER. . .

Sunrise is at a much more reasonable 7:25AM  —  Sunset will be at 7:04PM.  Park is open 6:00am to 10pm.  There are several wonderful spots that will be good for both times of the day. 

Some of us are planning on spending the day at the park.  We will do lunch around noon, there are restrooms and picnic areas in the park.  You can either bring your picnic basket or head into town.

As usual, we will have a variety of cameras in play. . . everything from LF to handheld digital.  We will be working on more details as we plan this outing.  Stay tuned for more info.

See y’all there!

Posted by JB Harlin in D/FW LF GROUP, Events, Photography

Photographer Print “Throw Down” WHAT A GOOD TIME!

Print Throw Down

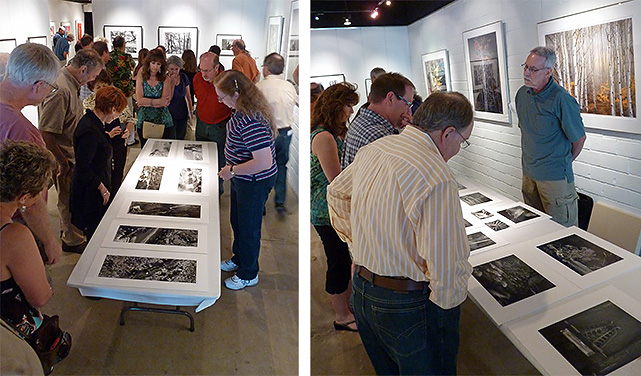
We had a fun afternoon today at the Sun To Moon Gallery and were delighted to be invited to participate in their second annual Photographer Print “Throw Down.”   We had a great time and a great crowd, sharing photographs and stories about what we do and why.  Already looking forward to next year!

JB

Posted by JB Harlin in Photography