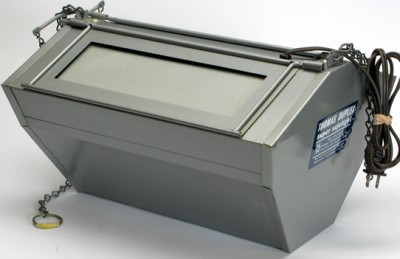
 Seems the last couple of times I have tested the darkroom safelight I have had to cut down the illumination. That should be a clue that the filters are fading and it is time to replace them. We use a Thomas Duplex Super Safelight that I rebuilt many years ago. Since we have a small darkroom I knew I needed to attenuate the light. My original safelight was modified when I rebuilt it and the 35 watt lamp was replaced with a 18 watt lamp. Note: You have to replace the ballast and start capacitor if you change the lamp wattage. Wasn’t that big a problem seeing how the original ballast was no good. I purchase the safelight many years ago not working for little to nothing.
So, now I needed to replace the filters. Since I am only interested in B&W, work that simplifies things for sure. All I need to find is the correct filter and then I can assemble my own replacement. I have plenty of scrap glass, and tape.
With a little research on the Internet I discovered that the hard part had already been done. Seems a Rosco #19 “Fire” filter has the necessary bandwidth to filter out the annoying green and blue spikes in the low pressure sodium lamp spectrum. And, seems that others had proven this the best way possible. . . they tested it in their own darkroom.
All I needed was to order some filter material. Rosco filters are the industry standard for stage and film production and readily available. That was way too easy. The thing that I was still toying with was how to adjust the light output. It finally came to me. Why not put the #19 filter in the body position and then add a Neutral Density filter to the vane? Yep, that would do it. So I ordered a sheet of Rosco #19 filter and a sheet of 0.30 ND.
We have a lot of scrap glass around. I cut new glass to fit the body and vanes using TruVue Conservation Grade UV glass. Thought it wouldn’t hurt to add even more filtration. I also found out why the factory uses tissue paper. Without it, the filter material does not look that great against the glass and I could see that if any moisture were to condense in there, it could be bad for the filter. I really didn’t want to use tissue paper and I had a roll of Gila frosted window film from another project. This stuff is a self-adhesive plastic material used to frost windows. It was exactly what I needed to put a smooth textured surface on the inside of the glass to keep the filter from sticking. It also works well to diffuse the light.
One of my favorite tapes is the aluminum HVAC ducting tape. It is lightproof, sticks and stays in place. Slit a few pieces of tape, peel the backing and it will hold the filter sandwich in place with ease.
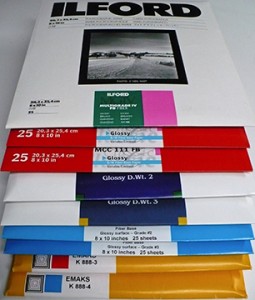
I placed the #19 filter in the body and 0.30 ND in the vanes. My first test showed there was still too much light. I was testing at my closest point to the safelight for the worst case situation. I ended up adding a second layer of 0.30 which made for 0.60 ND, which is two full stops attenuation. But remember, I was testing with the most sensitive VC paper we use at a very close proximity to the safelight. Always test for the very worst case scenario.
Once finished, I found that the darkroom is much brighter than before. This proves that the filters do fade. Now we are back in business. With the vanes fully closed all VC and standard papers are safe. I like to print on Azo, which allows me to open the vanes for even more light.
I will test again in a year or so and if I need new filters they are easily replaced. I have plenty of material, the Rosco filter comes in a 24 x 24 inch square. Enough for several more safelight filters, if and when they are needed.
JB

 Seems the last couple of times I have tested the darkroom safelight I have had to cut down the illumination. That should be a clue that the filters are fading and it is time to replace them. We use a Thomas Duplex Super Safelight that I rebuilt many years ago. Since we have a small darkroom I knew I needed to attenuate the light. My original safelight was modified when I rebuilt it and the 35 watt lamp was replaced with a 18 watt lamp. Note: You have to replace the ballast and start capacitor if you change the lamp wattage. Wasn’t that big a problem seeing how the original ballast was no good. I purchase the safelight many years ago not working for little to nothing.