ULF Photography

SELENIUM TONING

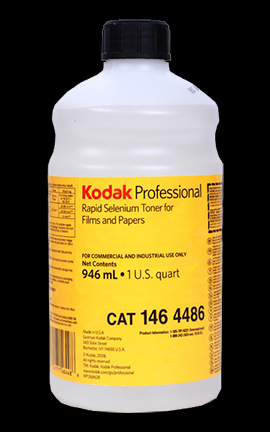
SELENIUM TONEREveryone has their personal way of doing most anything.   I have sorted through what works for me and it may not be the only way to do things, but it is the way I have refined and standardized my working habits.  (I hate the term ‘workflow’ sounds way too digital for me.)  What I have tried to do is explain how I work in the darkroom.  You can use my methods as a starting point and determine what works best for you.

Selenium toning of finished prints is a given for what we do.  Every print is toned in selenium, for permanence, a slight shift in print color, and to enhance tonal range.  We have used numerous dilutions of toner and what works for one paper and developer combination, may not work for another.  When it comes to the dilution and time, you have to experiment.

Here is how we selenium tone prints.  Not sure exactly where all of this came from.  Some from Ansel Adams, others from Fred Picker.  Never the less, here is our standard procedure.

Prints are developed, stopped in acid stop, then fixed in an acid sodium thiosulfate fixer for four (4:00) minutes.  The finished prints are rinsed in running water for five (5:00) minutes or so, then transferred to an archival washer.   The washer is used as a holding bath during a printing session that may last all day.

Once printing is finished, each print is evaluated and may receive further processing by some selective bleaching.  After bleaching, the prints are washed again in running water and again end up in the archival washer for storage.

At this point it is time to start toning.  We use three trays when selenium toning.  The first contains plain hypo (Hypo), the second selenium toner at some predetermined dilution (Toner), and the third tray is hypo clearing agent (HCA).

Prints are removed two at a time and placed, back to back, in the Hypo tray for about four (4:00) minutes.   This is your second fix.  The Hypo is an alkaline fix and is necessary to prevent stains, since any acid in the toning solution will result in undesirable stain.  If you use an acid first fix as we do, be sure to wash well before placing into the Hypo.  You do not want to carry any acid into the alkaline Hypo.

After the plain Hypo, prints are drained and transferred to the Toner tray.  Start the timer. . . Toning times vary.  We adjust the Toner dilution to yield a Toning time between two (2:00) to about four (4:00) minutes.   The Toner tray requires continuous agitation by tipping front to back and side to side.  As soon as the prints are in the Toner tray, two more prints from the washer are added to the Hypo tray.  The prints in the Hypo tray are used as a reference to judge the amount of change that is happening in the Toner tray.

When the prints in the Toner tray have reached the desired tone, they are drained and moved to the HCA tray.  The prints in the Hypo are moved to the Toner and two new prints are added to the Hypo.  When the HCA tray gets its second set of prints, the set that has been in the longest are rinsed in running water, then moved back to the washer.

This is a daisy chain process that continues until all of the prints have been process and are back in the washer.  The idea is to fix the prints for about four (4:00) minutes in the Hypo. . . Tone for two to four (2:00-4:00) minutes. . . then about four (4:00) minutes in the HCA.  These times may vary, and is not that critical.  You need to second fix, in Hypo, for no less than three (3:00) minutes and HCA for the same amount of time.

Once all of the prints are back in the washer, wash as usual. For us, our tested time is about one hour.  Be sure to test your washer for optimum wash time.  You will find the mixtures we use posted in the FORMULAS page here on this BLOG.

This is a whole lot more complicated to explain than to actually do.  It is a rhythm you pick up as you work through the prints and is really quick and easy.  One word of caution; once you begin to selenium tone your prints, you will never be satisfied if you don’t.

JB

Posted by JB Harlin in Darkroom, How-To, Photography

OLD TIME CAMERA PHOTO SHOOT

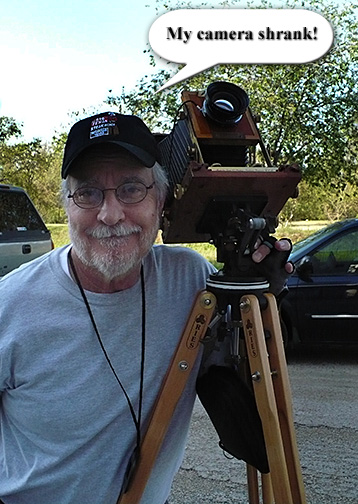
JB Harlin with 4x5 view cameraSee why these film cameras could help you with your photography skills as well.  Metering, composing, keystoning, and hyperfocusing will be discussed and demonstrated.  It will be a fun morning!
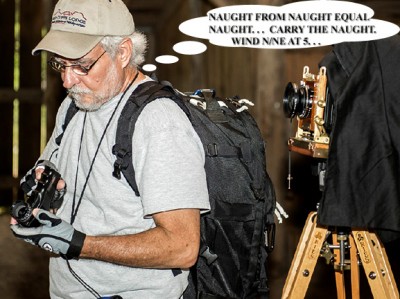
Come out and see some of the ancestors of your digital camera that still produce magical images.  There will be a few of the Large Format cameras – You know the ones with the cape you pull over your head, tripods that could hold a truck, yep those cameras.  They will be out and taking photos and explaining how they work for anyone that wants to know.

You will also see some medium format film cameras as well.  These cameras still produce 145MB digital scans with more detail than the largest dSLR!

Although the Large Format cameras are a work of art in themselves, the Nash Farm is also a very beautiful farm that’s just great for a day out. Farm buildings, tools, even a small cemetery are all on the grounds of this city park.

When:  Saturday, September 22, 2012, 8:30 AM to 11:45 AM

Where:  Nash Farm, Grapevine, Texas  Google Map

Parking: Park on the side street – Homestead Drive – Stay on the Farm side of the street – DON’T park in front of someone’s home.  Please don’t pull into the farm.  Take a look at the parking map.

Posted by JB Harlin in D/FW LF GROUP, Events, Film, Photography

D/FW LF GROUP OUTING; Cedar Hill State Park, Sat 10/20/2012

It’s been a long HOT summer. . . Time to break out the cameras. . .  Let’s go back to Cedar Hill State Park!

Cedar Hill State Park

NOW, IF I CAN JUST REMEMBER. . .

Sunrise is at a much more reasonable 7:25AM  —  Sunset will be at 7:04PM.  Park is open 6:00am to 10pm.  There are several wonderful spots that will be good for both times of the day. 

Some of us are planning on spending the day at the park.  We will do lunch around noon, there are restrooms and picnic areas in the park.  You can either bring your picnic basket or head into town.

As usual, we will have a variety of cameras in play. . . everything from LF to handheld digital.  We will be working on more details as we plan this outing.  Stay tuned for more info.

See y’all there!

Posted by JB Harlin in D/FW LF GROUP, Events, Photography

D/FW LFG An outing without Dark Cloth

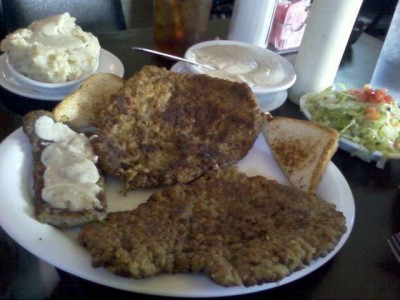
Mary's Cafe  Strawn, TXWe are heading out to Strawn, Texas this Saturday (7-14) to Mary’s Cafe for the best Chicken Fried Steak in Texas.  Some in the group are heading out early to scout the area and we will be meeting for lunch.  Plans are to be at Mary’s for the real thing at 11:30AM this Saturday.

 Mary’s Cafe
119 Grant Ave.
Strawn, TX 76475

Bring some photos to share, equipment to show or sell and let’s have a fun lunch.

Hope to meet some new members!

JB

Posted by JB Harlin in D/FW LF GROUP, Photography

CONTACT PRINTING & AZO

Contact Printing AzoI have to admit that I am a contact printer.  Susan and I both contact print.  There seems to be some confusion about contact printing and all I can say is, it is the easiest way you can make a print.  Contact printing is nothing more than laying the negative directly on a sheet of printing paper, covering it with a piece of glass, and adding some light for the exposure.  Nothing could be more simple.  You do not need any special equipment to print on graded paper.  A negative, some graded paper, a sheet of glass, and a lamp.
As a side note at this point, note I use the term LAMP.  I have been corrected for years by an old friend that worked in the lighting industry at one time.  In the industry, there is no such thing as a Light Bulb. . . it is a LAMP.  So when I say LAMP, you can be assured that to the laymen I am talking about a Light Bulb.  Now back to contact printing.

You can contact print on any paper, but one of the more interesting papers that is highly sought after is the old Kodak Azo.  Azo is a silver chloride printing paper that was manufactured primarily for making proofs.  It is extremely slow and requires such a large amount of light to yield an image it is mostly used as a contact printing paper.  There seems to be some confusion about printing on Azo, and believe me, it is not that complicated.  You just have to use a light source that is bright enough to yield reasonable printing times.  This is where the lamp comes in.

All you need for printing on Azo is a simple, frosted lamp.  For small negatives, 4×5 or smaller you can use a sheet of thick glass for printing.  Larger negatives require a printing frame that holds the paper and negative under pressure.  Edward Weston printed most of his most famous work using an 8×10 negative in a simple spring back printing frame, exposed under a lamp hanging by its cord from the ceiling.  He adjusted the lamp intensity by changing the lamp size, or moving the lamp up and down by coiling the cord and using a clothespin.

So, now we get down to designing a printing rig for Azo.  This can be as simple or complicated as you wish.  I am going to describe how we print Azo and other papers.  This is the setup we use, and how it is designed.  I will say this again, you can use this same setup for contact printing regular enlarging paper also.

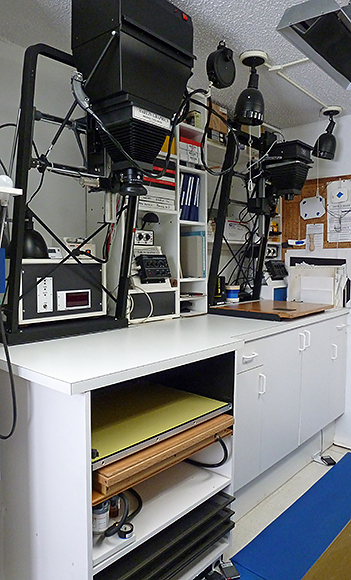
Let’s begin with the printing frame.  We print large negatives, and we use a vacuum frame.  The advantage of a vacuum frame is that you get absolute even pressure between the film and paper, no matter what the size of the film.  We shoot 8×10, 11×14, 8×20 and 16×20 film, and have a vacuum frame large enough to accommodate the largest film.  The vacuum frame is positioned under the drop table below the 8×10 enlarger.  The vacuum pump is located just below the frame and includes a vacuum gauge which is handy to confirm the frame is properly closed and the vacuum is drawn down.  By having the vacuum frame located below the enlarger we can also use the enlarger for printing on other papers, including VC papers that require control of blue and green light.  The top of the counter is removable, as is the drop shelf which is used for enlarging.  By removing the counter top and drop shelf, the vacuum frame is exposed and can be used for printing.

Printing on Azo only requires a lamp placed at some distance from the film and paper.  Different negatives require different amounts of light.  We set the vacuum frame to lamp reflector to a fixed distance and change the lamp wattage as required.  The higher the wattage, the brighter the lamp.  We keep a supply of lamps, ranging from 7 ½ watt to 200watt depending on the amount of light required.  For most of our negatives we use the 45watt, 65watt, and sometimes a 100watt lamp.  I like having a reflector around the lamp to help keep the light out of my eyes while printing.  It also focuses the light downward onto the printing frame.

The lamp fixture is fitted with a custom machined clamping mechanism that attaches to the focusing rail of the Beseler 8×10 enlarger just below the lens, and is held in place with a thumbscrew.  The enlarger head is raised or lowered to set the distance from the lamp reflector to the vacuum frame.  We always adjust the lip of the reflector to vacuum glass to 30 inches.  For our setup, this allows for even illumination of the vacuum frame and keeps the reflector between your eyes and the lamp.  The lamp assembly is easily removed by loosening the thumb screw in case you want to change to enlarging paper and use the enlarger as a light source.  This all sounds complicated, but in reality it is very simple.  Refer to the photos for more detail.

The only thing that might affect your printing repeatability would be any variation of the line voltage to the lamp, which will affect the lamp output.  The voltage is easily stabilized using a constant voltage transformer.  You can find constant voltage units used, take a look on eBay.  The one we use is a 350watt unit made by Sola-HD and will easily handle our largest lamp which is 200watts.

The constant voltage transformer is mounted in a large box that is located behind the 8×10 enlarger.  I have also added a timer and a one second metronome, both made from an old digital alarm clock.  Some cheap digital clocks can be modified to function as a resettable timer.   I was able to rig the alarm beeper so that it chirps every second.  I like to use a metronome when contact printing, and there is also a large digital readout timer that I can use as a check, just in case I lose count.  The printing lamp and timer are wired to a foot switch.  When you step on the switch the lamp comes on and the timer begins to count upward.  The metronome runs continuously and has a switch to disable it.  My wife does not like it, she only uses the timer.  There is also a switch on the main box that controls the vacuum pump.   As a safety precaution, the lamp will not activate until the vacuum pump is running.  This way if you accidentally step on the footswitch with your box of paper open, the lamp will not light.

Printing is extremely simple.  Switch off the room lights, place a sheet of printing paper, sandwiched with your negative, in the center of the vacuum frame.  Close the glass top.  Hit the pump switch and check to see that the frame has drawn down.  When you are ready to start, step on the footswitch.  The printing lamp comes on and the timer starts counting.  I always step on the switch in time with the metronome.  Count off the desired exposure.  When complete, release the footswitch.  Turn off the vacuum pump.  Remove the paper and process.

Need to burn and dodge?  Keep track of your exposure and use a card or cutout shape for the appropriate time.  You can easily see the image since the paper is white and the negative is easily seen through the glass of the printing frame or vacuum frame.

Contact printing on Azo, or any other printing paper, is extremely easy, and is not rocket science. By adding the ability to print Azo using the 8×10 enlarger, we save space, which is always a premium in the darkroom.  You can make your printing setup as simple, or complex as you desire.  The main thing is to make prints.  Make lots of prints.  Those prints are what is important. 

JB

Posted by JB Harlin in Darkroom, How-To, Photography

THE 2012 ILFORD ULF FILM RUN BEGINS NOW

It is that time again. . . time you get your order in for this year’s Ilford ULF film run.  The ordering window opens on Monday 30th April and will run until Friday 22nd June 2012.  More information and a list of dealers HERE.


Ilford

Posted by JB Harlin in Film, Photography

JOBO IS BACK!

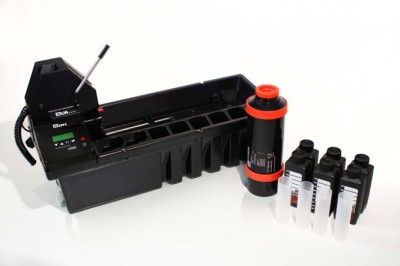
Good news for those of you that use Jobo products for processing in your wet darkroom.  Posted on the Internet below from Firscall Photogaphic LTD, located in Taunton, Somerset, UK.

JOBO

Jobo Announces first Film and Print Processor in over 20 years!

 Posted on April 3, 2012 by Firstcall Photographic

Jobo stopped production of its rotary processors in 2010. In doing so it became the last manufacturer to market a range of film processing machines to photographers.

With the resurgence in demand for film usage, reduced mini-lab sites and film processing in multiple retailers, they have decided to re-tool to make a new film processor that will be available in the last quarter of 2012.

Based on the original design for the Jobo CPP2, the new model has the initial product code of CPP3 and will have the capability to process all types of film and paper. It will have accurate temperature control, timer and take all Jobo tanks up to the 3000 Expert (sheet film tank system).  The original CPP2 concept will also be maintained in that it will have both cog and magnet lid connection for use with a lift and normal rotary agitation.

 To get a technical Specification and a free £290 lift with purchase of the processor send your name and contact info to  info@firstcall-photographic.co.uk

Posted by JB Harlin in Darkroom, Photography

BEER & RODINOL

When I first began working with B&W in my own darkroom I only had a 35mm camera. So I shot many rolls of 36 exposure Tri-X. At one time my favorite developer was Rodinol. Not very expensive, easy to use, keeps forever and I liked the negatives. What else could you ask for?

Even way back then I kept a notebook with all of my darkroom procedures laid out in a step-by-step fashion. This way I knew I would always do things exactly the same. I used the same graduates, arranged in the same order every time. Developing film is a one shot deal. Make a mistake and that is all she wrote. At this point in my progression with film and darkroom, I had become confident in my ability to develop film. The process had become the first step on the way to making prints.
My procedure for film was simple. I would line up my chemical containers in the correct order. Fill them with the proper liquids and adjust the temperature. Then I would head to my closet darkroom to load the film into the developing tank. I used a 16oz tank that held two reels and I usually did two rolls at a time. I loved the Rodinol because it came in a stock syrup and was mixed something like 1:200, if memory serves me correctly. I would measure the stock using two small syringes since it only took a few milliliters to make up the developer. I would lay the syringes, once loaded, next to the container marked developer which contained distilled water. I always have used presoak, so once the film was in the presoak, I would empty the syringes into the developer container and stir up the developer. Not much to it, simple and easy. Usually took me about forty five minutes from start to hanging up film to dry.

Now this one particular Saturday myself and a few friends went out and I shot two rolls of film that day. Later that evening we returned to my place for a few beers and by about 8:00 everyone headed home. I had this bright idea that if I processed the film from the day it would be dry and I could print it Sunday. Nothing to it, just get out the notebook, measure and slosh. . . processed film!

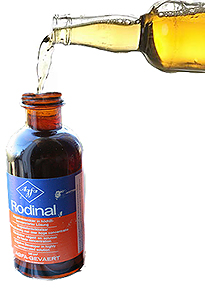
There was nothing very special about this film run, except the slight fog in my head from the beers and maybe a little to much sun. Everything went as usual. Once the film was washed I unrolled the first strip to find it completely clear end to end. The second roll was the same. What the @#$%^*? My first thought was the camera quit working. As I sat there perplexed I looked at my processing line and what do you think I saw? There next to the empty container for the developer lay my two syringes with the stock Rodinol still in them. I had failed to mix the developer. I learned right there that plain distilled water will not develop film. I also immediately enacted a strict rule in the darkroom; NEVER MIX RODINOL AND BEER!

JB

Posted by JB Harlin in Commentary, Darkroom, Film, Photography

CROPPING

CROPPINGThose that dictate hard and fast, unwavering, rules for the creation of art usually are the vane, egotistical, self-centered types that are full of their own over-inflated view of their importance and try to tell you that cropping is an unforgivable sin.  I say. . . Not True!

No one has the authority, nor the right, to tell you what, nor how, to create your art.  Cropping is a personal decision, and can only be justified by you as an individual.  If cropping helps any particular photograph, then it is no sin to proceed to crop away.

Cropping is best done in the camera at the time you make the negative, but it is not always possible.   There will always be those instances that appropriate framing is just not possible in the field.  Never pass up an opportunity just because the perfect image does not exactly fit the film.  Keep cropping as an option.   Do not dismiss anything that will help. CROPPING

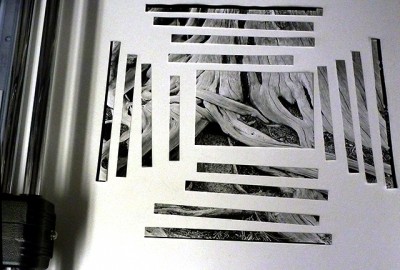
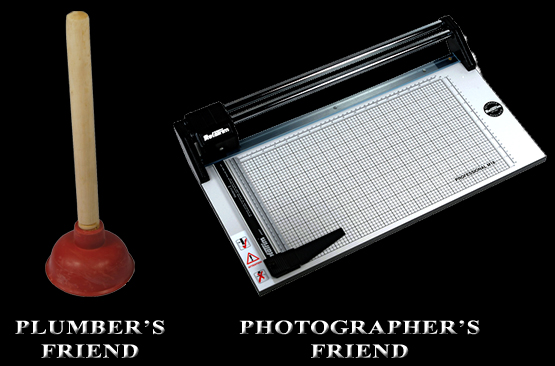
During the printing process look carefully at your first work print and determine if the image is strong from corner to corner.   Use cropping L’s to mask questionable edges of the image and determine if lopping off some of the image will strengthen it.   If you are enlarging you can reset the easel and the print size.  If you are contact printing, a rotary trimmer is your best friend.   The choice is totally yours.  Do not be a slave to others opinions.  There are no rules.  The decision is so eloquently expressed by Bob Segar:  “What to leave in, what to leave out. . .”

If cropping does not improve the photograph, maybe it is a good idea to find another image that will be more expressive.   If you do hit a brick wall with a photograph, save your work and put it aside for later.  There are few negatives of questionable substance that are worth killing yourself in order to print.  You are usually better off to concentrate on those that are not a struggle to print.

It is easier on you and more productive, and less frustrating, to make negatives that are well seen and easy to print.  A mastery of craft will make everything work more smoothly, but never let anyone tell you that you should not, can not, crop your photograph.  Just don’t go there!  Cropping can be your best friend.

JB

Posted by JB Harlin in Commentary, Film, Photography