ULF Photography
“VIEW CAMERA PHOTOGRAPHY BY JB & SUSAN HARLIN”
 Hopefully fall is coming and bringing cooler weather and some rain. The Texas summer is just too brutal to get out and do much photography. So, with a little cooler weather finally moving in, it just may be a good time to get out and look at some photographs. Susan and I are having another exhibition of our work that will carry everyone from fall into winter. We will have 28 of our latest Black & White photographs on display including everything from snow, to desert, from 8×10, to 8×20, in living B&W, on display at the Downtown F/W Library.
“VIEW CAMERA PHOTOGRAPHY BY JB & SUSAN HARLIN” will run September 29, 2011 through January 12, 2012 at the Central Library West Wing Gallery, Downtown Fort Worth Library. We will be posting our reception date soon, so check back for the date and time.
Library location and parking information HERE.
JB & Susan
UPDATE: We have 28 photographs up and ready for viewing. If you stop by, please drop us a line and let us know what you think.
WRITING ON THE NEGATIVE EDGE
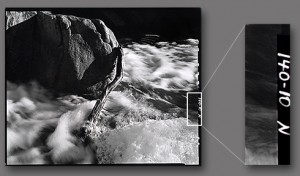 I was recently asked what type of writing device we use to mark the catalog number on the edge of our film. I had not given it much thought since we have been using the same pens for marking film for many years. I have heard of people using various mechanical pens and India ink. Some say they use a common Sharpie. There are numerous ways to do this, but the easiest and most effective way I have found is to use a pigment liner pen.
Specifically, I have used a Staedtler pigment liner pen for years. They are clean, easy to use, make very dense letters and numbers that easily show up on proofs, and are filled with permanent black ink. The ink used is lightfast and will not fade. One nice thing about the Staedtler pigment liner pen is it will not dry out. The manufacturer says, “The unique cap-off feature of the ink enables pens to be left uncapped for 18 hours without drying up. Even when left open during long breaks in writing, they remain ready for action without delay.” They also last a long time. We have not had to buy new pens in years.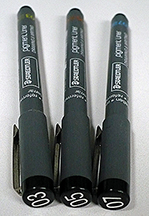
The Staedtler pigment liner pens are available in nine writing widths from 0.05 mm to 0.8 mm. My favorite sizes are the 0.3, 0.5, 0.7 mm widths. I use the smaller diameter pen for small film where the clear edge is very narrow. You still get very legible writing along the film edge that prints well on the proofs. I prefer the larger diameter pen for the really big film. These have worked well for me for over 30 years, and should work well for you also.
 Here are a few things I have learned over the years that may help when using these pens to mark your film. I always mark my negatives on base side opposite the emulsion, this way the file number prints correctly on the edge of prints and proofs. Be sure to let the ink dry thoroughly before you place the film into a storage sleeve. It should only take a minute to dry. I have found that if you make a mistake, you can remove the ink using a cotton swab lightly moistened with acetone. And, one more thing; the biggest mistake you can ever make is not using a filing system for your negatives. If you choose to mark your film on the edge, these markers will do the trick.
If you are interested in learning more about Staedtler pigment liner pens, HERE is their web site.
JB
STOP & FIX WITH STAINING DEVELOPERS
 As most know by now, we use staining film developers. To be specific, we use the classic PyroCat HD formula from Sandy King. This developer gives us the type of negative we like. Keep in mind that creating art, no matter what may be your chosen medium, is a very personal thing. What works for me may very well not be at all acceptable to you. My father used to say, “that is why they paint cars different colors.” Personally I do not care for red cars.
All of that said, I have experimented with numerous staining developers and have chosen the one that works best for us. Along my journey of research I have found many opinions and myths that I have found to just not be true. Everyone seems to have an idea of what they believe to be true, but few have actually gone to the trouble to, as Fred Picker would say, TRY IT.
One area of great debate when it comes to staining developers is what stop and fix is appropriate. I find that this is not that great an issue and even John Wimberley agrees. Just in case you have not heard of John Wimberley, he is the father of modern Pyro developers. Even Gordon Hutchings the father of PMK, and author of “The Book of Pyro” was preceded by Wimberley and his first modern formula, WD2H. From an article titled “PyroTechnics Plus: Formulating a New Developer” in Photo Techniques magazine, March/April 2003, Wimberley has the following to say about Stop Bath and Fixer:
“Myths abound concerning the correct stop bath and fix to use with pyro, but it is not a critical issue. Either an acid or plain-water stop bath may be used, and any standard or rapid fixer is acceptable. . . However, avoid hardening fixers. I recommend the manufacturer’s minimum recommended time to avoid the possibility that sodium sulfite in the fixer might weaken the dye mask.”
Wimberley goes on to say that you should follow the manufacturer’s suggestion as to the proper stop for any type of fixer. If you use an alkaline fixer, use a plain water stop, or follow the instructions. He also says Hypo Clearing Agent (HCA) should not be used, since they are mostly sodium sulfite and “the enemy of the dye mask.” He recommends a 10 minute wash time in running water sufficient to complete five changes of water by volume.
If you do much research on this subject, you will find a lot of differing opinions. The thing is, you finally have to draw a line and choose what you intend to do with your processing procedures. So, having said that, here is the way I process film using PyroCat HD.
• Film is processed in open trays by the shuffle method
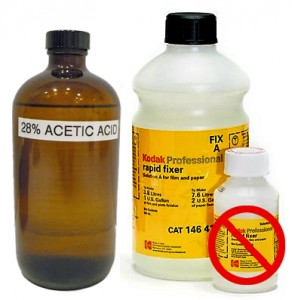
• Acid stop using 3ml 28% Acetic Acid plus 1,000ml water
• Fix in Kodak Rapid Fixer (no hardener)
• Rinse in running water 2-3 minutes
• Wash in a vertical washer 15-20 minutes
• Bathe in 2 drops wetting agent plus 1,000 ml distilled water
• Hang to dry
This is how I process film using my chosen staining developer. I am sure there are those that will point out all of the reasons this will not work, but I can assure you, it works for me. The most important thing to do is to be consistent. If you do things exactly the same every time, there is a very good probability that you will see consistent results. Fred Picker would say, “different is not the same.”
Remember, the best thing you can do is finalize your procedures and get on with creating your art. The finished print is what is important, how you get there should not get in the way of your creativity.
JB
• Acid stop using 3ml 28% Acetic Acid plus 1,000ml water
• Fix in Kodak Rapid Fixer (no hardener)
• Rinse in running water 2-3 minutes
• Wash in a vertical washer 15-20 minutes
• Bathe in 2 drops wetting agent plus 1,000 ml distilled water
• Hang to dry
EASILY FIND GRADE #2 AND GET YOUR FILM TEST CORRECT
 So, here is the predicament; you are getting ready to do your film testing; you have decided to use the simple visual film testing technique. Visual film testing is a really simple way to determine your correct film EI and developing time. All you need to do is perform these tests on a grade #2 paper and you will know you are making the best possible negatives.
>But, there is one nagging little problem. If you are using VC paper, how do you know what filter, or light source setting, that will produce a grade #2 contrast? Even if you are using filters, each filter set has different filters that will give different paper grades on different papers. Even the developer you choose can affect paper contrast. You really need to KNOW how to achieve a true grade #2, using your equipment and darkroom, in order to do a valid film test.
What if I could show you an easy, inexpensive, and quick method that will get you plenty close enough? Well, here you go. . . “FINDING VC PAPER GRADE #2; EYEBALL CALIBRATION.” This method should get you well within range to get you started on the right track.
Remember, that making a good negative is the first step in making a great print. Hope this helps you on your quest for photographic excellence! Download the PDF version from the Articles area of our web site.
“Simplicity is the ultimate sophistication.” -Leonardo da Vinci-
JB
MEASURING PAPER FOG
I was recently asked to test some Kentmere paper for fogging. A friend had shut down his wet darkroom and had several packages of paper he wanted to sell, but wanted to know if it was still useable. I agreed to test for him and if you wonder how to check for paper fog, here is the process I use.
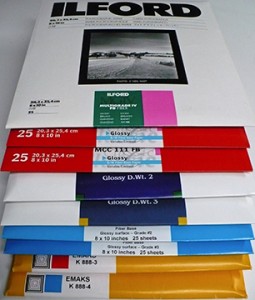 Begin by cutting off a strip of the paper to be tested in very subdued safelight to total darkness. Since the paper I was testing was 16×20, I cut off a strip across the short side about two inches wide. I then cut the strip in half. This gave me two pieces of paper 2×8 inches. On the back of the paper I mark one with the letter ‘F’ and the other with the letter ‘D’ and place the latter into a light-tight box.
The strip marked ‘F’ is placed into a tray of fresh fixer and agitated for five minutes. Then it is placed in a tray of running water. Next the strip marked ‘D’ is placed into a tray of developer, agitated for two minutes. . . stop for thirty seconds. . . and fixed for five minutes. I use my standard print developing chemicals and the normal times. If you use different materials, use your normal times. Once both strips are in the wash tray, turn on the lights and wash for thirty minutes. Remove the test strips and dry as usual.
What has happened here is I have cleared the test strip marked with the ‘F’ which stands for fixed only and I have developed the strip marked ‘D’ for developer as usual. All that is needed now is to measure the reflected difference. I used an X-Rite 810 densitometer to measure the difference and found it to only be about 0.003, which is nothing to worry about. Keep in mind that all light sensitive materials, film or paper, will have some amount of base fog when developed.
Fortunately I was able to report to my friend that his paper was in excellent condition and he was happy to be able to sell it to another photographer. Hopefully this batch of paper will live on to produce some beautiful prints.
Also keep in mind that you do not need a densitometer to run this test. If you cannot see any appreciable difference in the two test strips, you can assume the paper is in good condition. If you have some old paper that shows signs of fogging, you can experiment with adding a restrainer, like Benzotriazol, to your developer to see if it will help. Never throw out printing paper just because you have had it on the shelf for some time. Test it first. . . you may be surprised to find that it is in good condition and useable.
JB
JB & SUSAN HARLIN UPCOMING EVENTS
Here is our current calendar of upcoming events. More information available by clicking on the item in the ticker above. We invite everyone interested in film photography to join us, though we specialize in LF and ULF, we love all film. Hope to see you at one of our gatherings!
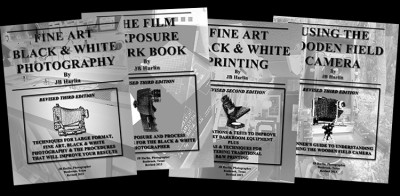
NEW UPDATED & REVISED E-BOOKS AVAILABLE FOR IMMEDIATE DOWNLOAD TO YOUR COMPUTER!
DFW LF GROUP, PILOT POINT GATHERING, Saturday, July 30, 2011
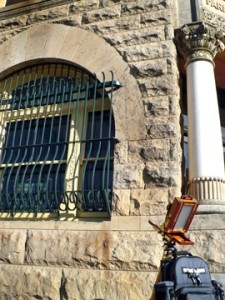 Here we go again! Our informal LF Photography Group is holding another outing, and even braving the heat of summer in Texas.
Visit historic downtown Pilot Point for some great photo opportunities; both architectural as well as close-up detail of antiques and antique fixtures.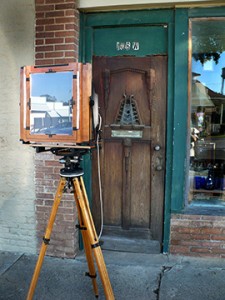
Since it is the midst of summer, we will meet early in the morning – 7:30AM. Color film photographers might want to be there even earlier! Sunrise will be at 6:39! Complete side lighting right down W. Main Street will be at 9:17AM. This might provide for some interesting shadows! There are some wonderful murals to photograph also. Google “Bare Nekkid Ladies in Pilot Point” to read up on the most controversial mural in town! The bank building, just off the square, was used in the movie “Bonnie & Clyde.” Many photographic opportunities are within 2 blocks on each side of the town square.
We will end with brunch at the local greasy-spoon on the town square between 10:30 and 11. This should help us beat the worst summer heat and humidity!
Estimated drive times from:
Ft. Worth: 1 hr, 10 min
Dallas: 1 hr, 15 min.
Carrollton – 55 min.
We invite everyone interested in LF & ULF photography to join us for some serious discussion and fun. Also, if you are a working photographer, please bring a few photos to share with everyone.
For more continuing information, drop by theLarge Format Photography Forum.

Dallas: 1 hr, 15 min.
Carrollton – 55 min.

Hope to see you July 30th in Pilot Point!
JB & Susan
VIEW CAMERA LUBE
 It is important that your view camera work and work smoothly without glitches in the field. Nothing is worse than having some issue when you are out working. I spend a lot of time maintaining our cameras. I feel it is better to do this before we go out, than to have problems that require work in the field. Nothing is worse than wasting time on repairs when you are out.
A high-quality Microcrystalline Wax is one of your best friends when it comes to keeping your view camera clean and working smoothly. See my previous post titled “Wax On. . . Wax Off” for more information about waxing the camera.
But, waxing the camera is only part of keeping it functioning smoothly. You need lubrication for the metal parts. Metal rails, guides, and locking knobs need lubrication to keep them working freely. Nothing is worse than having a threaded part to seize up in the field. The best lubrication for metal parts is a dry lubricant. One that goes on wet but dries leaving a slick lubricant that does not get on your hands and possibly on your lenses or film. A dry lubricant also does not attract dust and dirt.
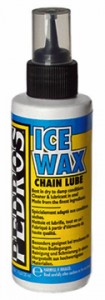
One of the best lubricants I have found is a product made for lubricating bicycles. Pedro’s Ice Wax 2.0 is a natural wax-based dry lube for use on bicycle chains. It is also an excellent choice for the metal-to-metal parts of the view camera. It works on brass, steel, and aluminum surfaces equally well. The manufacturer says it is a Hydrophobic wax coating that repels water and provides protection from wear and contaminants. It goes on wet and dries leaving a lubricating film that keeps parts moving freely.
Just a drop or two worked into the metal-on-metal surfaces is all you need. And it lasts for a long time. It is also good for all threaded locking knobs to keep them free and to prevent them from seizing up. A little Microcrystalline Wax plus some Ice Wax, and you should be good to go. . . go to the field that is, without any glitches to slow you down.
JB
WHAT PAPER DEVELOPER ARE YOU USING THESE DAYS?
 So. . . everyone has their preferred brands, methods, techniques and such. I have mine for sure. As Fred Picker said, “if you have been around for twenty years or more and haven’t formed any opinions, what have you been doing?” I miss Fred!
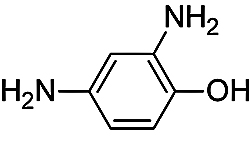
There seems to be a lot of paper developer formulas floating around. My wife and I have tried our share of so-called ‘magic’ formulas. We have been down the Amidol road, and don’t get me wrong, Amidol is a great developer but it is far from magic. Amidol is about the best I have found for Azo. Yes we do print on Azo, in fact, we have a stock of it on hand. I would just like to go on the record as not being a person that subscribes to the idea there are magic bullet formulas. There is what works for you and that can be anything that suits your way of seeing. Anyone that has a one-size-fits-all attitude, usually has something to sell.
We have had our frustrations with Amidol developers. And I am not convinced that it is the best, certainly not the only, developer suitable for Azo or any other paper. In a side-by-side test my wife and I determined that Amidol was our developer of choice several years ago. There is a subtle edge there that is not something you can put into words, but there is a difference we decided worth exploring. But Amidol is expensive and can be frustrating to use at times. Yes, we have tried all of the popular formulas. I have just not been too impressed with the results I have obtained at times. What I was searching for was a cold-tone developer. Not only for Azo, but for the other printing papers we use. At times Amidol was still giving a green cast on Azo. Not bad but annoying and required lengthy toning in selenium to offset. I like a cold, neutral tone for most of what I print and the Amidol formulas just wasn’t consistent enough for me. I was not happy with how things were working. It was time to do some research.
I found a lot of interest on the Internet about a Pyro base paper developer formulated by Donald Miller. Mr. Miller named his developer Pyro Plus Paper Developer (PPPD) and after reading about this formulation I was inspired to give it a try. Believe me it takes some inspiration to get me to try something new, but I was frustrated with Amidol and I needed some good news for a change.
From all of the discussions about PPPD I found one thing was clear; there were numerous variations to the formula. The original published formula called for both Pyrogallol and Pyrocatechol. Now this is where things get a little confusing. I don’t recall where I found the particular variation that I tried, but there was a suggestion from somewhere to replace the Pyrogallol with Citric Acid. Not sure where I found that, but that was the formulation that I first tried.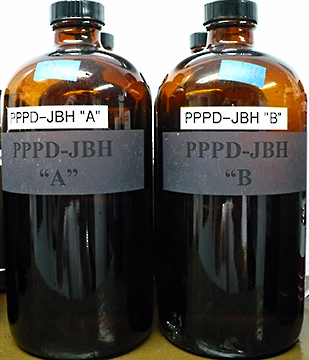
From what I gathered, adding the Pyrogallol and changing the amount of Potassium Bromide makes a more warm-tone developer. I was not interested in warmer, I wanted a cold, neutral developer. To my surprise the variation I tried worked very well. It more than met my requirements, and so far, has yielded very neutral cold tone results on the Azo we have on hand. No more green tint, just what I wanted! It has also proven to be excellent with all other papers we use. And, for those that are economy minded, Pyrocatechol is much cheaper than Amidol.
PPPD keeps very well in an open tray once mixed, but should be dumped at the end of a printing session. I have never had it to die in the tray from oxidation. It does die from exhaustion, just like most any other developer. I would estimate that after about twenty 8×10 prints per liter, you should start looking to mix some fresh developer.
This particular formula also keeps well as a premixed two-part stock solution. Part ‘A’ is mixed 1:1 with part ‘B’ for use. I found that by mixing one liter of both part ‘A’ and part ‘B’ and storing it in full brown glass bottles it keeps at least six months. At least at this point in my experiments that is as long as I have stored the stock solutions. I keep three to four one liter bottles mixed and on the shelf in the darkroom. When we go to print, you just dump a bottle of part ‘A’ and part ‘B’ into a tray and away you go.
I really like this developer and my wife is using it also. So if I am asked what developer I am using, I say now days it is my variation of Donald Miller’s PPPD. My bottles are marked PPPD-JBH for my personal favorite formula.
Oh. . . almost forgot. . . I guess if you have read this far you are interested in the version of PPPD we are using. Here is the formula that we have found to work very well with every paper we use, including Azo. Maybe it will work for you. . . maybe not. The only way to find out is to, as Fred Picker would say, “TRY IT!”
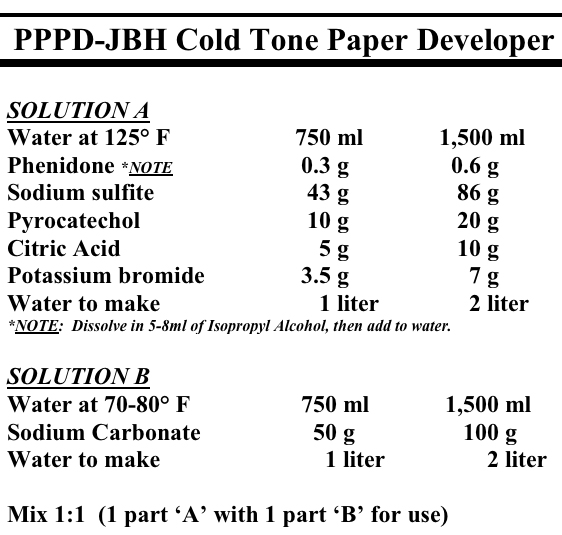
Please note that this developer contains chemicals that could be hazardous. Practice safe handling procedures when mixing chemicals. Wear gloves or use tongs when working with PPPD. In fact, it is a good idea to wear gloves when using any print or film developer.
Keep in mind this is a cold-tone developer. If you search the Internet you will find more information on other variations of the PPPD formula. Supposedly adding Pyrogallol and varying the amount of Potassium Bromide makes this a warm-tone developer, but I have not tried it, since I was not interested in warmer print tone.
I would like to personally thank Donald Miller, and all the others involved for laying the groundwork and publishing this formula, and its numerous variations, for Pyro Plus Paper Developer. Anyone wishing to experiment with PPPD, or seeking more information, try an Internet search for Pyro Plus Paper Developer.
Here you will find the original Pyro Plus Paper Developer formulated by Donald Miller;
http://unblinkingeye.com/Articles/PyroPlus/pyroplus.html

