ULF Photography

ARE YOU PHOTO READY?

Photo Ready

What would you do if you were asked to show a sampling of your photographs? I am sure you would jump at the chance. . . but. . . what if you were told you would be showing prints? No computer screen, no projection. Now what would you do?

What if today, right now, you were asked to have ten of your photographs ready to be displayed in an exhibition in thirty days. Could you do it? Do have ten photographs that you would put on public display? If so, do you have finished prints ready? Are they, at a minimum mounted? Could you have them dust spotted, mounted with an over mat and framed in a month?

Have you ever had to prepare for an exhibition of your work? Do you have any idea of what is involved in preparing for an exhibition of your work? Do you have the materials on hand? Have you ever framed your work for formal display? Do you have a mat cutter? Have you ever cut your own mats? Yes you can buy precut mats, but do you know where to get them? Do you have frames and glazing? Do you know where to purchase suitable frames? What frame would you choose?

It is not a trivial task and I would venture to say it will take you at least three times as much effort and time than you would expect. I don’t care what your photographic medium is. It matters not if you are traditional wet darkroom, hybrid or all digital; do you have finished prints you can show if asked? Not that you would run into this situation but, could you deliver in thirty days or maybe less?

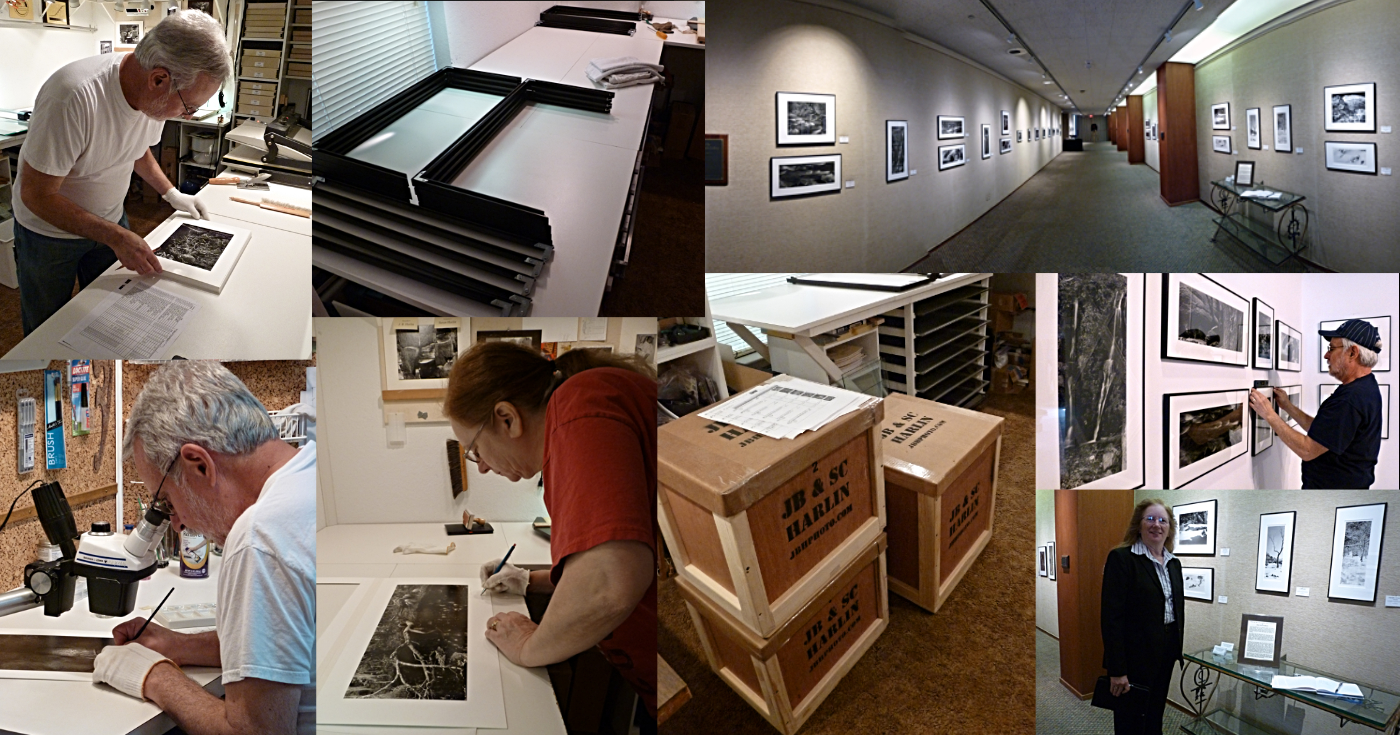
We always have mat board on hand. In several sizes. We cut our own custom over mats; have frames and glass on hand; have presentation cases filled with mounted photographs ready to be shown on a moment’s notice. We like to be prepared. We did one exhibition of our work which included over 100 framed photographs. I can guarantee that took longer than thirty days to prepare.

The idea is, if you put your time, skill and money into your work, why not have it in a finished state, ready for display? You never know when you may be asked. Think about it.

JB


E-Books

Posted by JB Harlin in Commentary, Photography, Presentation

DUST. . . Still A Four Letter Word!

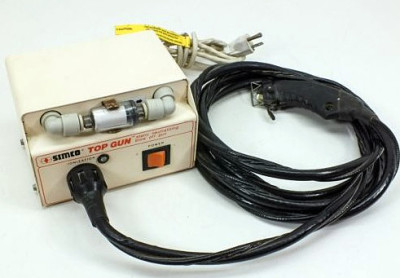
Simco F10 Top Gun

If you shoot film, you know that dust is one of your biggest enemies.  It gets into everything and is nothing but a nuisance.  I have written before about controlling dust around your camera and film holders, see these articles; “DUST. . . A Four Letter Word!” and “Wax on. . . Wax Off.”  
 
There is another Dust battle you have to deal with when handling and printing the finished negatives that requires as much, if not more attention to the problem.  Static attracts dust to the film like a magnet.  You can eliminate or greatly reduce the dust on the negative using compressed air, but there is even more you can do.  If you use an ionizing device you can greatly reduce the static charge, which helps in removing dust and helps keep it away.
 
Dust is not only a problem with film, it is also a big problem in manufacturing.  Ever notice how clean your new phone or TV is when you take it out of the box the first time?  There are numerous commercial devices used in the manufacturing process to help control the static charge that attracts dust.  These devices are on the expensive side, since they are specialized tools designed for commercial use.  The good news is, since they are used so much, they appear on the used market at much more tolerable prices.

We have two Simco F10 Top Gun Static Neutralizing Blow Off Guns.  (I know, get your mind out of the gutter, this is what the manufacture calls the device. . . see photos.)  We installed one in the darkroom years ago.  It worked so well, we added another in our work room where we mount, mat and frame.  This model has been replaced, but you can find them on eBay.  The unit is simple to use.  All you need is a source of air (a compressor) and a standard grounded electrical outlet.  They do work well.
 

One problem with the Simco unit is the hose and electrical umbilical.  It is long, about 10 feet and difficult to handle.  I solved that by building a spring-loaded retractor attached to the ceiling.  This keeps the umbilical out of the way and the device easily accessible when needed.

As I said, you will need a compressor with a regulator to furnish air to the Simco unit.  I keep the system pressure at about 40psi and you will need to add a filter to your air source.  We have a compressor in the garage which has a filter on its outlet.  Air is piped in via piping in the attic, then there is another filter at each Simco unit.  You do not want water or oil in your air lines.

We use the Simco Top Gun units every time we print or mount and frame prints.  They have become an integral part of the way we work.  Anything you can do to eliminate dust will help you in keeping print spotting to a minimum.  These units are also great for helping eliminate dust when mounting and framing.

Also worth mentioning is the Chapman ionizing antistatic brush.  I am not sure if they are still made, but Zone VI, Kodak and others sold these at one time.  We have a Chapman model and use it from time to time.  The unit has a soft camel hair brush attached to a high voltage supply via a long cord.  This is a good alternative if you do not want to have to use a compressor as with the Simco unit.  We both used the Chapman brush until we found the Simco units.  The ionizing brush works well, but nothing beats having compressed air combined with an ionizer.

Just remember; DUST IS A FOUR LETTER WORD!

JB

Posted by JB Harlin in Darkroom, Film, How-To, Photography

PENTAX DIGITAL METER SCALE MODIFICATION

I have been going through and updating this blog site and I have found several entries I have never posted. This is a project that was completed way back in 2007. Enjoy this blast from the past!
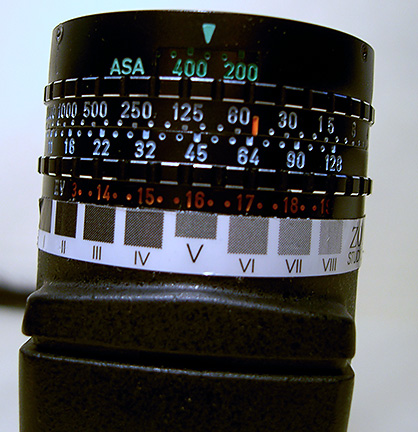

Pentax Digital Meter ModSo, I know that I really should spend more time talking about photography, but it is so much easier to talk about equipment and modifications. . . so. . . here we go again.  I know I have said several times before that little around here has not been modified in some way.  I have to say that my Pentax Digital Spot Meter is about my number one tool when photographing.  Maybe I should say it is my only tool that has a battery.  No wonder Paul Horowitz chose it to modify for Zone VI.  I like everything about it, except the Zone Dial.  Now don’t get me wrong here, the old Zone VI Zone Dial was plenty useable.  It was just that the label was not that durable and though we had purchased replacement Zone scales, I wanted something that was more rugged.   So, this is how it all started.  I just wanted to make a better label.  And, another complaint I had was that part of the Zone Scale was covered by the meter barrel.


What I wanted was a more durable scale, and the ability to see the entire scale from Zone I to Zone X against the EV numbers on the dial.  I had an idea about the scale and I thought I might open up the barrel of the meter a little.  Turns out the scale was not that difficult, but in order to open up the barrel on the meter required I machine an entire new part.

First I needed to design a new meter scale and see how it would fit.  The nice thing about doing your own modifications is you can design for the way you think.  I set off first laying out a Zone Dial that I liked.  I wanted a few symbols to jog my memory without clutter.  I wanted to see ten full stops.  It would include markers for N as well as N+1 ½ and N-1 ½, so I would not have to do any counting of Zones or EV numbers, just dial up whatever you want with little thought or counting.  I also added a marker for Zone III to remind me of deep shadows and one at Zone IV for lighter shadows.  Of course I added my name, website and copyright and there it was.  I did the artwork in TurboCad and laid out the spacing to match the EV dial on the meter.  I printed out a paper model and proceeded to check for fit and functionality.

Next I needed to rework the rear part of the meter barrel.  I first thought I could modify the original, but it became obvious that if I were to cut away metal on the factory part, I would then have to strip the original anodize and re-plate.  That usually does not work too well, so I opted to just make an entire new ring.  This wasn’t that hard to do.  The lens barrel is easily removed and the rear part that I needed to modify was simple machining.  All I had to do was measure the original and make the replacement, adding my modification.  I turned out the new part and made several test fits to make sure everything worked as planned.  Once I was satisfied with the new ring, it was just a matter of some black anodize and assembly.  I should note that we have four of these meters and I modified all of them at the same time.

I ordered some light sensitive, adhesive backed, aluminum that is mostly used for trophies and name plaques.  I have used this material for panels on prototype devices before.  This would serve as my new meter dial.  I printed out a negative on clear film and this was used to expose the metal plate.   After development, I had my dials ready to be cut to size.  All that was left at this point was positioning the dials onto my new, opened up, meter barrel and one more project was done.

Zone System Dial

This was another one of those projects that was a little more involved than originally anticipated, but turned out to be well worth the effort.   I did the modifications in 2007 and our meters have seen a lot of use since.   My slightly encoded Zone Dial has worked very well, allowing me to work quickly and hopefully with fewer mistakes.  Like I have said before, I like to keep things as simple as possible when working.  Too much technical chatter gets in the way of creativity.  I would rather do the technical work in the shop so I can get on with making my art without too much distraction.

JB

Posted by JB Harlin in DIY, How-To, Photography

CUSTOM PANO PRINTING EASELS

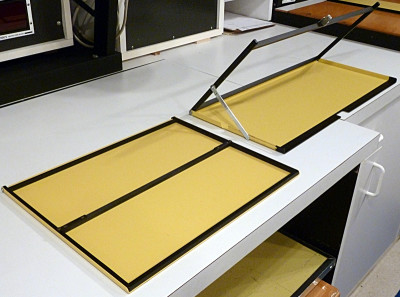
Custom modified 5.5 x 14 & 8 x 20 printing easels

Seems the more you do the more you need to do.  Or, maybe more accurately, the more you do unique things, the more custom hardware you need.  Either way, seems there is always some project that needs to be addressed.

Susan started working in the pano format exclusively about 11 years ago.  She shoots only 4×10 and 8×20 film.  This means she enlarges her 4×10 negatives to mostly 5 1/2 x 14 or 8 x 20.  She cuts 11 x 14 and 16 x 20 paper in half when she prints.  Not much of anything exceptional there, except you need some sort of non-standard printing easel when making such prints.  For years now she has been using a modified 16 x 20 Saunders Speed Easel and an adjustable easel for 5 1/2 x 14.  Thing is, these easels are very large and the way our 8×10 enlarger is setup, you have limited baseboard area.  What she wanted was a custom easel for the 8 x 20 for sure and something similar to her modified 16 x 20 using an 11 x 14 Speed Easel.

 
This is not that difficult of a machining project. . . just requires a little thought, some metal and the magic ingredient. . . time!  Oh, and a couple of spare Saunders Speed Easels to perform a modification upon.  We did find the easels on eBay, and I had ordered the material. . . finally I found the time.
 
For the 8×20 easel the idea was to cut down the hold-down border to the correct size, then cut the base to match.  This would make a custom 8 x 20 Speed Easel.  The actual re-fabrication was not too difficult.  It took more time measuring to make sure things worked out to the right print border size, since this is a cut once type of project.  I machined a new cross bar for the hold-down, made sure it was a good fit and drilled and tapped the ends.  Next I cut off the unneeded portion of the stock hold-down, drilled the side bars and assembled the new 8×20 border hold-down.  It all fit just about right.
 
Next I needed to cut off the unneeded portion of the base of the easel.  I carefully measured and marked the needed cut.  The bandsaw did the rest.  A little dressing with a large flat file and the new base was almost done.  Since the larger Speed Easel has a locking mechanism to keep it closed, I needed to add a relief in the base to clear the latch.  That required a little more bandsaw work, followed by some finishing up in the vertical mill and all was well.

Once everything was test fitted, all that was left was a little painting.  Since all of the easel is steel, it is a good idea to discourage rust.  I lightly sanded the newly fabricated border hold-down and gave is a luxurious coat of self-etching flat black primer. . . done.  The base was a little different.  I really didn’t want to repaint the whole thing and finding paint that matched the Saunders yellow was not really an option either.  I decided to mask off the end where I had removed the excess base about one inch inward and only paint that portion with the black primer.  That way I would get the bare edge of the exposed metal covered and it would not look that bad.

All that was left now was to wait for paint to dry and then assemble.  I did have to remove the anti-skid rubber feet from the cutoff piece of the base and glue them to the new 8 x 20 easel.  That was it. . . all done. . . ready to use.

For the 5 1/2 x 14 easel modification, I took a much simpler approach.  Since the original 11 x 14 easel was small, there was no problem using it on the enlarger base.  So, no need to cut the entire easel down to a smaller size.  All I really needed to do was machine a new cross bar to cut the easel size in half.  I also worried that if I did cut the easel down that the border bar assembly would not have enough weight to hold the paper flat.

I cut a new cross bar from a length of 0.25″ square steel bar and machined up a couple of bracket pieces from aluminum to hold it in place.  A little drilling and tapping and six #4-40 truss head socket cap screws and all was ready for some finish work.  The new divider bar, along with the brackets were cleaned and given a coat of flat black self-etching primer.

I know this is not a project for the average person to attempt with only a few hand tools.  This is not complicated, but does require a degree of precision and tools suited to the task.  There are those times you have to build what you need.  This is one of those things I do to relax and unwind.  I offer this little project as an example of what can be done.  If you decide to modify your easel, do proceed with caution.

JB

Posted by JB Harlin in Darkroom, DIY, How-To, Photography

EXHAUSTION; OR, IS THIS STILL GOOD?

Fixer does not soon become “exhausted” in the sense that it can’t dissolve more silver salts. Instead, the trouble is with silver/sulphur complexes that build up as the hypo is used. They can’t be washed out of paper. One of Alfred Stieglitz’s sins was that in spite of excellent training in photographic sciences at the Berlin Technische Hochschule under the great Wilhelim Vogle (whose discoveries made orthochromatic and panchromatic film possible), Stieglitz told the young Ansel Adams that a gallon of fixer is good for thousands of prints. He thought that Kodak’s advice to change the hypo frequently was just corporate greed-anxiety to make big profits selling more dirt-cheap hypo. No doubt that’s why some Stieglitz prints are turning funny colors.*
* Photo Techniques Magazine, “Advanced B&W Printing” 2002, “Photo 303, The Pratt Institute Handouts” by David Vestal, p.40

EXHAUSTION
Nothing lasts forever. And, this is even more true when it comes to photographic chemistry. The question is, how long does the chemistry used in the darkroom last once mixed and what is the exhaustion rate? I firmly believe that trying to milk photographic chemistry for every last little bit is a recipe for disaster. Think of it this way. You have invested a lot of time and money by the time you get into the darkroom. Is it really worth it to try and save a few dollars by pushing your luck with chemistry that may not be up to par? Honestly, the least expensive item you use in the photographic process is the chemistry and water. Why scrimp, and risk disaster?

We calculate the exhaustion rates of all chemical formulas we use. It is very important to know the capacity of the film developers you use. If you try and stretch the chemistry beyond its useful capacity you will ruin your film. Same thing happens with the fixer. Printing paper is the same, except if you make a mistake you can always start over. But with film there is no do-over.

We very closely watch the capacities of the chemistry we use. The basic rule in our darkroom is to assure that we seldom go beyond 50-60% capacity. Film developers are used one-shot, making sure to use an adequate volume of chemistry for the number of square inches of film being developed. Film fixer is ran to 50-60% capacity then discarded. The same criteria is used when printing. Paper developer is used to maybe 60-70% capacity then discarded. Paper fixer is never used more than 60% of capacity.

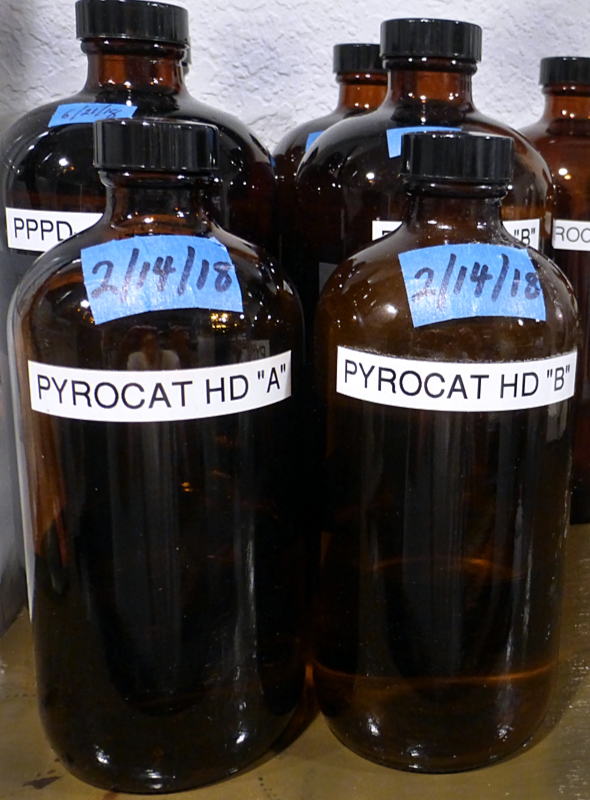
In our darkroom there are few chemicals that are not discarded after a darkroom session. The only fixer we keep is the rapid fix used for film and it is discarded at 50-60% capacity. The only other chemistry we keep is Selenium Toner. All chemistry is labeled with the date it was mixed. Those that are kept for reuse are marked with the number of sheets of film or paper it has seen.

There is no need to run the risk and facing the consequences of exhausted chemistry when it comes to your photography. As said before, the chemistry is the least expensive item you will use in the whole photographic process, from film to the finished print. It is not worth the possible disaster that scrimping can cause. It is important to know the capacities of every formula used and never run any to full exhaustion. Nor is it a good practice to keep mixed solutions too long. Some formulas deteriorate rapidly once mixed. Know your chemistry and use it wisely!

JB

Posted by JB Harlin in Darkroom, Film, How-To, Photography, The Darkroom Workshop

WHAT TO DO ABOUT THE EDGES

WHAT TO DO ABOUT THE EDGES

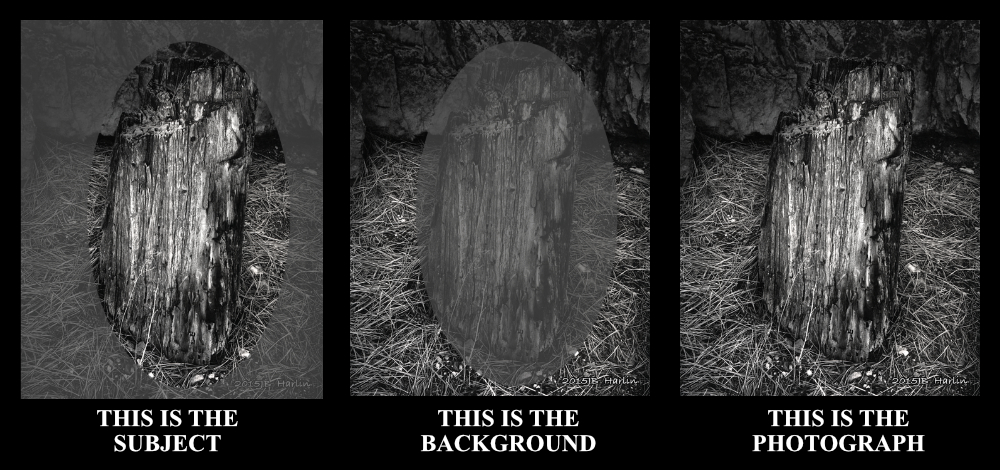
When looking for a suitable photographic subject, the subject should be the focus of the finished print. You want the viewer to be drawn to what you have chosen. Problem is, it is easy to become obsessed with that subject and blind to its surroundings. Have you ever taken a photograph of something or someone and been surprised when you see that in the finished print there is some nasty, distracting object somewhere in the background? Or maybe at the edge of the frame something shows up that really ruins your creative intention. How can this happen? I believe it is because you are mentally so focus on the subject that you completely ignore the surroundings. This is something you will learn to pay attention to after a few failures.

I learned this lesson years ago the hard way. This is why failures are important. You need to analyze your mistakes and learn not to repeat them. There is no great loss in failing. Failure can be especially important if you learn from your error. The idea is to analyze the problem and not keep repeating the same mistake. I find myself constantly scanning the edges of the frame when composing on the ground glass. I have even noticed, mostly unconsciously that I find myself scanning the edges of the frame when watching a movie. I know the director intentionally wants you to focus on the subject of the scene. Yet I am always looking at the background and what surrounds that subject. The movie set is there to establish the mood and to give the illusion of a place and time. I am fascinated by how much time is spent on the surroundings in a really well made movie. Most people completely ignore the objects surrounding the actors. I find I am always paying very close attention to those things that are not suppose to be obvious or are suppose to be ignored. This is a mindset that is learned over time.

It cannot be stressed enough that the edges of the photographic frame are important. How important? They could be much more important than the chosen subject itself. It’s your job as the photographer to make sure everything in the photograph works together. Interestingly enough, the subject is the subject and it usually takes care of itself. It’s those nasty little distractions that surround the subject that can make or break a really great photograph. Personally I find that once I have zeroed in on my main subject, I tend to spend a lot of time working with the surroundings.

Remember, you can always move the camera. If moving is not an option, you can try another lens. For fine tuning, you also have camera rise/fall and shift. The idea is to never let something distracting in the background or at the edges become something that interferes with your creative intention. Use those elements at the edge to reinforce your subject.

My best advice is to spend a lot of time on the frame edges. You will not regret it!

JB

E-Books

Posted by JB Harlin in Commentary, Photography

Photo Arts Xchange 2019

Photo Arts Xchange

Mark your calendar now to attend Photo Arts Xchange 2019, May 3-5!

Are you a serious photographer? Do you regularly make finished prints? Would you like to share your work with other like-minded and serious photographers? Would you like to see what other dedicated photographers are doing? How about a three day meet up to share your work, your passion and your commitment to the art form?

Photo Arts Xchange (PaX) is a unique, first of its kind event created just for sharing your finished photographs. Yet PaX is a different kind of event. This is not the usual technical gathering for discussing processes. There are plenty of workshops that teach photographic technique.

What PaX is about is taking the art of photography beyond the technical and exploring the more demanding aspects of artistic creation. This will be a gathering specifically for print sharing and digging deep into each photographers creative mindset. The focus will center around discussions of creativity and foster camaraderie with others that share your passion for photography.

This will be a three day gathering in Rocky Hill, Connecticut hosted by passionate photographers exclusively for sharing the artistic side of serious image making. Again, this is not a how-to workshop, but a multi-day event solely for the purpose of sharing work and discussing the why of the creation of an artistic statement within a printed photograph.

PaX is a free event. Your participation is simple, in that all you need to do is Register for PaX by going to the PaX website. Participants should bring a sample of their finished, mounted and ready for display images they feel are their best work. Be prepared to talk about and explain your artistic vision and what motivated you to make that image; then bring it to completion as a finished print. Again, this event is different in that the focus is not on the how, but on the why.

We invite all serious image makers to join us in Connecticut May 3-5, 2019 for a groundbreaking new type of serious printmakers weekend of sharing the why of creativity. For more information and to register, drop by the PaX website and follow Photo Arts Xchange on FaceBook.

We hope to see you there!

JB & Susan

Posted by JB Harlin in Events, Photography, Presentation

PROCESS AND RESULTS

PROCESS AND RESULTSThe scientist is absorbed in the process, while the artist is obsessed with the results.
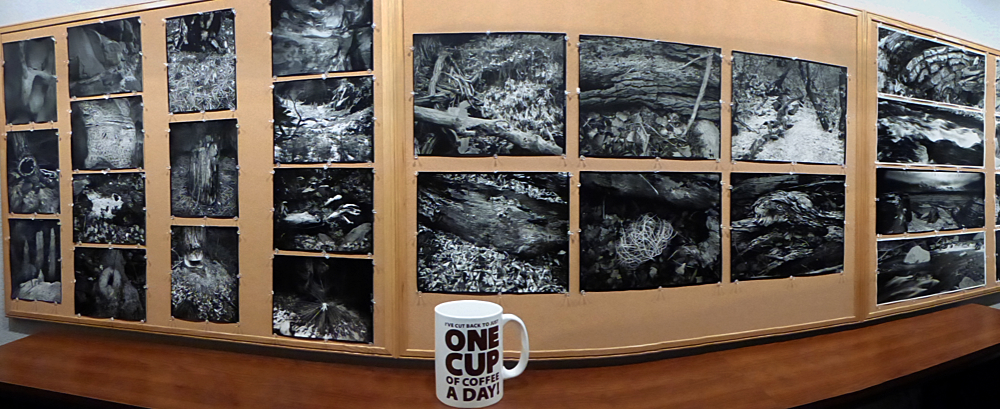
 
Brooks Jensen, publisher of LensWork Magazine, tells an interesting story about someone he once knew that had a thirst for photography.  Seems this fellow leaped  into photography with unchained enthusiasm.  He spent many hours, and a lot of money, purchasing equipment and building a darkroom.  Then spent even more time learning how to control the process of B&W film and printing.  He became an expert at exposing, developing, and printing.  He was a master of the equipment and materials.  Then suddenly he got rid of all of his photographic equipment and took up another interest.  When asked why he said, he could not find anything of interest to photograph.  He had nothing to say artistically.  He was absorbed in the process, yet discovered he had no interest whatsoever in the results.  To quote one of my earlier BLOG posts; Edward Weston said something to the effect that, you should be able to look down at your feet and find something interesting to photograph.
 
Edward Weston was absorbed in his photography.  It was said that he had little interest in anything mechanical.  Edward never learned to drive a car.  He was totally dependent upon others for transportation.   If his camera or other equipment broke, he was helpless to repair any of it.  Yet he was a master at operating the camera and in the darkroom.  He was obsessed with the results, and understood only enough of the process to achieve his vision.
 
I have witnessed this phenomenon myself.  I have seen those that really believe they wanted to work with big cameras and film.  They start off with a bang and end with a fizzle.  Creating art really is hard work.  You have to master the photographic process, but it is even more important that you have something to say.  Don’t become absorbed with the gear and forget that the end product is what really counts.  Like baking a cake, it should be about the cake, not the brand of mixer used for the batter.  Remember that PROCESS is only a path to RESULTS.

JB

E-Books

Posted by JB Harlin in Commentary, Film, Photography, The Darkroom Workshop

WHAT IS YOUR LEVEL OF DEDICATION?

WHAT IS YOUR LEVEL OF DEDICATION TO PHOTOGRAPHY?

There is an old photographic saying that goes something like; “if you buy a camera, you are a photographer; if you buy a piano, you own a piano.” No matter what your experience may be with the camera and making photographs, my question for you is, what is your commitment to photography? Are you dedicated to making photographs? Do you make prints? Or, are you only interested in the hardware?

When I think of what a truly dedicated photographic artist would look like, I think of Edward Weston. He lived a very simple life. He was not a camera aficionado. Edward did not have an elaborate darkroom. Yet he created some of the most influential photographs of his time. He was all about the finished image. Certainly he was a master of his technique and the hardware he used. But technique and hardware were only the tools he used to do what he loved.

One trend I find disturbing is that people today do not make prints. There is something very special about a finished print. Whether held in an album, or framed on the wall. Just the act of making a print says there is something special about this particular photograph. It requires, even demands you look! Not a casual glance, but to really take the time to look at what is there.

I don’t care what hardware you use, do you make finished prints? Do you feel your time, money and effort is worthy of making a print? Do you go out and shoot several hundred images, look at them maybe once then discard them? Why not go out with the intention of making only one photograph which you will then take the time to make a finished print from? Why not intentionally go and make only one or two, or three photographs? Then choose the best, and take the time to make a print. Hang it on your wall and live with it. Show it to everyone you know.

Maybe, just maybe if you made prints and did it often, you could influence others to do the same. Why not be different? Why not get out of the rut of snap, look and discard? Why not demand that people look at what you do? Make a statement! Do it to the best of your abilities. Make a finished photograph. . . make several. Be tough on yourself and make photographs that say something to you. If you reach others, then you are doing something worthy. You are expressing yourself and not just flashing something on a little screen to immediately forget and discard.

Why not be a trendsetter? You never know, you might even surprise yourself!

JB

E-Books

Posted by JB Harlin in Commentary, Darkroom, Film, Photography, The Darkroom Workshop

FILM; STILL ALIVE AND KICKING!

And they said it wouldn’t last! Hmm. . . seems that has been said before. What am I talking about? Well. . . FILM of course! It’s amazing to see the resurgence in the interest in and the use of the worn out old technology of photographic film. Sort of like vinyl records, tube amplifiers, buggy whips and saddles. What becomes old is new again. I honestly had this feeling something like 15-20 years ago when that tired old chant started; Film Is Dead. I didn’t believe it then and now it looks like I was correct in my assessment. I didn’t fall for the sell your film gear now while you can still get something for it. Truth is, we bought even more film gear. And what is happening now? The prices of film photographic equipment is once again rising. All of the manufacturers closed up shop and went chasing after high-tech gizmos. And now, suddenly there is a growing market with a finite supply of hardware. You have to choose what you can find used or refurbished. How could that happen? What is going on in the world of photography?

It’s all because of young people. They grew up with all that techno stuff and one day someone, like me, showed them there is something else. Something different. . . Wow! A different way of seeing, creating, photographing. . . making your artistic statement. The key word is different. Fred Picker used to say, “different is not the same!”

I hear all kinds of comments. Look at the size of that camera! You can still get film for that? You can get film that big? Oh, you make prints? And the look of them! That seems to be something else that is new to the younger generation. I grew up looking at photo albums put together by my family. You didn’t have a little screen to view your snapshots instantly as you made them. You had to send the film off and wait! And those prints you got back in that envelope had value. You didn’t make a thousand snaps and pick one to look at once and then discard. You kept real printed photographs and looked at them over and over. And if one was really special, you had an enlargement made!

Yes the story of film and film cameras has come full circle, just as I had predicted way back in the Film Is Dead days. I said there would be a mass exodus by film and film camera manufacturers. But I also said that film would not go away. There would always be someone out there that would keep making it. Because there are those of us that are not willing to give it up. I predicted there would be someone to fill the niche market. I also predicted the price of film would go up. . . and it has. But, what is the cost of what you love? How can you put a price on that which you have spent most of your life learning, exploring, refining and experimenting with?

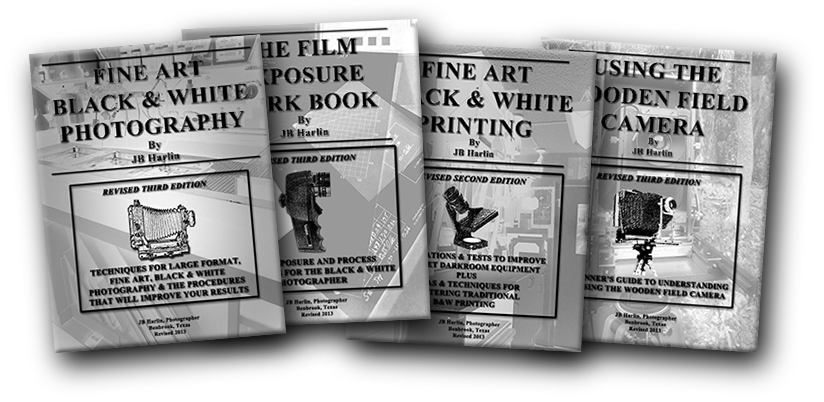
Another thing I feel strongly about is knowledge and passing it on to future generations. I feel it is near a responsibility to preserve what you have spent a lifetime learning. This commitment led to the four book series that Susan and I put together and self-published 20 years ago. Those books have been revised and are now available in e-book format. Through our web site and this Blog we have further endeavored to highlight what we do and how we approach photography as an art form. 

It’s been an interesting and fulfilling journey to this point and that journey is just beginning. I feel I can now say with confidence, FILM IS NOT DEAD!

JB

Posted by JB Harlin in Commentary, Film, Photography, The Darkroom Workshop