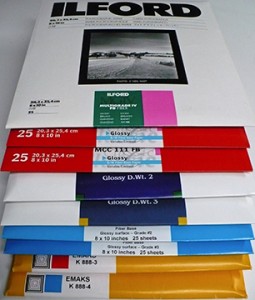
Paper Grade

EASILY FIND GRADE #2 AND GET YOUR FILM TEST CORRECT

GRADE #2 So, here is the predicament; you are getting ready to do your film testing; you have decided to use the simple visual film testing technique. Visual film testing is a really simple way to determine your correct film EI and developing time. All you need to do is perform these tests on a grade #2 paper and you will know you are making the best possible negatives.

>But, there is one nagging little problem. If you are using VC paper, how do you know what filter, or light source setting, that will produce a  grade #2 contrast? Even if you are using filters, each filter set has different filters that will give different paper grades on different papers. Even the developer you choose can affect paper contrast. You really need to KNOW how to achieve a true grade #2, using your equipment and darkroom, in order to do a valid film test.

What if I could show you an easy, inexpensive, and quick method that will get you plenty close enough?   Well, here you go. . . “FINDING VC PAPER GRADE #2; EYEBALL CALIBRATION.”  This method should get you well within range to get you started on the right track.

Remember, that making a good negative is the first step in making a great print. Hope this helps you on your quest for photographic excellence!  Download the PDF version  from the Articles area of our web site.

“Simplicity is the ultimate sophistication.” -Leonardo da Vinci-

JB

Posted by JB Harlin in Darkroom, How-To, Photography

MEASURING PAPER FOG

I was recently asked to test some Kentmere paper for fogging. A friend had shut down his wet darkroom and had several packages of paper he wanted to sell, but wanted to know if it was still useable. I agreed to test for him and if you wonder how to check for paper fog, here is the process I use.

PAPER FOGBegin by cutting off a strip of the paper to be tested in very subdued safelight to total darkness. Since the paper I was testing was 16×20, I cut off a strip across the short side about two inches wide. I then cut the strip in half. This gave me two pieces of paper 2×8 inches. On the back of the paper I mark one with the letter ‘F’ and the other with the letter ‘D’ and place the latter into a light-tight box.

The strip marked ‘F’ is placed into a tray of fresh fixer and agitated for five minutes. Then it is placed in a tray of running water. Next the strip marked ‘D’ is placed into a tray of developer, agitated for two minutes. . . stop for thirty seconds. . . and fixed for five minutes. I use my standard print developing chemicals and the normal times. If you use different materials, use your normal times. Once both strips are in the wash tray, turn on the lights and wash for thirty minutes. Remove the test strips and dry as usual.

What has happened here is I have cleared the test strip marked with the ‘F’ which stands for fixed only and I have developed the strip marked ‘D’ for developer as usual. All that is needed now is to measure the reflected difference. I used an X-Rite 810 densitometer to measure the difference and found it to only be about 0.003, which is nothing to worry about. Keep in mind that all light sensitive materials, film or paper, will have some amount of base fog when developed.

Fortunately I was able to report to my friend that his paper was in excellent condition and he was happy to be able to sell it to another photographer. Hopefully this batch of paper will live on to produce some beautiful prints.

Also keep in mind that you do not need a densitometer to run this test. If you cannot see any appreciable difference in the two test strips, you can assume the paper is in good condition. If you have some old paper that shows signs of fogging, you can experiment with adding a restrainer, like Benzotriazol, to your developer to see if it will help. Never throw out printing paper just because you have had it on the shelf for some time. Test it first. . . you may be surprised to find that it is in good condition and useable.

JB

Posted by JB Harlin in Darkroom, How-To, Photography