JB & Susan Harlin
www.jbhphoto.com
MY REPLACEMENT FOR ZONE VI PRINT & FILM FIXER
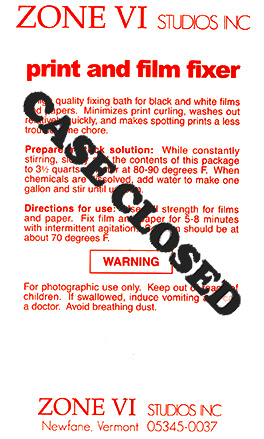 I had written earlier about the demise of Zone VI chemicals and how it has now become necessary to mix our own chemistry from raw supplies. Take a look at the previous post titled, “ROLLING YOUR OWN FIXER.” Since that post I have done quite a bit of research and testing. I am convinced that the fixer formula we chose is not exactly a direct replacement for the old reliable Zone VI product. Not that what we have been using is not a good fixer, it just is not the same. Fred always said, “Different is not the same.”
I have mixed up several concoctions, but have always come back to the Looten Acid Fixer for its simplicity and close match of pH. I kept bypassing some of the more well known formulas for some reason, possibly because everyone says they have a very unpleasant odor. I don’t believe any could be any worse than the Looten Acid Fixer we have been using. . . this stuff will take the hair out of your nose.
I want to use an acid fixer for paper, because that is what I have used for years. All I wanted to do was find a 100% replacement for the Zone VI Fixer I have used for as long as I can remember. Zone VI Fixer was stable and it had little to no odor. I have searched all over and have never found the exact published formula used by Zone VI.
I looked through all of the old Zone VI Newsletters and finally resorted to watching the Picker videos. Finally in the printing video Fred talks about his fixer being Kodak F-6. The only problem is that the Zone VI Fixer I have used for years always came in a single bag as dry chemical. If you check the formula for F-6 you will find it contains 28% Acetic Acid. I am no chemist, but as far as I know, 28% Acetic Acid only comes in liquid form. Plus, F-6 is a hardening fixer. I have no reason to believe that Zone VI is a hardening fixer, let alone all instructions for F-6 say that the hardener, Potassium Alum, must be dissolved separately and added after all other ingredients have been completely dissolved. Again, the Zone VI Fixer came in one bag containing only dry chemical. So, I really do not believe that F-6 is the correct formula for what was sold as Zone VI Fixer.
There are a lot of guesses, but I do not want a guess. I measured the pH of Zone VI Fixer to be 5.5. None of the other concoctions that I have tried matched this pH, nor did they lack a strong odor. My original choice of Looten Acid Fixer had the closest pH coming in at 5.0, but has a strong odor, where the Zone VI Fixer has little odor at all. I still found myself going in circles.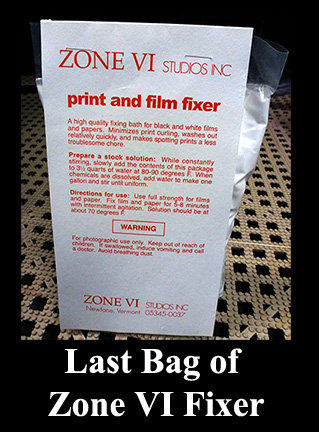
I finally got tired of having to run the vent fan on high to get away from the smell. Time to put on the apron, roll up the sleeves, and do more research. This time I decided to investigate the Kodak F-24 formula. Why I bypassed this one before is beyond me, but I did, and it was a mistake. There is an alternative mixture that is suppose to be ‘low-odor’ that substitutes Citric Acid for the Sodium Bisulfite of the original Kodak formula. This mixture still had a very strong smell. So much for the alternative, low-odor mixture!
Next, I mixed up a two liter batch of the original F-24 formula, and surprise. . . it smells just like Zone VI Fixer. Next to no odor at all. I measured the pH. . . well whaddya know. . . it was exactly 5.5, just like Zone VI. Next I needed a stability test. I put two liters of F-24 in a four liter jug and let it set for a week. No change! That does it for me. So far as I am concerned, there is no difference.
Wow! Have I solved the great mystery? Could it be that Zone VI Fixer is nothing more than Kodak F-24? I have changed our FORMULAS AREA to reflect the formula for F-24 Fixer since it is now our chosen formula for paper. Note, that the only difference in the new formula is the addition of 10 grams of Sodium Sulfite per liter to the original Looten Acid Fixer formula. Not that difficult, but it does make a difference. Even if F-24 is not the exact same formula as Zone VI, it is plenty close enough for me. I will add that Gordon Hutchings also recommends F-24 for film and paper in “The Book Of Pyro.” So, now you know what I have learned about fixer.
There is one more thing to be aware of; be very careful with the temperature of the water when mixing Sodium Thiosulfate. The most common Sodium Thiosulfate is the Pentahydrate (crystalline type) which requires 240 grams per liter. You need water at about 100-125°F, because it is extremely endothermic and will rapidly cool the water as it dissolves. This I knew from experience. What I didn’t know is that Sodium Thiosulfate Anhydrous (fine grain like table salt), which requires 152 grams per liter, should never be mixed in water above 90°F, because it will decompose and form a precipitant. Just so you know, if using Sodium Thiosulfate Pentahydrate (large crystals) use hot water. If you are using the Anhydrous (fine grain) type, mix at about 80-85°F.
CASE CLOSED. . . at least for me. I have found what I was looking for. If you were a Zone VI Fixer user and are looking for a suitable, easy replacement, this should work just fine. Now, back to making photographs. . . and. . . I can turn that vent fan down to low again!

JB
Kodak F-24
- Water (at about 125°F)…………………750.0 ml
- Sodium thiosulfate, crystalline………240.0 grams
- Sodium sulfite, desiccated……………10.0 grams
- Sodium Bisulfite………………………..25.0 grams
- Water to make……………………………1.0 liter
Note: If anhydrous thiosulfate is used, the water temperature should not be over 90°F (80-85°F) to prevent decomposition.
PYRO STAINING FILM DEVELOPER
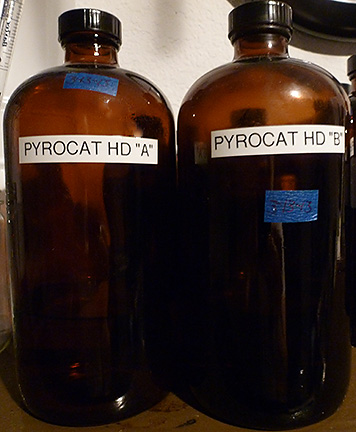 I had written about my experiments with Pyro Staining Developers back in October of 2010, and that should make it very clear that I have chosen my favorite film developer. Take a look at my previous post, “THE PYRO-CAT IS OUT OF THE BAG.” Of all of the Pyro Staining Developers I tested, PyroCat-HD by Sandy King has proven to be, hands down, the best of the best. If you are seriously looking for the finest all-around film developer, I would strongly suggest you take a serious look into PyroCat-HD.
Sandy King has done his research and formulated an excellent developer. Also, he has a new web site that is outstanding. I was pleased to find that he has a section dedicated to his technical writings which contains his original article on Pyro Developers. If you are seriously thinking about working with Pyro Developers, I would highly recommend you take a look at the article, “AN INTRODUCTION TO PYRO STAINING DEVELOPERS, WITH SPECIAL ATTENTION TO THE PYROCAT-HD FORMULA” by Sandy King.
There is no need for me to go into the details of my experiments with Pyro Developers since I have covered what I learned in my previous BLOG post. I would also recommend the above mentioned article by Sandy King, which covers a lot of what you need to know about Staining Developers. All I can add is that PyroCat-HD is the only developer we now use. Maybe you should try it yourself?
JB
WEIGHT BAGS FOR MOUNTING PHOTOGRAPHS
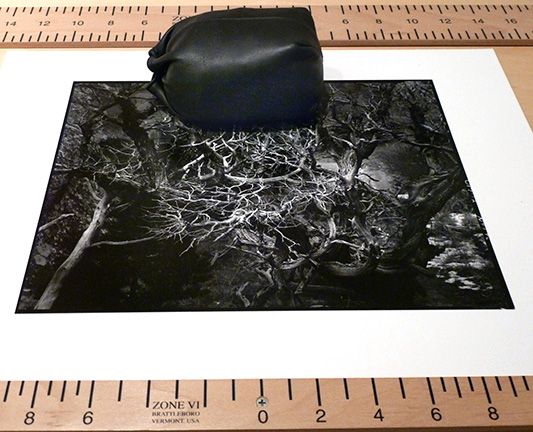 Like most everything I do when it comes to photography, I am not the source of the technique, idea or clever device. I would say that 95% of what I do is something I learned from someone else. I may add my own twist, but I cannot take credit for the idea.
Mounting photographs is a tedious and time-consuming task that we all must master if we want to display our photographs. Dry mounting is our chosen method of print presentation. Anyone that has dry mounted photos knows what is involved. You tack dry mount tissue to the back of the photo, trim the edges, then align the image on the mount. It is, at best, a nerve racking chore and one slip then you have just ruined a print.
It is imperative that you get the photograph aligned properly on the mount. This is a tedious process of measuring and measuring again. . . and. . . maybe you should measure again! Nothing is more frustrating than when you get everything just right, you bump the print and have to start again. What you need is something to hold the print in place while you do the final tacking to the mount. This is where a weight bag comes into play. For a small print only one small weight bag should be enough. With larger prints a larger weight bag might be better, or possibly two smaller ones would be better to hold things in place. Either way, a good weight bag is a big help.
So, now that we have solved the problem of what to do, we need to look at how we can construct a suitable weight bag. For me, simple is always better. . . inexpensive is even better than simple. So here is how I solved the mounting weight bag predicament.
A weight bag for mounting photographs must be made of some very soft material so as not to damage the print surface. The perfect material is a synthetic Naugahyde-type material that lens bags are made from. A good place to look for lens bags is your local camera show. There is nearly always a box under some table full of such things that range from really cheap to even free. What you are looking for are the bags that are made of very soft, supple material. A lot of the bags are made of very stiff, rough material that will damage a print. I have several size bags ranging from those that were intended to carry large, long, lenses, to those that would hold a small normal lens. See if you can find several large bags and a couple of the smaller ones.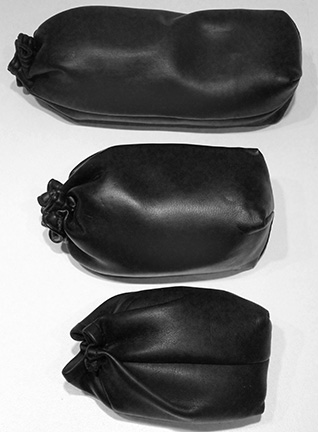
Once you have the bags it is only a matter of stuffing them with a suitable weight material. I have heard suggestions from sand to marbles. I would suggest using Aquarium Gravel from the local pet supply as a great weight material. Any of these items should work well, but I did something completely different. First, I just don’t like the idea of rocks, sand or gravel in or around my work area. Second, I did not have that many marbles (some say I lost all of my marbles years ago). There was one thing I did have an abundance of and that was pennies. I had several large jars filled with pennies in the back of a closet. Why not use them, since they are heavy and should work well for my purpose.
No matter what material you choose for filler, I would highly recommend that you first load your weight material into a heavy plastic bag. I would even further suggest that you double bag your weight material, just in case. You will have to adjust the amount of filler needed to fill the lens bag and still allow you to close the drawstring end closed. Once you have the correct amount of filler in a plastic bag, close them securely with twist ties, or use a heat sealer. Note: Do not stuff the inner bags too full. You want them to be about 90-95% full.
All that is left to do is stuff the bagged weight material into the lens bag and close the draw strings. I tie the drawstrings off then cut off the excess.
I have had my weight bags, stuffed with pennies, for years and they have served me well. I use them for print mounting and for weight when flattening prints under a sheet of 1/4 inch glass. Weight bags are a handy tool to have around. The next time you are at your local camera store or a camera show, look for used lens bags. Pick up a few soft bags and make your own weight bags.
JB

ZONE VI DEVELOPING TIMER PROBE BRACKET
 I am a firm believer that necessity is the mother of invention. Let’s face it, most people do not design and build just for the enjoyment of designing and building. . . at least I don’t. Many years ago I decided to purchase the Zone VI Compensating Developing Timer and I have used it ever since. This is a great darkroom tool, and I would not process film nor paper without it.
The biggest problem I had when I first got my timer was trying to come up with a way to mount the sensor to my trays. Since by this time in my photographic career I was tray processing sheet film, I had no use for tanks and what was sorely missing was some sort of bracket to hold the sensor in the tray. I tried tape and even a plastic close pin. Nothing seemed to work, so it was off to think a bit. I do my best thinking while taking a nap.
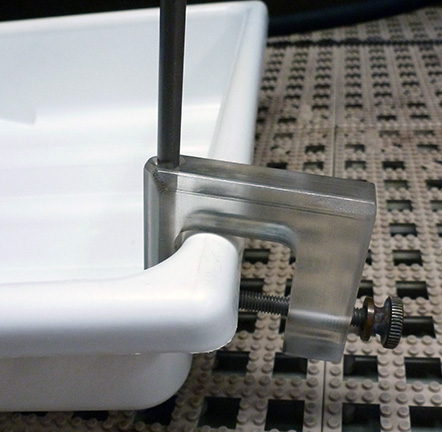
After some time contemplating the situation, I finally visualized a clamping device that could be attached to the lip of a tray. I decided that it needed to be made of a tough material that wasn’t affected by chemistry and would be easy to keep clean. So I chose to make my clamp from a chunk of Acrylic.
I dug out an old hunk of scrap Acrylic from the junk box and began working it into shape with a band saw and vertical mill. What I eventually came up with was a prototype temperature clamp that I have been using for over ten years now. Take a look at the accompanying photos and you will see a very well used piece of darkroom equipment.
I have always wanted to improve a little more on my original design, but just never got around to it, until now. Though my prototype shows no signs of degradation, it is well stained from the Amidol days and my biggest concern is that there might come a time when the Acrylic would fail. You know how nothing ever fails except when you really need it. I could envision this thing breaking in the middle of a printing session or even worse, in total darkness during a film run. Though from careful examination of the original, I can see no signs of failure. Still, I always like having a spare on hand.
So, having decided I need a spare clamp it was time to do a little redesign and then off to the shop to cut up some Acrylic. I beefed up the clamp a little and reworked it so it could be drilled for both sizes of probes that came with the original timer. Yes, we do have a spare timer also. The only thing is the spare is the newer unit and uses the larger probe. My original Zone VI Compensating Developing Timer came with a probe with an OD of 0.1875 inches, while the newer model has a probe diameter of 0.250 inches.
As with most projects of this type, it is just as easy to make several as it is to make one. I cut up all of the Acrylic that I had on hand and made a handful of Probe Brackets. I still have some hardware on order, but I already feel better knowing I have spare parts on hand.
JB
D/FW LF GROUP OUTING, ST. OLAF’S CHURCH IN CRANFILL GAP, SAT 4/27
Who is up for some shooting this Saturday, April 27? We will be meeting at St. Olaf’s Church in Cranfills Gap. The gate is usually opened after sunrise, scheduled for an early 6:49. Michael says, from Plano it is a good haul, so he would not make it until about 8:30 at the earliest. The sun will still be low enough to provide for some great shadows. There is a German restaurant a few miles north – on the way home – where we can stop for lunch. http://zurautobahn.com/OurMenu.html
Hope you can make it, we always have a good time. . . and don’t forget to bring a film camera and some film!
JB
Traditional B&W Darkroom, JB & Susan Harlin. . . Our New FaceBook Page
If you are a FaceBook user, please drop by our new page titled “Traditional B&W Darkroom, JB & Susan Harlin” and be sure to click the LIKE button to follow our latest post and discussion. As always, we support film and the traditional wet darkroom. Come join in the conversation.
JB
THANK YOU
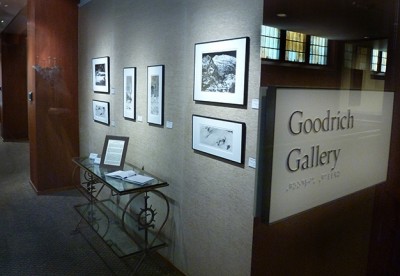 We would like to thank everyone that took the time to see our exhibition “A B&W INTERPRETATION OF NATURE” that ran the month of March at the Goodrich Gallery in Dallas. We had a lot of comments, met many new people and heard a lot of encouraging remarks. The reception was great fun and we appreciate everyone that stopped by.
We would also like to thank the Goodrich Gallery, their committee, and staff for their support and grand hospitality. Everyone was very knowledgeable and helpful and were key to the success of this exhibition.
Again, thanks to everyone for your continued support.
JB & Susan
CONSISTENCY IS THE SECRET
 Working in the wet darkroom processing both film and paper is nothing more than simple lab work. You are a lab technician in charge of performing a series of processes. These processes must be done exactly the same way each and every time in order to guarantee consistent results. Any variation in process or mixtures will affect the end result.
You have to keep track of exactly how you process both film and paper. Consistency is of paramount importance when processing film. You only have one chance with your film and if you make a mistake there is no going back. If you happen to make a mistake when printing you can always start again. You only lose a sheet of paper. With the film, you loose the image forever.
It is imperative that you do everything exactly the same every time. Any variation, even down to the tray sizes and volume of chemical can affect the end result. Film processing is not hard, but you have to do everything exactly the same every time. It is also worth mentioning that you have to be scrupulously clean. Contamination of any of the processing chemicals can cause disastrous results. One thing that is easily overlooked is mixing up the stock solution tops when using developers that have more than one part. Only remove one cap at a time and replace each before opening the next. Also, mark each cap and never mix them up.
Good darkroom habits begin with keeping notes. I keep a three ring binder containing notes on all of the procedures that I use in the darkroom. I have notes for each film size that includes the size of the trays, chemical mixtures, volumes of chemicals, and number of sheets of film for each processing run. When I begin a film processing session, the first thing I do is grab my darkroom notes. I make sure that I do the exact same thing every film run.
Even the printing process needs to have order and a plan to ensure you do not end up chasing your tail. My darkroom notes also contain information that pertains to printing. Though not as critical as film, I want to be sure I do things in an orderly and repeatable manner. I also want to be sure I mix all of my chemicals correctly, so everything is written down.
One of my favorite darkroom stories comes from Fred Picker. In his information packed little book titled “ZONE VI WORKSHOP” he describes his early days trying to get a handle on the process of B&W printing. If you have a copy of this gem of a book, turn to page 40 and read the chapter titled “THE CUSTOM LAB.” This is a really good account of how NOT to print.
I keep notes on most everything I do in the darkroom. There are times when I cannot remember exactly how I did something. With my notes there is no question as to how to remain consistent. As Fred Picker used to say, “DIFFERENT IS NOT THE SAME!”
JB
SPOTTING MICROSCOPE UPGRADE
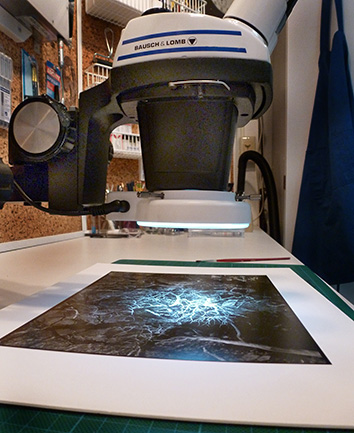 I have been doing some upgrades to my spotting microscope and due to the interest this seems to have generated, here is more of the story of what I use for spotting prints and negatives and what I have learned.
STAND
The boom stand that came with the original microscope was more than adequate when spotting smaller prints, but the large base sitting on the table top was always in the way when working with larger mounted prints. I was forever having to turn the print to get to the area that needed work. The large, heavy base was always the problem, even though the boom arm reaches out 16 inches. I toyed with several ideas that would have attached the boom I had to the wall, but it still would not have been long enough, nor have enough range to be very workable. What I wanted to do was to get the stand off the table, and make the microscope more mobile.
I did some research and found that you can purchase an articulating boom for microscopes that can be clamped to a table edge or bolted to the wall. The articulating boom arm I found has a reach of 36 inches and will support loads up to twenty pounds. Certainly robust enough for my setup. I found the dimensions of the arm on the manufacturer’s web site and made a quick mock-up from wood to see exactly how the boom would fit on my table. The wall mount version turned out to be exactly what I was looking for. We ordered one and had it in hand by the end of the week. It was a simple matter to locate the appropriate place to bolt the mount to the wall and the entire installation took less than an hour.
The articulating boom is certainly robust enough, it weighs nearly 20 pounds and is made of very heavy steel. This is exactly what I was looking for. It provides a stable support that allows the microscope to cover most of the work table. Positioning the unit is extremely easy now.
ILLUMINATOR
One thing I really wanted was a more even illumination under the microscope. The Bausch & Lomb 31-35-28 Microscope Light Nicholas Illuminator that came with my setup is a simple miniature spotlight. It is certainly bright enough, but the light is very harsh and directional. The unit fits into an angled hole in the back of the Focus Mount and illuminates a small circle of light just below the work area of the microscope. I found that I had to remove the print from under the microscope, find the spot under another light, mark it with the end of my gloved finger, then return the print under the microscope to complete the spotting process.
I replaced the B&L Nicholas Illuminator with a 144 LED ring light. What a difference! The print surface is now evenly illuminated. I can see spots without moving the print by looking around the microscope, then move that area into view and start work on the area. This is much better for sure. The LED ring light is dimmable and generates little to no heat. The lighting is extremely bright, even, and easy to work under.
The B&L SZ4 pod is threaded on the bottom to accept 38mm attachments. In order to mount the ring light you will need an appropriate mounting collar that fits the pod. The ring light I purchased came with a 48mm mounting ring, so I was off to the shop to spin out my own 38mm version. Found a hunk of aluminum and a couple of hours later I had my custom mount ready. Note: You can purchase a 38mm adapter if you prefer not to machine your own.
EYE PIECES
The last thing I did was to upgrade the eye piece set. The original unit came with a pair of very old B&L 10x eye pieces that I really wanted to replace. I have to admit the originals work extremely well, but after replacing them with a new set of wide angle 10x units, the difference was well worth the expense. The newer ones have a larger size that makes it easier to use wearing glasses.
AUXILIARY LENS
So, once I had everything setup one concern I had became reality. The ring light was in the way of my brush due to the very low proximity of the bottom of the microscope to the work surface once focused. I measured the distance from the lip of the ring light to the work surface and found it to be only three inches. But, there is a fix for that also. There are auxiliary lenses that screw into the bottom of the pod case that change the magnification ratio. I purchased a 0.50x lens which does three things. First; it acts as a mounting collar for the ring light (so much for my custom-made ring, oh well). Second; it reduces the magnification of the unit by one half. Third; and most important, it doubles the height of the unit above the work surface.
I now have plenty of room to work under the microscope without bumping it with my brush. Cutting the magnification by one half is not an issue, since I nearly always used the unit at its lowest magnification anyway. Cutting the magnification by one half now gives me a range of 3.5 to 15 x. The single most helpful thing about using a stereo microscope for spotting is not high magnification, but the ability to really see the area you are working on and precisely place the spotting dye on the spot and not the surrounding area.
FINAL THOUGHTS
For most users the tabletop boom stand will be more than adequate for working with prints up to 8×10 inches or even larger. If you have a deep enough work table, placing the base directly in front of you will allow you plenty of working room. My work table is not that deep, so I needed something different, hence the articulating arm and wall mount were my best choice. The tabletop boom stand weighs 34.5 pounds and is very stable. The bulk of the weight is the 0.50 inch thick steel base plate. You can see from the photo below that it supports the microscope at full extension without any danger of tipping over. I have used that setup for years on both prints and negatives.
My new setup is much more user friendly for my work space. The boom swings against the wall, out of the way when not in use and is easily swung out when needed. One more thing you need to do is cover your microscope when not in use. Dust is the worst enemy of all optics. I use a small plastic bag that fits around the microscope body and works well to keep nasty dust away.
I would like to thank Christopher Burkett for his help. He was the first photographer I saw using a microscope and was very helpful in answering my questions and helping me select a unit suitable for print and negative spotting.
I can highly recommend the B&L SZ4, since that is the unit I use. There are many other stereo microscopes that are more than suitable for the photographer. The used market is full of units that have been taken out of service in laboratories or manufacturing. A search on the Internet should find more info on what to look for and what to avoid when purchasing a stereo microscope.
As always, a very good place to look for used microscopes and accessories is the old standby, eBay. There are several instrument sellers that deal in used equipment that have stores you can browse. Again, a Google search will turn up even more used and reconditioned equipment.
Keep in mind that what I have done is upgrade my original microscope that has been in service for over five years and has been very useable in its original configuration. You do not need anything but the basic unit as described in my two previous posts titled “SPOTTING MICROSCOPE” and “MORE SPOTTING MICROSCOPE INFORMATION” to get started.
These are the refinements that I have found that make things easier and more convenient for the way I work. Be good to yourself and your eyes, let alone your art. I keep saying the same thing over and over, you can’t go wrong using a stereo microscope for spotting prints and negatives! Any microscope is better than none, or struggling with another type of magnifier. Hopefully this information will help get you started.
NOTE: I have placed the no longer needed pieces of my original microscope setup in our For Sale area. If you are piecing a setup together, you may be interested in some of the parts I no longer need.
JB


