JB & Susan Harlin
www.jbhphoto.com
WHY COMPLAIN SO MUCH?
 It seems that I hear a lot of bellyaching about this or that when discussing getting out with a view camera. I wish it really were that easy, but working with large cameras and sheet film is not something that is trivial nor easy. Here are a few complaints I have heard;
-
My dark cloth is not dark enough
-
My dark cloth is too heavy
-
My ground glass is not bright enough
-
I want one of those inverting viewers
-
My lens is not exactly the one I want
-
My camera is not sturdy enough
-
My tripod is too heavy
-
It is way too hot (that one is mine)<
-
It is way too cold (not for me)
It is much too easy to complain rather than to just suck it up and get to work. Nothing is ever perfect and if you really want to get out and expose film, you will learn to work with whatever you have, in whatever conditions may occur. I believe most of this is more about using complaints as an excuse not to get out and make photographs as it is about reality. As I said, making photographs is difficult hard work, especially with a large view camera. It requires dedication and a stick-to-it kind of mindset.
Let me address some of these items from my viewpoint;
-
I have never had a dark cloth that wasn’t dark enough. If the cloth is black on the inside and relatively thick it is plenty good enough to see your ground glass. The main purpose of the dark cloth is to cancel any light and reflections on the ground glass so you can see to compose and focus. It will seldom be cave dark if you are out in bright sun. Quit looking at how bright it is and concentrate on the ground glass.
-
Yes, if you have a 100% opaque dark cloth, then the odds are it will be heavy and even cumbersome to use. May not always be the case, but everything is a trade off.
-
The ground glass is not a computer screen. . . it will never be as bright as a TV or computer screen. In my experience everything I have tried makes things worse for me. I tried a Fresnel. . . once. . . not for me. Yes it was brighter, but the lines broke the image up to the point I could not easily focus. I got rid of it and learned to use what I had. I prefer a plain ground glass. I have learned to use it. Remember to let your eyes get accustomed to the dark when you get under the dark cloth. The longer you stay under there the better you will see. Be patient.
-
I have said this before and I will repeat; nothing will improve your composition any more than looking at your subject upside down. This is a fact. . . get used to it. . . use it to your advantage. . . it is true!
-
Don’t go there. . . optimally you need, a short, a medium, and a long focal length lens. If you can’t afford all three, compromise and learn to use what you have till you can afford something else. Not a good excuse.
-
Everything in a mechanical design is a tradeoff. The lighter and smaller your camera folds, the less sturdy it will be. . . fact of life. Remember: The camera only has to be still when the shutter is open!
-
Tripods are another tradeoff. Light tripod; less sturdy, more prone to vibration. Heavy tripod: more sturdy, less prone to vibration. You get to choose. Me, I carry a 19 pound wooden tripod for 8×10 and 11×14. I wouldn’t use anything else.
-
This is my worst area. So far as I am concerned, when it gets to 80F, it is way too hot for humans to function. Working with a large camera, I begin to draw the line at 50F. And, I am not going to get over it! Being sick and suffering heat exhaustion is not a fun time, nor is it creative.
-
Too cold. . . what is that? I prefer to work well under 40F. We have worked at near 0F and survived. My rule; if I break a sweat, time to head home. See, I also whine!
Nothing is ever perfect and the lack of perfection is not an excuse for not making photographs. You can always find some reason not to get out, how about finding something worth exposing a sheet of film on instead of complaining? When I wrote this it was the middle of July, 103.8F, with a dew point of 62F on the back porch. I don’t even want to look outside, let alone go outside in this kind of weather. I have whittled my list of complaints and excuses down to hot weather. . . how about you?
JB
I have never had a dark cloth that wasn’t dark enough. If the cloth is black on the inside and relatively thick it is plenty good enough to see your ground glass. The main purpose of the dark cloth is to cancel any light and reflections on the ground glass so you can see to compose and focus. It will seldom be cave dark if you are out in bright sun. Quit looking at how bright it is and concentrate on the ground glass.
Yes, if you have a 100% opaque dark cloth, then the odds are it will be heavy and even cumbersome to use. May not always be the case, but everything is a trade off.
The ground glass is not a computer screen. . . it will never be as bright as a TV or computer screen. In my experience everything I have tried makes things worse for me. I tried a Fresnel. . . once. . . not for me. Yes it was brighter, but the lines broke the image up to the point I could not easily focus. I got rid of it and learned to use what I had. I prefer a plain ground glass. I have learned to use it. Remember to let your eyes get accustomed to the dark when you get under the dark cloth. The longer you stay under there the better you will see. Be patient.
I have said this before and I will repeat; nothing will improve your composition any more than looking at your subject upside down. This is a fact. . . get used to it. . . use it to your advantage. . . it is true!
Don’t go there. . . optimally you need, a short, a medium, and a long focal length lens. If you can’t afford all three, compromise and learn to use what you have till you can afford something else. Not a good excuse.
Everything in a mechanical design is a tradeoff. The lighter and smaller your camera folds, the less sturdy it will be. . . fact of life. Remember: The camera only has to be still when the shutter is open!
Tripods are another tradeoff. Light tripod; less sturdy, more prone to vibration. Heavy tripod: more sturdy, less prone to vibration. You get to choose. Me, I carry a 19 pound wooden tripod for 8×10 and 11×14. I wouldn’t use anything else.
This is my worst area. So far as I am concerned, when it gets to 80F, it is way too hot for humans to function. Working with a large camera, I begin to draw the line at 50F. And, I am not going to get over it! Being sick and suffering heat exhaustion is not a fun time, nor is it creative.
Too cold. . . what is that? I prefer to work well under 40F. We have worked at near 0F and survived. My rule; if I break a sweat, time to head home. See, I also whine!
Nothing is ever perfect and the lack of perfection is not an excuse for not making photographs. You can always find some reason not to get out, how about finding something worth exposing a sheet of film on instead of complaining? When I wrote this it was the middle of July, 103.8F, with a dew point of 62F on the back porch. I don’t even want to look outside, let alone go outside in this kind of weather. I have whittled my list of complaints and excuses down to hot weather. . . how about you?
JB
UPDATE TO FORMULAS
 We have just updated the FORMULAS area here on the jbhphoto.com BLOG (click the link at top of the page). What you will see is mostly cosmetic with a few corrections here and there. The formatting of the older area was made of screen grabs of notes and was not that well organized. Hopefully it is now a little more tidy.
Very little changes in the realm of the wet darkroom and film photography. There are no fads. . . no here today, gone tomorrow. . . no high-tech gadgets. . . no amazing updates. Traditional film photography is a craft you learn; fine tune; then use. The bottom line is the finished fine print. Traditional film photography is very old fashion and grounded in down-to-earth proven techniques, that once learned are the backbone of the art form. Bottom line; not a lot to stand in line or camp on the street to be the first for some new-fangled gadget or upgrade. Once you master the technique, there are no excuses not to produce finished work. Film photography is a craft; you learn it; then you use it; for the rest of your life; and you pass on what you have learned.
In our Formulas area you will find the mixtures we use. Nothing very special about anything we do, and it would be a good assumption you will see little new there. Take what you can make work for you; leave anything else for the next interested photographer.
JB
LOOK, FEEL, PRESENCE & NUMBERS
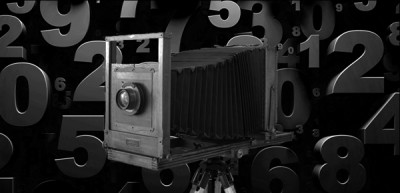 Numbers can not quantify a feeling. . .
A fine photograph has A LOOK; A FEEL; A PRESENCE; there are qualities that cannot be measured or codified. They are seen and felt, yet have no tangible attributes. . . some things are impossible to put into words. You can run tests, plot curves, generate computer models, but the emotional response, if any, to a photograph is an experience and not a quantifiable known.
In the process of making the fine photograph there are subtle adjustments that the photographer literally pours into the image. These fine adjustments may actually not even be perceivable to the viewer, but they make or break the finished image.
In the creative process of making a finished print, there are no hard and fast rules. There are photographs that take on a completely different atmosphere than may have been seen or felt at the time the film was exposed. These are those “happy little accidents” as the painter Bob Ross would say. You may follow one direction you believe will make the image speak when in the field, which is totally abandoned in the darkroom at the time of printing. You make your best estimate as to what you believe you will eventually end up with, but you will not absolutely KNOW for sure what a film, paper, developer combination is really doing until you make a real photograph. It is all about that feeling. Do not allow yourself to get locked into any preconception. Allow your creativity to guide you. Do not get hung up on numbers or any hard and fast rules.
I keep coming back to the same point; you can not calculate feeling. There are some things that just exist and are not possible to be explained by a mathematical expression. . . they are emotional expressions. . . emotional responses. . . subject to any number of personal preferences of the individual. . . these preferences are the product of what make each person an individual. . . you cannot measure these things. . . they are subjective. Think about it. . . can art really be created and expressed by numbers???
It is about personal taste. . . Ford or Chevy. . . Coke or Pepsi. . . red or blue. . . one size does not fit all. What you may find perfectly acceptable in a film developer combination may not suit my taste at all. My father used to say, “that is why they paint cars different colors.”
Keep in mind that any hard rules or numbers are only a starting point. . . only a suggestion. Creativity comes from reaching far beyond hard figures and rules. The creative spark reveals the inner feeling by stirring the imagination with creativity.
JB
THOMAS DUPLEX SAFELIGHT & SOX
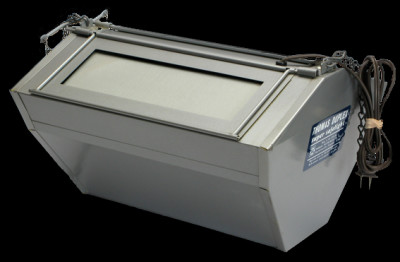 Had an interesting discussion the other day with a group of photographers about the Thomas Duplex Super-Safelight. This is one of the best safelights you can own. They are bright, powerful and will fog your paper before you can say Look Out! Honestly, these things are designed to light a very large darkroom, I would say, far beyond the size that most of us are accustomed to having the privilege of owning. They come with several glass-mounted filters that are designed for different darkroom uses, but there seems to be a lot of confusion as to what filters to use and how this all works.
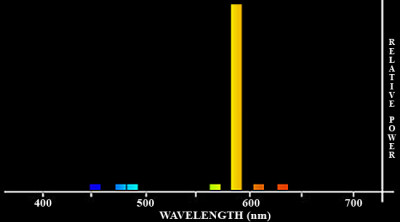
So, let’s begin by trying to better understand just how the Thomas Duplex Super-Safelight works. This is really an ingenious device that uses technology designed for something completely different. If you have ever looked inside of the unit you will see a strange looking glass lamp. This is the heart of the Super-Safelight. . . a Low Pressure Sodium lamp. . . designated in the industry as an SOX lamp. Without getting into a lot of very technical talk, this SOX lamp is an extremely bright light producing device. . . you get a lot of light per watt of electricity used. But there is a trade-off. . . the spectral output of the lamp is extremely narrow. In the simplest terms, there is a lot of light, but it is just one color. How this narrowband light is generated and the details of the lamp itself are way too complicated for this discussion. For the photographer, how to use the lamp is much more important. You do not need to know how to build a car from a block of metal to drive it. If you are really. . . really. . . really. . . interested in the technical stuff, here is a LINK. Also an Internet search will turn up even more technical info.
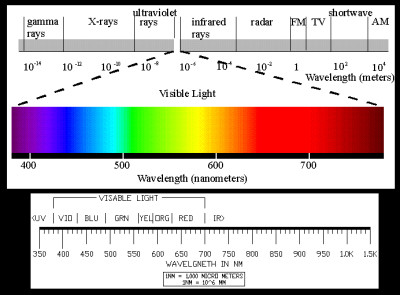
What we photographers are really interested in is the spectral output of the lamp. The SOX lamp produces a virtually monochromatic light, averaging about 589.3nm wavelength. I know, more of that technical talk. What is important to know is that this wavelength of light from the SOX lamp is outside the main spectral sensitivity of B&W printing papers. This is what makes the Super-Safelight unique.
So, roughly speaking, we can say that graded papers are mostly blue sensitive, and VC papers are mostly sensitive to blue and green light. Again, roughly speaking, graded papers are mostly sensitive to about 450-500nm wavelengths. While VC papers are roughly most sensitive to about 400-570nm wavelengths.
Now with a rudimentary understanding of the SOX lamp spectral output, it becomes obvious that it is well suited for use in a photographic safelight. The thing is, these lamps put out so much light that they are a danger to photographic printing papers. If you look at the spectrum, you will also notice there are other wavelengths in the blue and near green that can cause fog. A proper cutoff filter will remove them.
Even with the greatest spectral output beyond the main sensitivity range of the papers, if you expose the paper to too much light you will get fog. You have to attenuate the SOX lamp output even further. I have made my own filters for my Thomas Duplex Super-Safelight and it is not that difficult, nor is it expensive. I have another post on this BLOG that deals with the proper cutoff filter and using ND filters to tame down the light output. You will find the post titled, “THOMAS DUPLEX SUPER SAFELIGHT FILTERS” contains the details of how to make your own B&W filters.
You will also note in this previous post that I have replaced the lamp in the Super-Safelight we use. The stock unit comes with a 35 watt (SOX35) lamp, which in reality is way too much light for the small darkroom. The thing is just way too bright for our darkroom which is 9 1/2 x 16 feet. Realize that there is no practical way to electrically dim the lamp. So, I did what I usually do with most everything around here; I looked to modify how it works.
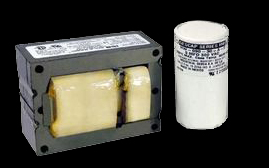
Doing a little research I found that the smallest SOX lamp available was 18watts (SOX18). That is what I wanted; less wattage; less light! If you choose to do this, keep in mind that the ballast and capacitor are specific to the lamp. If you want to change the lamp wattage, you have to purchase the appropriate ballast and capacitor. If you are not comfortable working with electricity, please ask for help, or do not attempt this. But, if you decided to move to the lower power lamp, there isn’t much to it. You simply swap out the ballast, the capacitor and the lamp.
Using the SOX18 lamp will greatly decrease the light output of the Super-Safelight. This coupled with the use of the proper cutoff filter and ND filters will allow you to tame the light output to a manageable level in the smaller darkroom.
NOTE: One more thing; the stock Thomas Duplex Super-Safelight uses the older magnetic ballast and external capacitor. This is what I used and this was near 20 years ago. Now you can purchase an electronic version of the ballast but I have absolutely no experience with them, so you are on your own there.
Now you know how the Thomas Duplex Super-Safelight works, and hopefully how to best use it in your darkroom. Do Not Forget to TEST to be sure your safelight is SAFE!
JB
SHOWING YOUR FINISHED PHOTOGRAPHS
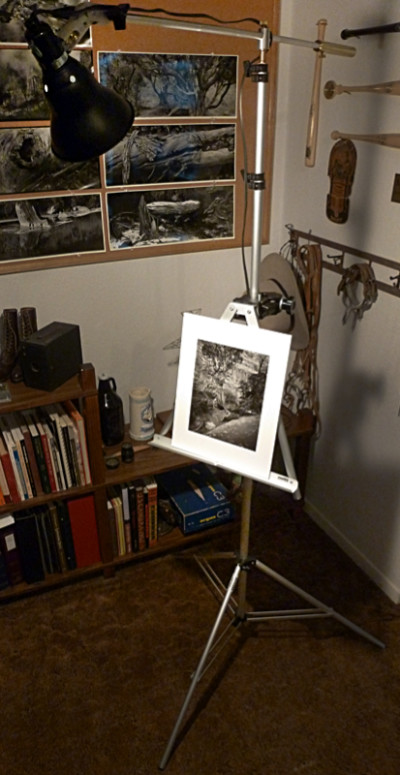
We work very hard out in the field exposing film to interesting and inspiring subjects that we believe we can turn into an acceptable finished photograph. Next we hold our breath as we get a first look at the negative. . . same thing when we get a peek at the proof and later the first work print. This continues through all of the refinements until we finally end up with a finished photograph. Next we live with this image. . . and when we are finally satisfied with what we have created, it is time to show the print.
We love to show our finished photographs. . . to anyone that is willing to look. The thing is, in order to really view a fine photograph, you have to light it correctly. Looking at prints in a dark room, gathered around a table in a restaurant, or anywhere there is insufficient light, is not what should be done. The problem is there is no easy way to properly light a photograph without hauling your own light. This has been one of those things I have pondered for years. The best I have ever done is to use an easel and a spotlight on a stand to illuminate sufficiently the photographs to be shown. Even Edward Weston would get out his light when he showed his prints. This is the correct way to show your photography.
The proper lighting of finished fine prints has been something I have agonized over for years. As usual, when I am faced with trying to design something from scratch, I take a nap. I do my best thinking when I am asleep. This one took more than a nap. I pondered this for quite a while, off and on for months. Then one night I had a dream. . . there it was!
Bringing an idea to reality is not always an easy task. Fortunately, I have been doing this for years and I have found that if I can imagine it, I can eventually build it. The interesting thing about this project was I had most everything I needed laying around. It was just a matter of putting it all together and making it work.
So, what am I talking about? What I wanted was a simple, easy to transport, easy to assemble display easel with integrated light. A single unit so I do not have to carry a wooden easel and a light with a separate stand.
As I said, we had most everything needed laying around the house. We have several of these really nice aluminum tabletop easels. There are several light stands in the closet, along with light fixtures and even a Manfrotto SuperClamp. These items made up most of what I needed.
The bulk of the project required that I make a boom to hold the light fixture and come up with a way to mount the easel to the SuperClamp. I machined a block of aluminum to hold the easel at a convenient angle and attach it to the SuperClamp. I spun out a simple boom with a counterweight that attaches to the top of the light stand and is fully adjustable. The SuperClamp, with mounted easel, is easily attached to the stand at any convenient height. All that is needed is electricity for the lamp. Presto. . . a complete, self-contained, lighted display easel.

The last piece of the puzzle was coming up with some convenient way to store and transport the lighted easel and its assorted parts. There wasn’t much we could find off-the-shelf, so it was off to the garage to build a wooden carrying case. Fortunately, there was enough scrap plywood on hand and it was just a matter of building the case and fitting the parts inside. A little sanding, a few quick coats of varnish, some felt padding, hinge, handle, latches and the whole thing is ready for the road.
Now all we need is a captive audience!
JB
OVER 25 YEARS OF MPD & STILL GOING
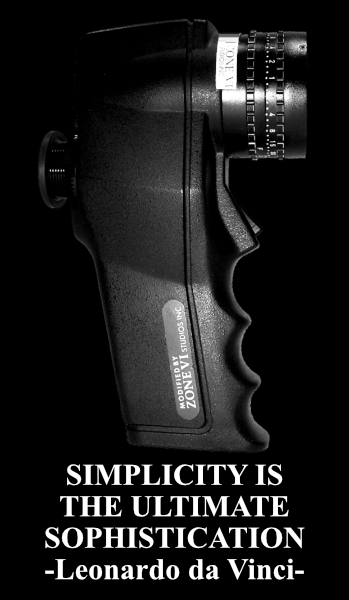 Seems everyone has their favorite method for exposing and developing film. You do shoot film, don’t you? If not, you should! But I digress for sure. . . There are as many ways of working with film as there are opinions. . . maybe more. None are better or worse than any other, if they work; if they give you the results you insist on within your own vision, then you are already there. But, in this day and age there are a lot of people coming into photography and just now discovering film and the traditional darkroom. In the beginning film is a mystery and requires some time to begin to master. Of course, the most important thing is that you shoot film and make finished photographs. How you get there is a very personal thing and you need to choose what works best for you. But, you have to start somewhere.
For me, I prefer simplicity when I am out making photographs. I do not want to get bogged down with a lot of complexity. I struggled with film exposure and development, like I would speculate that most everyone has when they first start out trying to understand film photography. It was way back in the mid 1970’s when I realized I could process and print my own photographs. This was a big deal for me. It started a lifetime involvement with photography and the wet darkroom.
I stumbled around, trying this and that looking for that magic technique that would give me a negative that would print what I saw in my mind’s eye in the finished print. I read everything I could find on the subject. I even toyed with the idea of becoming a strict Zone System practitioner. Thing was, everything I looked into was just way too complicated. There had to be a simpler way. . . at least, that is what I thought.
Somewhere in the 1980’s I discovered Fred Picker and his “Zone VI Workshop” book. This was exactly what I was looking for. It made sense and contained a simple approach that I found worked! Having found someone that was also into simplicity, I subscribed to the Zone VI Newsletter. I remember really getting excited when I discovered the latest issue in the mailbox. Plenty of opinion and advice that really made sense. To this day I still have my complete set of these newsletters. About 25 years ago when I seriously decided to start working with large format photography, I read the entire set again. . . three times. . . every issue, #1 through #83.
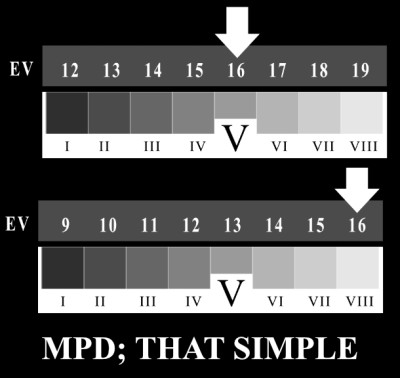
I had experimented previously with what Fred called MPD (Maximum Printable Density) back in my early days in photography. I had very good results, but I drifted away from the darkroom for a while to concentrate on a career. When I moved back into photography after a brief hiatus, I dove right into large format. I needed to relearn my darkroom skills, at least to the point where I had left off and establish a sound working technique.
MPD is such a simple approach to exposing film that most think it will not work. It is deceptively simple for sure! I did some experimenting to get back into the groove and continue my experiments with simplicity. I found that MPD was just what it claims to be. . . SIMPLE. . . and well-suited for any film format! I am a big fan of ‘simple’ for sure. As with anything, it is ludicrous to use something that does not work. Why make it worse on yourself. I approached MPD with the idea, that as long as it works, I will use it.
It is funny how there are things that just seem to fit you and continue to do so. It has been over 25 years now and I still use MPD. Why? Because it works! My wife uses it and she is sold on the idea of simplicity also. If you have seen any of our original prints from LF negatives, you have seen film exposed using MPD.
Oh, guess I forgot to mention exactly how simple MPD is in practical use. Here goes, don’t blink; 1. Find your subject, compose as you wish. Not much new there. But, here it comes. 2. Meter the area you wish to render as a Zone VIII. White painted wall, snow, sand. . . whatever you wish to print as finely textured white (Zone VIII). Meter that area. 3. Open up three stops, or place the reading on Zone VIII if your meter has a Zone Dial. 4. Set your exposure and expose the film.
It is actually even easier than that;
1. Meter
2. Place VIII
3. Expose. . . DONE!
Now, don’t believe this is a haphazard way of working. First, you must do your film testing. You need to establish your working EI (Exposure Index) and your normal (N) developing time. You need to establish a proper proofing regiment. Your proper proofs are your control. They tell you just how you are doing with film exposure and developing. Study your proper proofs and make fine adjustments on the fly. Thing is, once you find a starting point, things get much easier. You do not have to engage in never-ending testing. Test once. . . find that starting point. As Fred Picker said, “Get one foot on a rock.” Then you use your proper proofs for fine tuning and a constant check on how you are doing. Simple!
Are you interested in making really good negatives? Want to understand proper proofing, personal film speed and developing times? How about getting started using MPD? Interested in getting the technical stuff behind you?
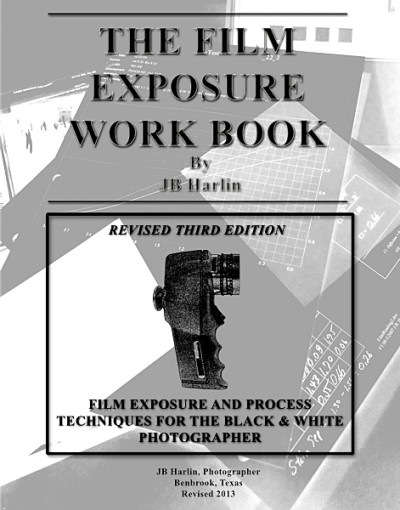
I was asked how to use MPD and what testing was necessary years ago. I wrote “THE FILM EXPOSURE WORK BOOK” specifically for those interested in learning where to start. This 44 page book is now available for download in e-book format from our online store. You will learn how to establish your working EI. Determine your N and N+1 1/2 developing times. Proper Proofing is covered and much more. You will also get a printable 12 page Work Sheet to record your testing results.
Is MPD right for you? If you are just starting out with film, it just might be if you are interested in a simple, reliable method for making the best possible negatives. Fred Picker had a large rubber stamp that said TRY IT. He used it to answer letters people wrote to him asking questions. You will only know if you TRY IT. It has worked well here for over 25 years!
JB
ILFORD PHOTO ULF FILM 2015
 It is that time of year again. Time to get in your order for custom size Ilford Film. The ILFORD PHOTO annual ULF sheet film ordering window for 2015 opens Wednesday 8th April 2015. This annual campaign allows ULF photographers the opportunity to order selected sizes of ILFORD sheet film and other specialist products without the constraints of the usual minimum order quantity.
Photographers have until Friday 12th June 2015 to place their orders with participating Dealers. The UK factory will start to ship orders to Distributors during August and end users should check with the local ULF reseller for expected arrival dates.
For a full list of the items available in this campaign, and for a list of participating Dealers, Click on
ULF 2015 Items and Dealer List
JB & Susan
THE NEW jbhphoto.com WEB SITE IS UP
It has been a very busy start to 2015 for us here at Harlin Photography World Headquarters. We returned from our annual trip out West the first week of January and have not had time to look up since. We had a lot of film to process and thankfully, that is about done now. Susan is already printing new film and JB is almost done proofing and filing.
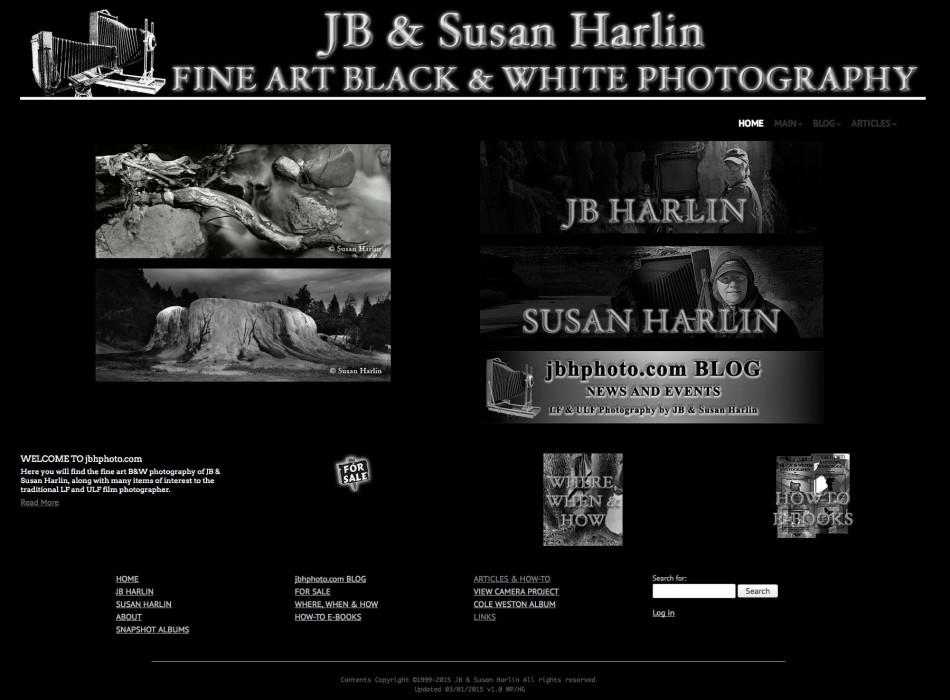 One project we have wanted to tackle for several years now has been an upgrade to a more user-friendly, modern-look for our web site. The site has been in continuous operation since 1999 and has gone through numerous upgrades over the years. We have continually added more and more content, so it is no small task to rebuild a site that has this much subject matter, but it needed to be done.
We really wanted to start on this last year, but there just wasn’t enough time. This year the web site project was moved to near the top of the list and it is finally a done deal! JB has been hacking on WordPress code, off and on, since early January and has finally finished the site with a completely new look. We have even moved to new web hosting for the delivery of the updated jbhphoto.com web site.
We have rebuilt all of the Snapshot Albums. The Cole Weston Workshop album was completely rebuilt and the original photographs have all been rescanned. The Articles and View Camera Project areas have been updated and revised. JB and Susan each have new areas with updated galleries of their work. We have updated the menu structure for easier navigation and access to content. The entire site has a new look using a customized theme that we feel is much more pleasing, up to date and much easier to navigate.
We would like to invite everyone to stop by and take a look at our new web site. . .www.jbhphoto.com
Always, thanks for your support!
JB & Susan
PS After the move to new web hosting and due to many instances of spammers registering, we have removed all registered users to this BLOG. If you were previously registered and receiving email notifications, we are truly sorry. . . don’t blame us, blame the spammers! You will need to subscribe to this BLOG to receive email notifications again when new posts are added. If you would like to Subscribe to the jbhphoto.com BLOG for email notifications, click on the SUBSCRIBE link in the top navigation menu under INFO, or in the bottom left menu. Follow the instructions on the Subscribe Page.

