For those that are planning to come to our current exhibition and those not able to visit, we have created a sample album which contains a few of the 28 images on display. Do not forget to mark your calendar for our reception Saturday, Nov 05th.
www.jbhphoto.com
If you were ever curious as to how photographic film is manufactured, then I can highly recommend a great book on how Kodak makes film. “Making KODAK Film; The Illustrated Story of State-of-the-Art Photographic Film Manufacturing” by Robert L. Shanebrook, is a book I can suggest to answer the majority of your questions about what goes into manufacturing film. I will quote from the author’s web site;
The book was compiled based on my personal experience plus the input from Kodak experts. Kodak provided access to Kodak Park and assigned experts to the project. Typically the experts explained the operation to me and then accompanied me as I photographed. After I retired I spent over forty days photographing in Kodak Park and many more days in discussion.
In addition, I was aided by input from 24 Kodak retirees. In most cases the retirees were the predecessors of the current Kodak experts that helped me. I also utilized the advice of ten experts from outside Kodak. To insure accuracy the manuscript was reviewed by many of the people that provided information used in the book.
I am grateful to over ninety people who helped me with the book.
Author
Bob Shanebrook graduated from Rochester Institute of Technology and worked at Eastman Kodak Company for 35 years before retiring in 2003. At Kodak he worked as a commercial photographer, researcher, product development engineer, film manufacturing manager, and for over twenty years was a Worldwide Product-Line Manager for Kodak Professional Films. He was involved in nearly all aspects of Kodak’s black-and-white and professional film business.
I highly recommend this book to anyone interested in learning about the art and craft of film manufacturing. For me this was a slow read since the book is mostly photographs. They say a picture is worth a thousand words, with some of these machines, it may be more like ten thousand.
Mr Shanebrook has self published this book and I can recommend it is a good one. . . two thumbs up from me. A great read if you are interested in just how complex the film in your camera is to produce. More information and how to order a copy from the author can be found HERE.
JB
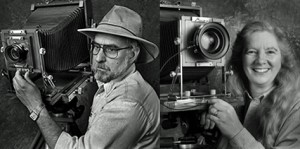 Hopefully fall is coming and bringing cooler weather and some rain. The Texas summer is just too brutal to get out and do much photography. So, with a little cooler weather finally moving in, it just may be a good time to get out and look at some photographs. Susan and I are having another exhibition of our work that will carry everyone from fall into winter. We will have 28 of our latest Black & White photographs on display including everything from snow, to desert, from 8×10, to 8×20, in living B&W, on display at the Downtown F/W Library.
“VIEW CAMERA PHOTOGRAPHY BY JB & SUSAN HARLIN” will run September 29, 2011 through January 12, 2012 at the Central Library West Wing Gallery, Downtown Fort Worth Library. We will be posting our reception date soon, so check back for the date and time.
Library location and parking information HERE.
JB & Susan
We are planning to meet for breakfast at the Original Pancake House at 9AM then head over to the Camera Show at the Grapevine Convention Center that starts at 10AM. Follow this LINK, and print out the page for $1.00 off admission.
SUNDAY, October 2nd
We are heading down toward Granbury to photograph down the Brazos River under the BRIDGE that is on County Rd. 1175. Sunrise is at around 7:20 so there is no need to be there until around 8AM for us B&W shooters! Before you get to the bridge (from the north) there is a small parking spot on the left. Once you walk toward the old r-r bridge you will see a path down towards the river. I do recommend some good support for your feet!
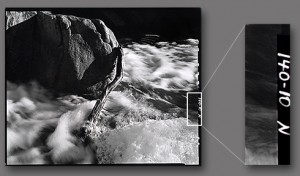 I was recently asked what type of writing device we use to mark the catalog number on the edge of our film. I had not given it much thought since we have been using the same pens for marking film for many years. I have heard of people using various mechanical pens and India ink. Some say they use a common Sharpie. There are numerous ways to do this, but the easiest and most effective way I have found is to use a pigment liner pen.
Specifically, I have used a Staedtler pigment liner pen for years. They are clean, easy to use, make very dense letters and numbers that easily show up on proofs, and are filled with permanent black ink. The ink used is lightfast and will not fade. One nice thing about the Staedtler pigment liner pen is it will not dry out. The manufacturer says, “The unique cap-off feature of the ink enables pens to be left uncapped for 18 hours without drying up. Even when left open during long breaks in writing, they remain ready for action without delay.” They also last a long time. We have not had to buy new pens in years.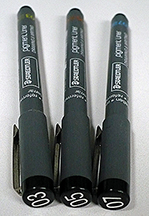
The Staedtler pigment liner pens are available in nine writing widths from 0.05 mm to 0.8 mm. My favorite sizes are the 0.3, 0.5, 0.7 mm widths. I use the smaller diameter pen for small film where the clear edge is very narrow. You still get very legible writing along the film edge that prints well on the proofs. I prefer the larger diameter pen for the really big film. These have worked well for me for over 30 years, and should work well for you also.
 Here are a few things I have learned over the years that may help when using these pens to mark your film. I always mark my negatives on base side opposite the emulsion, this way the file number prints correctly on the edge of prints and proofs. Be sure to let the ink dry thoroughly before you place the film into a storage sleeve. It should only take a minute to dry. I have found that if you make a mistake, you can remove the ink using a cotton swab lightly moistened with acetone. And, one more thing; the biggest mistake you can ever make is not using a filing system for your negatives. If you choose to mark your film on the edge, these markers will do the trick.
If you are interested in learning more about Staedtler pigment liner pens, HERE is their web site.
JB
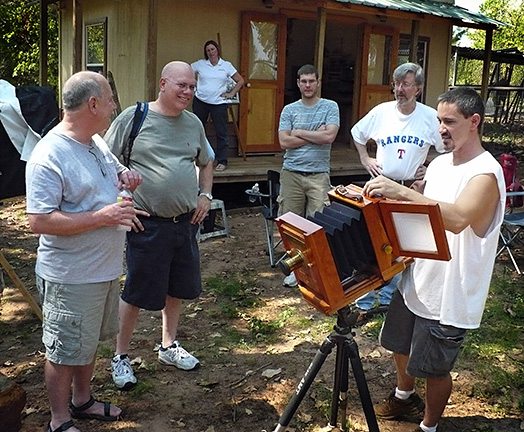 We had another great gathering in East Texas this past Saturday. Twelve dedicated photo enthusiasts braved the heat for a day with Ty Guillory to learn about wet plate photography. Ty gave us a tour of
 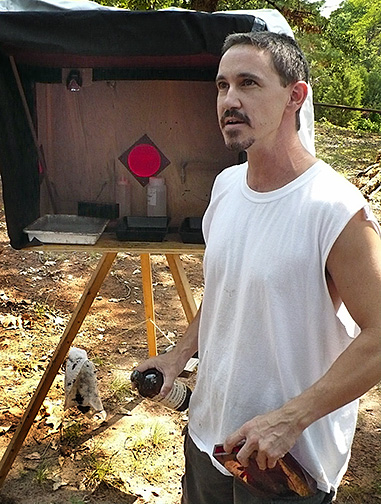 his workshop where he builds period cameras and showed us many of his wet plate photographs. There was a lot of discussion about period lenses, a subject about which Ty can give you plenty of information.
Once we had a good understanding of the cameras we moved outside for a hands on demonstration of the fine art of making tintypes. We were all fascinated with the simplicity and complexity of the process.
After a jam packed morning of photography we were treated to a great picnic lunch prepared by Ty’s wife Tina. After a break to recharge, we braved the 100 plus heat for even more photography.
One fun high point of the day was getting to drool all over the 5×7 camera that Michael purchased. Seems none of us were aware that Michael is now moving into the world of wet plate photography. Ty had even mounted a beautiful period lens that Michael had purchased.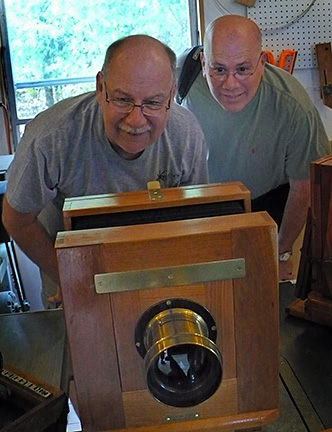
and the two of them took a great risk by making the first photo of yours truly. That lens may never be the same! As the afternoon progressed we moved inside to Ty’s shop and some welcome A/C.
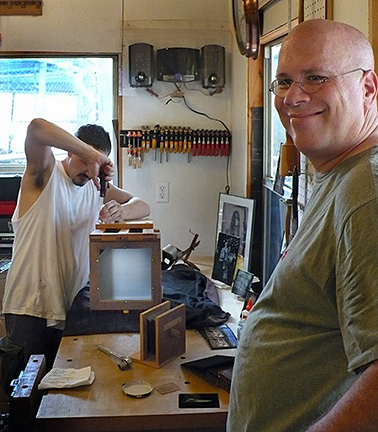 At this point it was discovered that Michael needed a 3/8-16 mount, so Ty proceeded to install a second tripod socket on Michael’s new camera while we all watched. By the time the last few of us really die hard types decided it was time to head home, it was near 4:00. The thermometer in the van read 110 most of the way home. What a day!
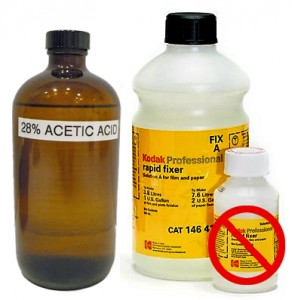 As most know by now, we use staining film developers. To be specific, we use the classic PyroCat HD formula from Sandy King. This developer gives us the type of negative we like. Keep in mind that creating art, no matter what may be your chosen medium, is a very personal thing. What works for me may very well not be at all acceptable to you. My father used to say, “that is why they paint cars different colors.” Personally I do not care for red cars.
All of that said, I have experimented with numerous staining developers and have chosen the one that works best for us. Along my journey of research I have found many opinions and myths that I have found to just not be true. Everyone seems to have an idea of what they believe to be true, but few have actually gone to the trouble to, as Fred Picker would say, TRY IT.
One area of great debate when it comes to staining developers is what stop and fix is appropriate. I find that this is not that great an issue and even John Wimberley agrees. Just in case you have not heard of John Wimberley, he is the father of modern Pyro developers. Even Gordon Hutchings the father of PMK, and author of “The Book of Pyro” was preceded by Wimberley and his first modern formula, WD2H. From an article titled “PyroTechnics Plus: Formulating a New Developer” in Photo Techniques magazine, March/April 2003, Wimberley has the following to say about Stop Bath and Fixer:
“Myths abound concerning the correct stop bath and fix to use with pyro, but it is not a critical issue. Either an acid or plain-water stop bath may be used, and any standard or rapid fixer is acceptable. . . However, avoid hardening fixers. I recommend the manufacturer’s minimum recommended time to avoid the possibility that sodium sulfite in the fixer might weaken the dye mask.”
 So, here is the predicament; you are getting ready to do your film testing; you have decided to use the simple visual film testing technique. Visual film testing is a really simple way to determine your correct film EI and developing time. All you need to do is perform these tests on a grade #2 paper and you will know you are making the best possible negatives.
>But, there is one nagging little problem. If you are using VC paper, how do you know what filter, or light source setting, that will produce a grade #2 contrast? Even if you are using filters, each filter set has different filters that will give different paper grades on different papers. Even the developer you choose can affect paper contrast. You really need to KNOW how to achieve a true grade #2, using your equipment and darkroom, in order to do a valid film test.
What if I could show you an easy, inexpensive, and quick method that will get you plenty close enough? Well, here you go. . . “FINDING VC PAPER GRADE #2; EYEBALL CALIBRATION.” This method should get you well within range to get you started on the right track.