JB & Susan Harlin

www.jbhphoto.com

CROPPING

CROPPINGThose that dictate hard and fast, unwavering, rules for the creation of art usually are the vane, egotistical, self-centered types that are full of their own over-inflated view of their importance and try to tell you that cropping is an unforgivable sin.  I say. . . Not True!

No one has the authority, nor the right, to tell you what, nor how, to create your art.  Cropping is a personal decision, and can only be justified by you as an individual.  If cropping helps any particular photograph, then it is no sin to proceed to crop away.

Cropping is best done in the camera at the time you make the negative, but it is not always possible.   There will always be those instances that appropriate framing is just not possible in the field.  Never pass up an opportunity just because the perfect image does not exactly fit the film.  Keep cropping as an option.   Do not dismiss anything that will help. CROPPING
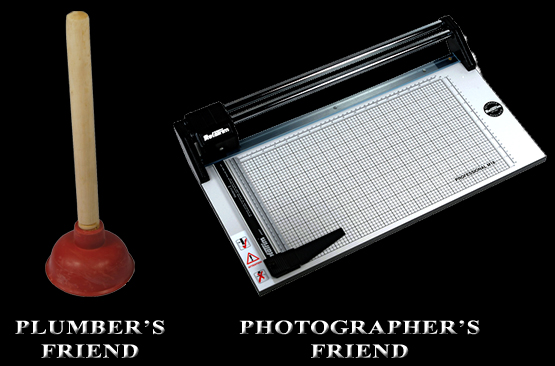
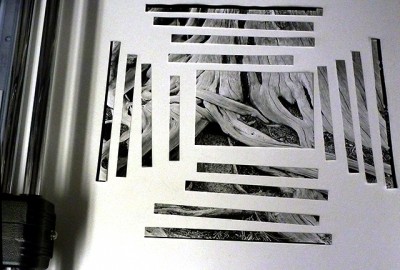
During the printing process look carefully at your first work print and determine if the image is strong from corner to corner.   Use cropping L’s to mask questionable edges of the image and determine if lopping off some of the image will strengthen it.   If you are enlarging you can reset the easel and the print size.  If you are contact printing, a rotary trimmer is your best friend.   The choice is totally yours.  Do not be a slave to others opinions.  There are no rules.  The decision is so eloquently expressed by Bob Segar:  “What to leave in, what to leave out. . .”

If cropping does not improve the photograph, maybe it is a good idea to find another image that will be more expressive.   If you do hit a brick wall with a photograph, save your work and put it aside for later.  There are few negatives of questionable substance that are worth killing yourself in order to print.  You are usually better off to concentrate on those that are not a struggle to print.

It is easier on you and more productive, and less frustrating, to make negatives that are well seen and easy to print.  A mastery of craft will make everything work more smoothly, but never let anyone tell you that you should not, can not, crop your photograph.  Just don’t go there!  Cropping can be your best friend.

JB

Posted by JB Harlin in Commentary, Film, Photography

DON’T LAY IT ON THE GROUND

JB&Susan tripod hanger 03Strange how many questions we get about what we do, why we do it, and always how do you do certain things. I never mind answering questions. This is how one learns, and I feel that sharing what you know is very important. We have no secrets. . . no secret methods. . . secret places. . . secret formulas. . . or anything that is in any way secret.
Funny how after our last trip, and sending out our Utah Snapshot Album, I received several questions about our camera packs. One that came up several times was how do you hang the pack from your tripod? We are pretty picky about our camera gear. It is imperative when you are a film photographer to keep any and all foreign materials as far from your gear as possible. I just could never set my backpack down in the dirt, let alone the mud, or snow. HERE is another post on this subject.

Pack Hook B 001 We tend to photograph in remote locations. We are always climbing over rocks, and are knee deep in mud or snow. One of the first packs I used was a really well-made and versatile Art Wolfe design that was perfect for a 4×5. The pack had a small webbing loop at the top and I soon found myself hooking it to one of the knobs on my Zone VI tripod. Worked great!
Things were fine until we moved up to larger cameras and larger packs from f64. They say necessity is the mother of invention.  So we modified the larger f64 backpacks with a hanging strap similar to the Art Wolfe design, since it was not a standard option from them. Later when we designed and built our own packs the hanging loop was a standard, must have, feature.  As our packs got larger and heavier we eventually changed over to Ries tripods and suddenly there was another problem. . . no good place to hook the pack. This was Pack Hook 06a challenge. When I need to think about something, I usually take a nap. I do my best thinking when asleep.
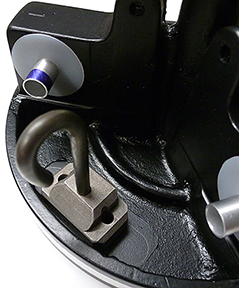
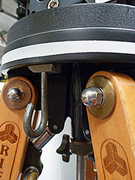
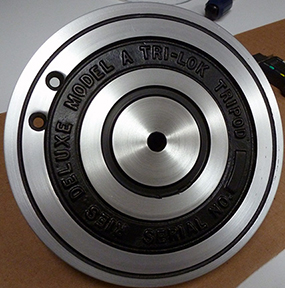
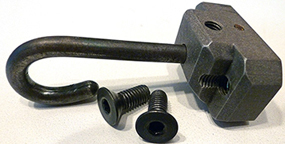
I dreamed up a simple modification to the Ries tripod head that allowed me to add a hook to the under side of the crown. I fabricated a small aluminum block and a hook made of 3/16 steel rod. The rod has to be heated and bent into shape, then quenched to harden the metal. The block uses a 6-32 set screw and a press-fit pin to hold the hook firmly in place. The hook assembly is attached using two 8-32 flat head machine screws drilled through the tripod crown.

Pack Hook B02Ries Pack HookI have added this modification to both our ‘J’ and ‘A’ model Ries tripods and they have preformed flawlessly for years. Ries tripods are extremely well-made and will support well beyond their factory weight ratings. I have hung a 45 plus-pound pack from my ‘A’ model for years now and never had any issues. . . except sometimes heaving that heavy pack onto the hook when in a difficult position.
Take a look at the photos to get a better idea of how I made this modification. I just did a complete rebuild of my 40 year old Ries ‘A’ model and it now has a new coat of paint and the legs have been refinished. It will not stay this nice looking for long. A tripod takes a beating in the field.

The running story around here is that we don’t own much of anything that hasn’t been taken apart and modified in some way. If you work with LF and ULF, you soon learn that there are very few off-the-shelf options available. If you need something, it is probably not made and you will either have to improvise, modify, or build it yourself.

This is how we solved the problem of keeping our pack off the ground. There are those times you just have to make a few modifications.

JB

Posted by JB Harlin in DIY, How-To, Photography

REWORKING MY RIES ‘A’ MODEL

It is really great to be able to fix, repair, and restore your equipment yourself.  I have always been a doer. . . I like to maintain and work on my own equipment when I can.  On our last trip to Utah I noticed that my very old and trusty Ries ‘A’ Model tripod was beginning to show signs of use.  I have no idea how old this one is, but I would guess it was manufactured in the late 1970’s or so.  I have had it for years and it was no where new when I purchased it.  The legs have taken a beating, needed a little work and a refinish.  The top crown paint was chipped and peeling and the previous owner had not used a friction washer between the head and the crown, so the crown top was pretty scared up and needed some attention also.

 What I had in mind was a complete strip down of every part of the tripod, remove all old paint and finish, repair dings and dents as best as possible, refinish everything, then reassemble.  It’s not that hard to dissemble a Ries tripod.  Take care not to damage anything and maybe take a few quick snapshots before you start, just in case you don’t remember exactly how it all fits back together. 

 I completely disassembled the legs, removing all of the hardware so I could sand and refinish the wooden legs.  The most difficult things to remove are the drive pins that hold the leg locking rods to the underside of the crown and leg swivel guides.  An appropriate size punch makes short work of the pins and an arbor press takes care of the guides. 

 At this point I have the entire tripod completely disassembled.  With the application of a little elbow grease, I completely sanded down all of the wooden leg parts, smoothed over the dings, scrapes, and dents, and shot three coats of spar varnish on all six upper and three lower legs.  Next I stripped the old paint from the tripod crown.  Took a few tries and some scrubbing with a brush, but soon I had nothing but bare aluminum.   Since the crown top surface was scored, I chucked the head in the lathe and resurfaced the top.  Next came a fresh coat of black self-etching primer and a bake in the sun for a day.   There is nothing like a day or two in the Texas sun to really cure paint. . . even in winter.

 The leg swivel guides did not fare well being removed from the crown, so I machined a new set.  Once I had the new guides pressed into the crown I also made a new set of friction washers. 

 At this point it was just a matter of cleaning up a few odd parts and reassembly of the entire tripod.  I did not need to do any work on the A250 head since it is much newer than the legs so it was only a matter of adjusting the leg tension and my tripod was ready for action.

 That is the entire process in a nutshell.  The tripod, though it will never look factory new, is now ready for another trip.

JB

Posted by JB Harlin in DIY, Photography

MIXING YOUR OWN

MIXING YOUR OWNI have always been an advocate of vertical integration. The more you can do yourself, the better control you have of the outcome. For many years I used prepackaged photo chemicals and have never had a problem. But, as the traditional darkroom and the materials used become more and more an alternative process, commercially available photo chemicals are getting harder to find. Some favorite chemicals have vanished. An old favorite, the Zone VI line of print developer, fixer and hypo are now gone from Calumet. I recently witnessed 8 bags of print developer and 2 bags of print and film fixer selling for $127.50 on eBay. That is well over double the original cost from Calumet.
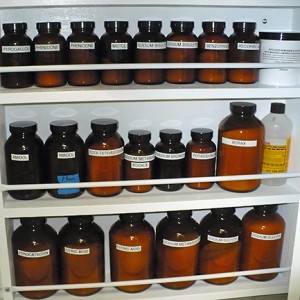
The bottom line is, you can mix your own photo chemicals. Sometimes, if you purchase bulk raw chemicals, you can even save a few dollars. Another plus to mixing your own is the fact that you have 100% control. If something goes wrong, you know who to blame. You can also modify the formula and experiment. Mixing your own photo solutions is not hard. It is not rocket science and you do not have to be a chemist. If you can follow a recipe and bake a cake, you can mix your own chemistry for the B&W darkroom.MIXING YOUR OWN

The first thing you need to understand is that in order to mix your own photo chemistry you will be handling CHEMICALS. If you are not comfortable with this thought, do not even go there. But, remember that you are surrounded with chemicals. . . the entire planet is made of them. If you take proper precautions and are careful, there is nothing to fear. I am not a chemist, so I have little understanding of deep details and I have even less inclination to study chemistry. Do as I do, assume that everything you handle in the way of raw chemicals are toxic. Do all mixing in a well-ventilated area. Clean up spills immediately. Avoid breathing airborne powders. Always wear gloves and purchase a respirator with proper filter. A little common sense goes a long way.

MIXING YOUR OWNAs I said before, for me, mixing photo chemicals is nothing less than following a recipe.
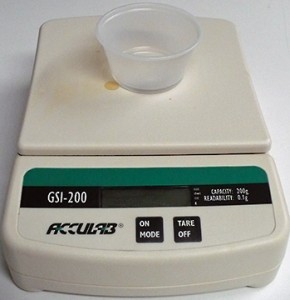
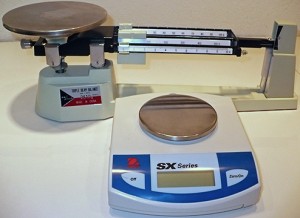
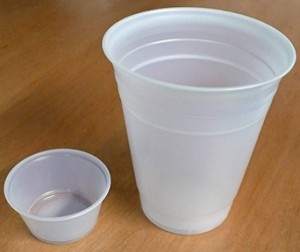
When mixing any photo chemistry formula/recipe you need to accurately measure all of the various chemicals. Most formulas call for dry chemicals measured in grams and liquids in milliliters. I have two scales for dry measure. I have a very accurate digital scale for small quantities and an old-fashion triple beam for larger amounts. I picked up a box of small serving containers at the local big box store to be used as disposable containers for measuring small amounts of dry chemicals. I also have larger 8oz plastic cups for larger amounts. Be sure to use the tare function to zero the scale with the empty container before measuring. Zero the scale with every new container, they do not all weigh the same. Once used, I toss them in the trash. I never reuse one of these plastic containers. This assures there is no chance of unwanted contamination.MIXING YOUR OWN

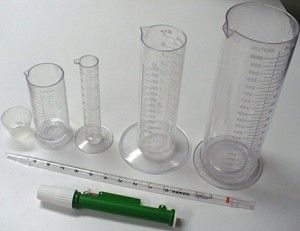
For liquids, I use an appropriate size graduate, and for small quantities, a pipette is the easiest way to make accurate measurements. You can use a pipette pump to make loading and measuring easier, or just dip the pipette into the container and hold your thumb over the end. Remember to always thoroughly wash the pipette after use and always use a clean pipette when going from one chemical container to the next. If the pipette is not properly cleaned, you will cross contaminate your chemicals.

Always follow the chemical formula. Most all formulas are mixed in water and there should be a temperature specified to insure the chemicals dissolve. Always mix in the exact order as called for in the formula. Add each ingredient slowly and continually stir until each is completely dissolved before adding the next. This is where a magnetic stirrer comes in handy. Take your time. Do not rush the process. Some chemicals take some time to completely dissolve.

MIXING YOUR OWNI use distilled water for all stock solutions. I always use distilled water for stock solutions and processing film. Unless your tap water has known problems, it should be fine for mixing printing chemicals.
Once properly mixed, store each formula in a clean bottle with a plastic cap. Never use metal caps, some chemicals will cause them to rust and contaminate the solution. Brown glass is best for developers and plastic should be fine for most others. Be sure to label each container as to its contents and also include the date mixed. Most all stock chemicals are good for three months, some much longer.

There are many published formulas. Some popular commercial formulas are proprietary, but in many cases there are alternative, similar formulas that are published. By applying a little experimentation, you can tailor your photo mixtures to suit you. Search the Internet for formulas and pick up a copy of “The Darkroom Cookbook” Third Edition by Steve Anchell.

Mixing your own is not that difficult. With a little study, careful handling, forethought and experimentation you can mix your own photo chemistry.

Here is a list of things you will need or may want to have;

• disposable gloves
• respirator
• apron
• a selection of required chemicals
• accurate scales
• disposable plastic cups for weighing chemicals
• several sizes of graduates for liquids
• stirring rod
• magnetic stirrer
• pipette
• pipette pump
• glass storage bottles
• plastic storage bottles

Resources:

Bostic & Sullivan
http://www.bostick-sullivan.com

Artcraft Chemicals Inc.
http://www.artcraftchemicals.com

The Darkroom Cookbook Third Edition by Steve Anchell
http://www.steveanchell.com

Pyrocat HD a semi-compensating, high-definition developer, formulated by Sandy King.
http://www.pyrocat-hd.com

The Book Of Pyro by Gordon Hutchings

JB

jbhphoto E-Books

Posted by JB Harlin in Darkroom, DIY, Film, Formulas, How-To, Photography, The Darkroom Workshop

D/FW LF GROUP GRAPEVINE CAMERA SHOW OUTING

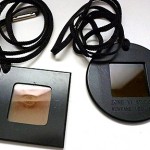
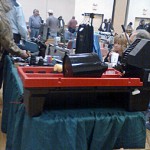
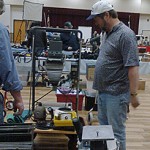
We had another outing.  This time breakfast and a camera show in Grapevine, Texas.  Though the show was a little slow this time, you always find something in a box that you just have to go home with.  Susan found a Zone VI viewing filter and in the next box I found one of the original square filters from way back in the early days of Fred Picker. 

Bob really wanted this Jobo, but I think someone else ended up with it. . . nice!  Paul found just what he needed for his new darkroom. . . a nice Beseler 45 with a lot of accessories to boot.  Way to go Paul!

Posted by JB Harlin in D/FW LF GROUP, Photography

A PLACE TO STAND

Ever found that once you have your camera in just the right position that you can’t quite see the very top of the ground glass. It is important to get up there so you can see if your foreground is in focus. Never fails, you need just a little more to get a good view. Well, we found a neat accessory that just may save the day for you.

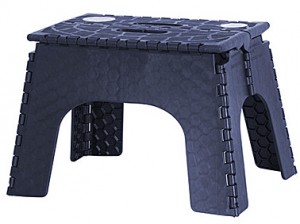
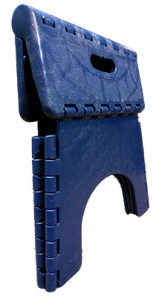
We discovered a nifty little folding step stool at Wal-Mart. We hauled a couple of these with us on our last trip and though I never used mine, Susan found it very helpful with several of her photographic efforts. It was especially useful for her and the pano format cameras she uses.  She made use of the step several times when she needed a little height working with difficult setups.

Here is more information from the Wal-Mart web site;

Keep everything within reach with the Mainstays 12″ Folding Step Stool. This skid-resistant step stool gives you an extra boost to reach high shelves or cabinets. It folds down to two inches thick for easy storage.

Mainstays 12″ Folding Step Stool:
Easy to carry
Skid-resistant top and feet
Stands 12″ high
Folds to 2″ thick
Weight capacity: 300 lbs
Folded Size: 13.5″ x 12.5″ x 2″
Weight: 2.5 lbs
Wal-Mart No.: 007126355

This 12″ step folds up and is easily tucked away till you need a little boost.  This is another accessory that is a life saver when you need it. We ended up purchasing several of these for use around the house also. You never know what you are going to find when you are out poking around in the stores.

JB

Posted by JB Harlin in Film, How-To, Photography

CLEANING FILM HOLDERS

Dust is forever the biggest enemy of the large format shooter. Seems that no matter how meticulous you are, that one little speck of dust sneaks in and plants itself right in the middle of some nice smooth area. . . like the sky. It is a never-ending battle and requires continuous attention.

It is obvious that you need to keep your camera clean and it is imperative that you vacuum out all of your film bags and equipment cases. Dust gets everywhere, and it is good practice to vacuum everything before you go out to photograph. But, there is one area we have found to be extremely important for dust control, and that is keeping your film holders clean.

We have found that a thorough cleaning of every holder just prior to loading film keeps the dust problem to a minimum. If the inside of the holder is clean, then the outside is the only place where dust resides. Realize that the most critical time is before and during exposure. If a dust speck gets on your film after exposure, at least it is no longer a threat for making the dreaded pinhole which leads to the black spot on the print. After exposure, the worst a dust speck can do is possibly scratch the film during handling.


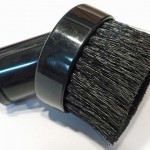
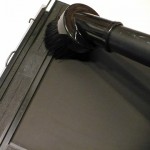
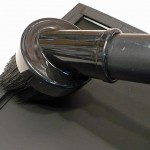
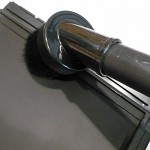
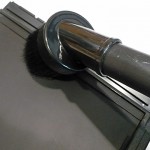
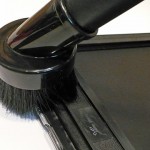
Everyone has their own methods for cleaning and loading film holders, and here are my main concerns and how we prepare our holders for loading. I will begin by saying that every holder is cleaned and inspected just prior to every loading session. Even on the road, we never load a holder with fresh film without cleaning. My biggest concern is dust inside the holder. I want the inside to be as clean, and dust free as possible. No matter how clean your film bags and cameras are, dust will always settle on the outside of the holders. If you thoroughly clean the inside of the holder, you will have a better chance of keeping the film dust free. I begin by cleaning the work surface with a damp towel and after dry I vacuum the area just to be sure. I always use the round brush on the end of the vacuum hose and before attaching I vacuum it well to make sure the bristles are free of dust.

I work each holder individually and begin by vacuuming the entire outer surface of the holder with the dark slide still in place. I pay particular attention to the entire area around the parameter of the holder where the slide meets the holder. I want the exterior of the holder as dust free as possible before I remove the slide.

One area that collects dust is the light trap area. Any dust on the dark slide will be wiped off by the felt in the trap. It is imperative that the dark slide be completely removed and the light trap vacuumed thoroughly. Also, while the dark slide is out of the holder, I vacuum the inside of the holder and the entire parameter, paying special attention to the film hold down and dark slide slots along the sides. I open the loading flap and vacuum under it also. The last thing I do before reinserting the dark slide is vacuum both sides of the slide and inspect it for dust or any possible damage. Each dark slide is removed, one-at-a-time, and always replaced in the same side of the holder. I never mix up slides, they always go back into the same holder and same side. . . always!

Once the holders are cleaned we immediately load them with fresh film and place them into their film bag. It is a good idea to vacuum the film bag before placing newly loaded film holders back inside. This is a good idea, especially if you have been in a particularly dusty area.

This is the ritual we go through every time we load film and we have little problems with dust on our film. Everyone has their own way of doing things and this is the procedure we use when loading film. There are a few things that we have found that greatly improve the odds of keeping your film clean. Remember, the vacuum is your best friend when it comes to dust. See my previous post titled “DUST. . . A Four Letter Word!” for more information.

JB

Posted by JB Harlin in Darkroom, Film, Photography

CALUMET SHUTTER SPEED TESTER LF UPGRADE

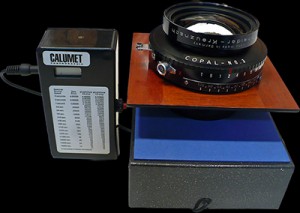
CALUMET SHUTTER TESTERIf you are lucky enough to own a Calumet Shutter Speed Tester, you know it is not exactly ideal for testing large lenses and shutters. I have owned one of these handy little devices for over ten years. I performed a modification/upgrade near ten years ago that makes the tester much more suited to testing large lenses and shutters.

This modification/upgrade is not difficult, but does require a little ingenuity and proficiency with a soldering iron. With a little planning and a good junk box full of odds and ends you can construct a remote trigger for the tester.

Follow the link HERE to our main web site which will take you to the ‘ARTICLES’ area and scroll down the page to download the PDF titled “CALUMET SHUTTER TESTER MODIFICATION: AN UPGRADE FOR THE LF SHOOTER.” This modification/upgrade has served me well over the years. Hopefully you will find this of interest also.

JB

Posted by JB Harlin in DIY, How-To, Photography

D/FW LFG IN PARIS. . . TEXAS THAT IS

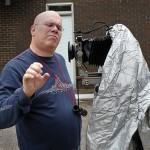
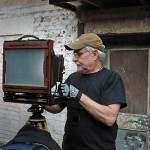
The D/FW LF Group had one more outing for the 2011 season. This time we headed up to Paris, Texas for a weekend of our usual fun. We met up Friday night at the hotel and prepared for two days of sightseeing and shooting some film. Michael, Janice & Terry, and Susan & I made up the group on this outing. We had a couple others that were not able to make it, but it was still a fun and productive trip.

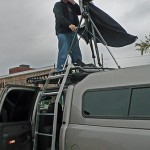
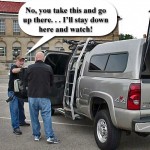
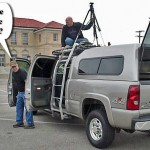
Susan and I exposed some B&W film and Michael got in his first field test of his new roof-top shooting platform on his truck. Nothing like customizing!

 We would like to thank Carolyn and Marcus for their warm hospitality and for arranging and guiding us on a tour of the town. We especially enjoyed the neat places and alleyways around the town. Wish the weather had been a little better. Cloudy is not a problem, but that excessive wind is when shooting LF. Fortunately we were able to find out of the way places and shelter from that south wind in some really great alleys around town.

Two days of really fascinating shooting in a very interesting and scenic town. Again, thanks to everyone in Paris for a great weekend and thanks to Michael for arranging this outing. We anticipate more of these outings beginning early in 2012. Hope to you see you there!

JB


Posted by JB Harlin in D/FW LF GROUP, Events, Photography

D/FW LF GROUP OUTING SATURDAY OCT 29th

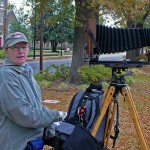
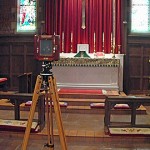
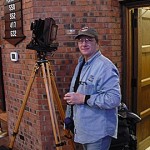
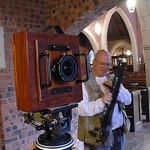
We had another one of our fun outings last Saturday to St. John’s Church in Fort Worth.  This was a limited outing and we ended up with only five making the trek, but it was well worth the time.  We would like to thank Fr. David for allowing us to have access to his beautiful church.  Here are a  few snapshots of the group at work.


Posted by JB Harlin in D/FW LF GROUP, Events, Photography