Fine Art Photography
THE VIEW CAMERA IN THE FIELD
This Is How We Work With A View Camera.
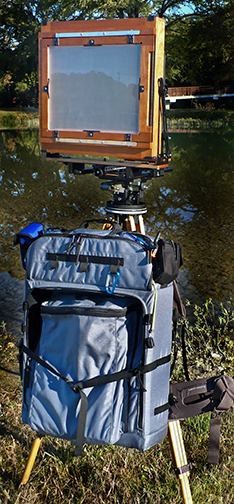 There is always a lot of discussion on how best to carry LF gear in the field. Seems that most people like to carry their camera in a backpack. That is our favorite mode of transportation in the field for sure. We like the backpack idea so much that Susan builds our packs to custom fit our cameras and accessories. All that we have learned about camera packs has been worked out the hard way. We have copied the features of commercial packs that we find useful and modified as required.
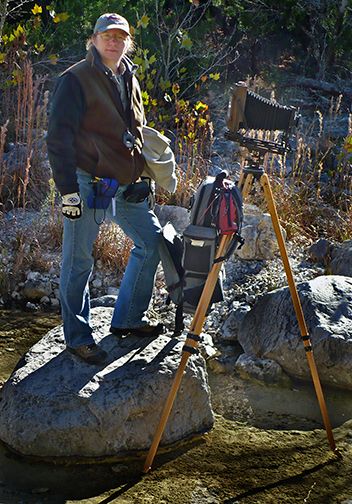
It seems that most people plop their pack down on the ground when they get ready to shoot. That is fine, unless you are in mud, water, or knee deep in snow. I have never liked the idea of setting my pack on the ground. And, yes I know, there are those that carry a tarp, but that is way too much trouble for me. I want to find my subject, plop down my tripod and then get to work without having to look for a convenient and safe place to put down the pack. This thinking led to a modification to both the tripod and the pack. Susan added a webbing loop to the top of the pack and I added a hook on the bottom of the tripod crown. This allows us to hang the pack from the tripod, keeping it out of the dirt and making it very accessible.
We both have worked out a system that allows us to carry everything we need and work efficiently in most any situation. The packs we use have a large compartment in the bottom for the camera and a separate top compartment for lenses and accessories. The custom packs also have room for several film holders.
This is how we do it and it has proven to be very efficient. However you choose to work in the field, the most important thing is to have everything you need with you, well protected, and easily within reach.
JB
THE B&W VIEWING FILTER
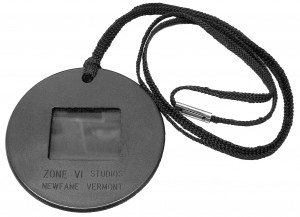
Susan and I have used a Zone VI B&W viewing filter for years. This nifty little round device not only shows you the relative tonal relationship between different areas of a scene, it also acts as a framing device.
So, what is a B&W viewing filter? In reality it is a Wratten #90 monochromatic filter. The gel version of these filters are available from the usual photographic suppliers. They are a gelatin filter and fragile. Several companies manufacture monochromatic viewing filters. Tiffin has a version for B&W, but we prefer the Zone VI filter. It is rugged, mine is over 15 years old and still going strong. The fragile filter is mounted between glass and encapsulated in a round molded plastic enclosure. The filter comes with a cord so it can hang around your neck ready for use at any time.
So, what does the B&W filter really do? What it does not do is turn a scene to B&W. The filter shows you the approximate tonal relationship between different areas of a scene as recorded by B&W film. It will show you if there are any mergers of tone within a scene. For example, the filter will show you if a building will tonally merge with the sky, thus indicating the use of a filter to darken the sky for separation. It will also give you a good idea of how different colors will look in B&W. I have found that nice little green moss on a tree trunk will merge with the bark and disappear. The viewing filter will show you this with just a glance. Once you get used to using this handy, yet simple little device, you will not want to be without it.
The Zone VI version also serves as a framing device. The 4×5 version has the same proportions as a 4×5 or 8×10 negative. By learning to hold the filter at the correct distance from your eye, you will soon be able to approximate what focal length lens is required on your camera for a specific framing.
One other thing, the filter forces you to close one eye to use. Remember, the camera has only one lens, one view, one perspective. You may be surprised, but try closing one eye while you are looking at a possible photograph. You just may quickly learn that once you remove the 3-D effect of using both eyes, the photo just may not work. Try it!
This is just another tool. It may work for you, maybe not. The only way to really know is to try it. The Zone VI B&W Viewing Filter is no longer manufactured, but you see them used all the time. Check the Internet. This just could become a regular part of your equipment complement.
JB
TRAVELING WITH FILM
 I have received several inquiries as to how we handle film when traveling. Our photographic outings typically last anywhere from two weeks to well over a month. We each shoot several different formats and we usually shoot a lot of film. We do not process film on the road since it is not practical to work with LF and ULF film anywhere but in our darkroom. So the question comes up, how do you handle several hundred sheets of exposed film when traveling?
First I have to say we keep meticulous notes on every negative we make. Everything from exposure, to location, to time of day is recorded on a small digital voice recorder. Every sheet of film gets an entry detailing all pertinent information. Search here on the jbhphoto.com BLOG for previous posts about our record keeping in these entries; “KEEPING NOTES” and “PRINTING NOTES & CATALOG.”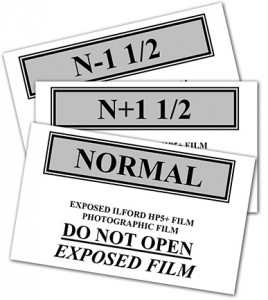
We only have room to haul just so many film holders in each format. So it is always necessary to carry fresh film and to reload holders on the road. Depending on how much we shoot on any particular day, we may reload every evening, or we could go several days before having to reload. Obviously we carry fresh film and empty boxes. How much film? The rule of thumb is to carry twice what you think you will shoot in any format. How do you know? Experience is the only answer to that question. If in doubt, throw in another box just in case. All I can say is we have never ran out of film on any trip. We always come home with unexposed film.
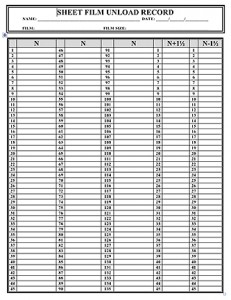
When reloading becomes necessary it is important to be able to sort the exposed film into groups that require the same developing time. We have printed sheets for unloading film. When it comes time to reload, we go through our audio notes and record the film holder numbers into columns that denote the development of each sheet of film. Once we have the sheet filled out, it is just a matter of locating the holders and arranging them in piles before unloading.
 We do not practice anything very exotic when it comes to film development. We expose with the intention of one of three development times for any particular situation. Each sheet of film is exposed to be processed either Normal, Normal +1 ½, or Normal -1 ½. That is it. . . we need three sets of empty film boxes for each format, each labeled for the appropriate developing time. As we load more film we empty more boxes that are then used to unload more exposed film. We carry labels that we print off before we leave and affix them to the boxes as needed. The labels denote film developing time and that the box contains exposed film.
We also carry a handful of large rubber bands. All boxes, whether exposed or unexposed are held closed with two rubber bands. This is insurance against a box coming open or accidentally opening the wrong box. In our scheme, any box with rubber bands on it contains film. . . Do Not Open!
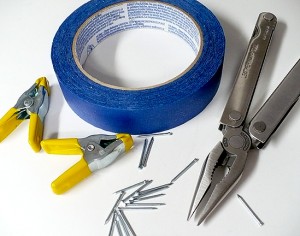
We carry a large Harrison tent, but I hate using it. So, we also carry spring clips, small nails, a hammer, tape and blackout material to cover windows as needed. We can nearly always find a bathroom or other room that is easily transformed into the temporary darkroom for film handling. We also carry a small folding table which comes in handy at times. Dust is always a problem when loading film. We carry a small field service vacuum, see the BLOG entry titled “DUST. . . A Four Letter Word!” Every holder is vacuumed, inside and out, every time we reload.
When traveling and shooting LF and ULF you have to be creative and prepared. This entire process is much more difficult to explain than it is to put into use. You just need a little forethought and planning. Traveling with film is not that difficult.
JB
WHAT IS IN A NAME?
name [neym] (noun)
1. a word or a combination of words by which a person, place, or thing, a body or class, or any object of thought is designated, called, or known.
 What is in a name? Interesting question for sure! There are times that a name has little meaning, other times it can be the key to an empire. Companies spend untold sums of money in the creation of a name for their products. Their chosen names are trademarked and protected by law. Some names are household words and are part of our everyday life. There are times when a name is extremely important.
There is a revolution brewing in the world of photographic art. The digital vs. analog debate is raging on, and at times is near a war rather than a debate. There are people aligned on both sides and most have made their choice. I can say without hesitation that I have made my decision and I plan to stay the course. It matters not what your preference may be as to the photographic medium you choose. The choice is a very personal and serious decision. You need to be comfortable with your selection and dedicated to its use.
The problem is there needs to be a clarification of terms used in photography today. The various forms that photography has taken on in these more modern times has lead to a lot of misunderstanding and confusion. The general public, along with even those in the fine art photography world, have trouble understanding and defining exactly what modern-day photography has become.
There is this grand misnomer that digital is a replacement for film. There was even a wide spread rumor that film was dead. This is nothing but a pure deception. . . little more than a marketing ploy by people in the photo industry that do not have a clue as to what photographic art is about. Do not buy into the farce that film is dead.
But I digress from my original topic. . . now back to the question at hand. What we need is to be more specific about photographic art. Gone are the days that the word photograph was assumed to mean a procedure based on film and the wet process. Photography has branched out into a more complex art form. Digital photography is a new art form, not a replacement. It is a new way of making images. Because of this new medium there is a lot of confusion pertaining to the process. Each medium has its own peculiarities, strengths, and weaknesses. . . each needs a name. We need to be more specific in the description of the imaging process. After much thought, I have defined three areas that encompass photography today.
1. Traditional Photography
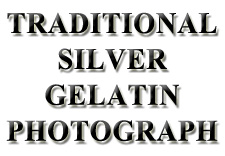
This process has numerous subcategories which are all based on an imaging process that uses film, a wet darkroom, and chemical processes from start to finish. Simply, the way photographs were made before the introduction of digital imaging. This also includes the numerous alternative processes that are still practiced today. This is my choice for the creation of all of my photographs, thus for me using film and the 100% wet darkroom process, my finished print on gelatin silver paper, would be identified as a Traditional Silver Gelatin Photograph.
2. Hybrid Photography
This process is new and is comprised of those that mix traditional and digital together. Some choose to shoot film and then use digital means for the finished product. There are also processes that incorporate digital means to produce a negative that is ultimately used for a wet processed product. This is a very popular art form today and it needs its own definition. . . hence, the term Hybrid. For example, if you are a platinum printer that uses digital negatives, your print should be labeled Hybrid Platinum Photograph.
3. Digital Photography
This is pure digital from start to finish. A digital camera is used to capture the image, computers are used for post processing, and a digital printer is used for the finished product. A Digital photograph is 100% digital in its creation from start to finish. If you work in this medium and use an inkjet printer the print should be labeled a Digital Inkjet Photograph.
This is how I choose to define photography in the modern world. There are three distinct categories of imaging and each should be properly defined. It should be obvious as to which art form I practice. From now on when asked, I will say I am a Traditional Photographer and my prints will be labeled Traditional Silver Gelatin Photograph. Just that simple!
 This is my choice and has absolutely nothing to do with anything other than it is what I feel correctly reflects the different types of photography. If you have chosen to be a digital photographer and work in that medium, why be ashamed of it? Same if your work is produced by the hybrid method. Why not be proud enough of your chosen medium to accurately define it and not hide behind the general, and now somewhat vague, idiom of Photography? Just keep in mind that none of these three categories are the same and none is a replacement for any of the others. Each is simply its own art form and they all fall under the general category of Photography.
So, what is in a name? What you call something can mean a lot, especially when you are trying to define your craft. What is your choice. . . TRADITIONAL. . . HYBRID. . . DIGITAL. . . or. . . some combination of the above? Doesn’t matter, just define your chosen medium accurately.
JB
THE PYRO-CAT IS OUT OF THE BAG
 Back in February 2009 I posted an entry titled “WHO USES PYRO?” and ended it with this statement, “I have about reached a conclusion as to which formula best suits what we do. . . and. . . I may just write about what I found at a later date. . .”
One thing I can say for certain is that for us, and let me be very clear about this, I repeat, FOR US and the way we work, most any staining developer out performs any non-staining developer we have used. It was just a matter of finding the right developer that suited us and one that would allow us to produce prints that have the presence and feel that best suits our vision.
After working with several of the more popular staining film developer formulas we have finally chosen our favorite. There was a lot of research and comparisons, followed up with field testing in order to ascertain what best fit our needs. I defined the main criteria and judged each developer on how well each performed in each area. Here is a short list of the main points:
• the formula had to be published
• we considered how we work
• what we expect from the negative and developer combination
• ease of use
• consistency of the developed film
• stability of the developer formula
• stain color
• general stain and stain density
• the look, feel, and overall print quality
• last, but not least, the cost
I prefer to always be able to mix my own chemicals from scratch. This became my first issue, since I do not want to depend on the availability of the developer from an outside source. I am a strong believer in vertical integration. Also, if I want, I can modify the formula, and I always know who to blame if something goes wrong.
One thing I have learned is that Pyrogallol is cranky. Nearly all of the formulas we tried that were based on Pyrogallol, at one time or another, under certain circumstances, gave inconsistent and sometimes unpredictable results. The problems could have been caused by any number of variables. We tray process all sheet film using the shuffle method. Some of the Pyrogallol formulas showed signs of aerial oxidation in the tray at the end of the developing cycle, while others did not. The biggest problem was that every Pyrogallol formula we tried, performed erratically and at one time or another, produced an occasional unevenly developed negative. One formula was especially sensitive to wash time. The longer you left the film in the washer, the more the general stain increased and the film went from a near neutral color to deep green. Never did understand what caused that. I am sure it was something that I did, but I do not like to have to deal with something that is that sensitive to slight variations of process.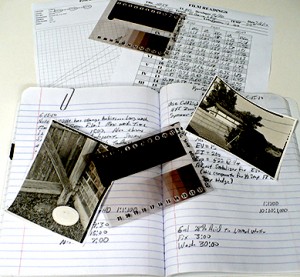
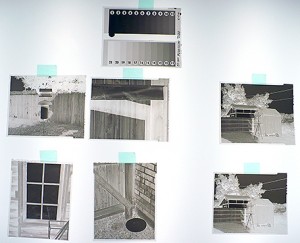 One thing I did learn was that Pyrocatechin is a much more stable and user friendly developing agent. The Pyrocatechin formulas showed little to no aerial oxidation in the tray after a processing run. No matter what I did, the negatives have not shown any uneven development or any other problems. I prefer to have the confidence that even if something is a little different during processing, it will not cause inconsistent results with the finished negative. In other words, I like to have a little wiggle room.
One other quick observation has to do with the general stain color. I know there has been a lot of discussion about the stain color and again this is what we have found to work best for us. Through our experimentation we quickly learned that green negatives do not work well for us. We print on numerous different papers, and use both graded and variable contrast materials. There is no one magic paper! The right paper is the one that works for any particular negative you are printing. We have found, that for us, the more neutral to brown stained negatives work the best. That is just us. . . if you find otherwise, then use what works for you.
With all of that behind us and a notebook full of test data, I can say it is time to stop the experimenting and get on with what is important, creating photographs. We have now chosen our favorite standard film developer. Pyrocat HD by Sandy King has proven to be the best choice for the way we work. What else can I say. It works. . . works consistently. . . and meets all of our expectations.
I would like to thank Sandy King for all of the research and work he has put into this formula. If you are not familiar with Pyro developers and Pyrocat HD, click HERE to learn more.
JB
FILM IS NOT DEAD!
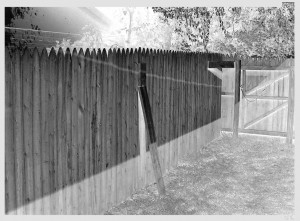 Contrary to popular belief boys and girls, FILM IS NOT DEAD! And I have the proof to boot! One question that everyone has is, where do you get film for that camera? Or, even more disturbing, I thought they didn’t make film any more? Then, where do you get film processed? And finally the most frustrating of all, why would you want to mess with film?
Well, I am not going to address all of this, but I am going to shout from the roof tops again, FILM IS NOT DEAD! Something great has just happened and I am jumping up and down with excitement. Keith Canham, owner of KB Canham Cameras has just announced at Photokina this year that he is now partnered with Kodak to coordinate orders for LF and ULF film. Keith will now take orders for any current Kodak film, in any size! Let me say this again. . . any current Kodak film, in any size!
Plus, just to reinforce the idea that film is not dead, Kodak also announced a new color film. Think about this now. . . Kodak is still developing new film emulsions. They are still doing R&D and improving film! Need I say this again. . . FILM IS NOT DEAD! Here is a portion of the announcement;
Kodak Introduces new Film at Photokina
Yes, a new film: Kodak Creates World’s Finest Grain 400 Speed Color Negative Film with New KODAK PROFESSIONAL PORTRA 400
ROCHESTER, N.Y., Sept. 14, 2010 – Eastman Kodak Company today introduced their new KODAK PROFESSIONAL PORTRA 400 Film, featuring the finest grain structure available in a 400 speed color negative film. The new film incorporates KODAK VISION Film Technology, plus Antenna Dye Sensitization in the cyan and magenta emulsion layers to achieve its unbeatable fine grain.
Yes, a new fine grain color negative film from Kodak. . . and. . . you can get it in any size you can dream of! Here is more information from Photokina on the Kodak BLOG.
Also. . . don’t forget, Kodak is not the only game in town. Ilford offers their B&W film in LF and ULF sizes. Plus there is imported sheet film in many sizes from places like Freestyle Photographic Supplies and others.
Think I am excited. . . well, yes I am! A very special Thank You to Keith Canham and Kodak for your support!!!
I just have to shout this one more time; FILM IS NOT DEAD!
JB
LANGDON CENTER RECEPTION
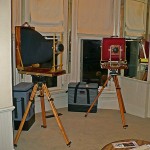
We would like to thank everyone that joined us last evening for the reception for our show at the Langdon Center in Granbury. We had a great crowd. Got to visit with old friends and met some new ones also. We made a few quick snapshots before everyone arrived. We had the vertical 8×20 and the 11×14 cameras on display. We also had a slideshow of our travels last year in the snow in Utah.
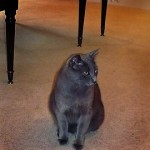
There were refreshments and an excess of talk about art and photography. We also had a guest of honor, Tucker the Cat.
Thanks again to everyone!
JB & Susan
FALL GALLERY NIGHT AT THE ADOBE WESTERN ART GALLERY
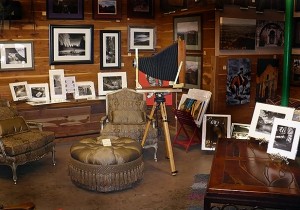 A special Thank You to all that came out and joined us to celebrate Fall Gallery Night. We had a great crowd at the Adobe Western Art Gallery. . . refreshments, friends (New & Old), a ULF Camera, photos. . . who could ask for more?
We would also like to remind everyone that our exhibition “THROUGH THE LENS OF THE VIEW CAMERA” runs through September 30th at the Langdon Center in Granbury, Texas. There are 36 of our prints on display and the Artist reception will be the 24th 6-9p.m.
As always, thanks for your support,
JB & Susan
Langdon Review of the Arts in Texas
 We are excited and extremely honored to have been selected to be included in the 2010-2011 edition of the “Langdon Review of the Arts in Texas.” The “Langdon Review of the Arts in Texas” is an annual publication of Tarleton State University providing an overview of the year’s most exciting cultural accomplishments in Texas.
Our essay titled “Through the Lens of the View Camera” along with 14 of our photographs appear on pages 140 through 150. If you would like to purchase a copy, follow the link below. We were also honored by being invited to present our talk titled “Big Cameras, Big Film” Thursday evening of the Langdon Review Weekend. Thanks to all that attended, we enjoyed having the opportunity to meet each and every one.
We would like to send our heart felt gratitude to everyone at Tarleton for their support and for allowing us to participate in this years review and celebration.
JB & Susan Harlin
PS We would like to remind everyone that our exhibition “THROUGH THE LENS OF THE VIEW CAMERA” runs through September 30th at the Langdon Center. There are 36 of our prints on display and the Artist reception will be the 24th 6-9p.m.

