A DIY SENSITOMETER. . . REALLY???
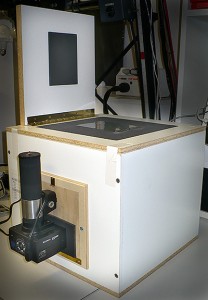 Film testing is one of those things that is just a fact of life if you, like me, choose to continue to pursue that art form. I am no fan of any testing, that is for sure. But, there are times you have to test in order to better understand how things will work.
I never thought I would ever need a sensitometer, but never say never. To compare different film developer formulas, I found that I needed to run some tests. In order to make the test I needed to expose numerous sheets of film and expose them all identically. What I needed was a film sensitometer. What I did was build one. This project was not as difficult as I first expected and most everything I needed was laying around, either in the closet, or the junk box.
I wrote abut my experience designing and building a DIY Sensitometer back in 2009, then shelved the article where is has remained dormant since. Well finally, I drug the thing out and put it up on our web site. Interested in learning more about building a film sensitometer? Head over to the ARTICLES & HOW-TO area of our web site, scroll down the page to the link titled, “BUILDING A FILM SENSITOMETER.” You will see how I did it, and you may just want to try it yourself. . . if this is something you have a need for.
JB
HOT WATER
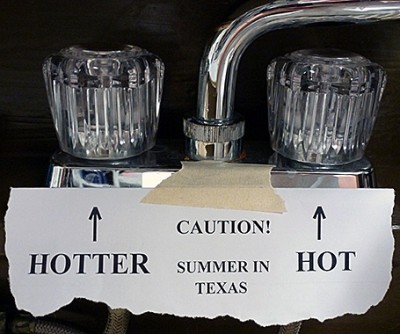 Yes, hot water is nice, but not when it comes out of the cold tap in the darkroom. Guess since the beginning of photography all wet processes are assumed to be run at 68F. Personally I have nearly always ran everything at 70F. This seems to be a good compromise since we live in Texas, where in a 12 month year, summer is 18 months long. Personally, I don’t care for temperatures to be much above 70F outside, but what can you do?
The cold tap here runs up near 88F by August, and for many years I dealt with that by freezing plastic bottles filled with water. Works well enough, but is still a hassle. Finally about 18 years ago I decided to look into a water chiller for the darkroom. I have to admit that I did try the coil of copper tubing in a washtub of ice water. Works to some degree, but is a mess to deal with. What I wanted was a no-muss, no-fuss way to chill the water to a manageable temperature.
So, you say you want a water chiller? That really is not a problem. There are commercial units that will provide very high volumes of chilled water. Problem is, they are large and expensive. So, like most things I had to find a balance between useable and practical. Everything is a tradeoff of some sort. I did a lot of research and eventually decided, based upon the limiting factors I had to face, that a small ElKay remote water chiller would be satisfactory. The unit I settled on was their Model ER101Y, which is rated as a 9.6 GPH (Gallon Per Hour) remote chiller. The unit was small enough to fit under the darkroom sink and ran off a 115 volt circuit. 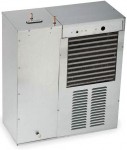
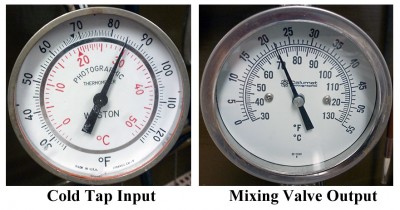
Now, the bottom line is, how well does this work? I have to admit it is not perfect, but it is certainly better than nothing and much better than anything else I had tried. The setup is very simple. I have a Calumet/Lawler mixing valve that in winter, when the cold tap is in the 50-60F range works very well. By adding the chiller in the summer I can keep a steady 70-72F wash water with cold tap up toward 85F, with a flow rate of about 0.75 GPM for as long as I need. This is plenty good enough for washing film or paper. We mostly process paper in the summer anyway, and when the tap gets to 88F the wash water goes to about 75F.
Not everything is perfect though. I would really like to run any flow rate for any length of time, at any reasonable cold tap temperature, but it will not happen with this small of a chiller. That would require more horsepower. Another thing to think about is the heat generated by the chiller. I had to add a powered wall vent next to the chiller to keep the room from heating up. The ultimate would be to vent the unit outside, but that isn’t practical for my location. . . so I just have to deal with it as best I can.
At least I do have a chiller and it does work. When I get ready to process film or print, I will fire up the chiller and allow it to cycle. This normally takes about fifteen minutes. I can then fill my washers, but I have to watch the temperature closely, because at full flow the chiller will run out of cold water pretty fast. When I see the mixing valve temperature start to rise, I will shut off the water and wait for the unit to cycle again.
Bottom line is, I would not want to be without my chiller. If I had the choice, I would upgrade to the larger ElKay ER191, which is a 19GPH unit. It would fit in the space now available. The original sink I installed the unit we have on did not have room. If I were going to suggest a chiller, I would say get the 19GPH unit. But do keep in mind that any chiller is better than none!
JB

JBH FILM STATS 1996 TO 2013
I have been working on my photo database the last week. I have detailed records of the photos I have printed dating back to 1996. Using that data I have created some charts of what I have done. Here are a few of the charts that outline the last 17 years of my fine art photography. This information is from the data entered into our master database which only contains those negatives that have been taken to a finished print. This data does not include all the negatives that have been exposed and processed during this time.
Guess all that time taking notes and entering all that data has some worth.
JB
SEWING GAUGE
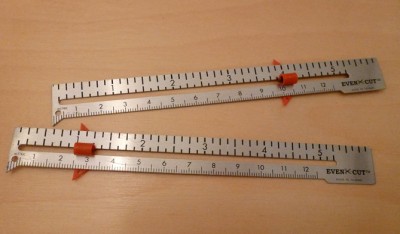 There are so many gadgets that have been devised over the years, and it always fascinates me how you can adapt a tool for some use other than what it was originally intended. One of my most valuable tools that I use regularly for mounting prints is a common Sewing Gauge. If you are a seamstress you probably know what this is used for. I had to look it up to find exactly what it was called. I just knew this would be something that I could use and it has proven invaluable to me.
I have used a six inch Sewing Gauge for years when mounting prints. I picked up several of these at a garage sale years ago and they are excellent for aligning prints on the mount. The sliding measuring guide is great to check, and double check, the edges of a photograph to be sure it is centered and aligned to the edge of the mat board. I have used a Zone VI Dry Mount Jig for many years, but I have also used two Sewing Gauges as a second check for proper alignment.
[nggallery id=18]
The typical Sewing Gauge is six inches in length and the movable guide will go from a depth of about 1/8 to 5 inches and is used to mark hems and make alterations. You can probably find these in even longer lengths. Take a look on line, or go by your local sewing retailer. They are not expensive and are really near worth their weight in gold. . . well. . . almost!
JB
The typical Sewing Gauge is six inches in length and the movable guide will go from a depth of about 1/8 to 5 inches and is used to mark hems and make alterations. You can probably find these in even longer lengths. Take a look on line, or go by your local sewing retailer. They are not expensive and are really near worth their weight in gold. . . well. . . almost!
JOHN SEXTON & ANNE LARSEN AT SUN TO MOON GALLERY
 John Sexton and his wife Anne Larsen are coming to Dallas this September. They are having a two-person exhibition of their photography at Sun to Moon Gallery. The show will run from September 5 to October 12, 2013. John will be giving a lecture at Richland College Saturday, September 7 at 1:00 pm. Later that evening there will be the opening reception for their two-person exhibition at the Sun to Moon Gallery from 5:00 to 8:00 pm. Both of the events Saturday are open to the public.
This should be a very informative and entertaining event. Susan and I are looking forward to catching up with John and Anne. If you are truly interested in photography, you should mark your calendar and make plans to attend. For more information, take a look at these links;
http://www.suntomoon.com
http://www.johnsexton.com
http://www.richlandcollege.edu/photography/events.php
JB
http://www.johnsexton.com
http://www.richlandcollege.edu/photography/events.php
500 YARDS
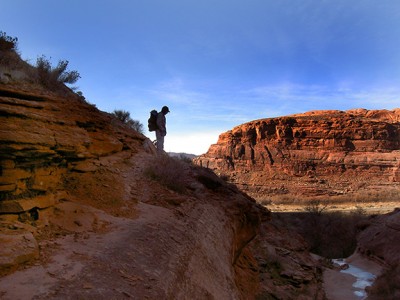
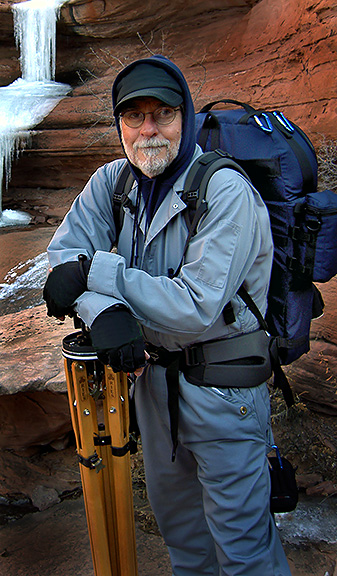 Brett Weston is credited with saying, “Anything more than 500 yards from the car just isn’t photogenic.” That is particularly true when you enter the world of Large and Ultra Large Format. I would even venture to say that distance shortens exponentially as the camera size increases. You could say that distance is inversely proportional to size. We live by these laws of physics and it is darn hard to get around them.
I have given this a lot of thought and have deduced that;
1. The camera folded size is determined by the film size
2. The camera weight is determined by design and materials
3. My back can only carry so much
So, it is pretty clear that item number one is fixed and there is not much you can do to make any format camera much smaller in size. Also, my back has its load limit and that I do not want to exceed. This leaves item number two as about the only place you can experiment.
It is understood that making any mechanical device lighter makes it less rigid. You have to sacrifice some rigidity for a reduction in weight and size. There is always someone that starts complaining about how some cameras are not rock solid when they grab one end and twist. They complain about the camera not being stable. The reality is, it is just a function of the design. I always say the same thing, the camera only has to be still while the shutter is open. The rest of the time, who cares? The camera is just a tool and should not be obsessed over. Choose what works best for you.
 Way back when I first started getting serious about photography I decided to buy a new 35mm camera. I did a lot of research and settled on three major brand names. The trouble was, I could not decide which best suited me. I knew that there would be no appreciable difference in the finished print. I challenge anyone to look at a framed print on the wall and tell me what brand of camera was used.
So, it all finally came down to making a decision. After some contemplation I decided to go to the local camera store and handle each camera. Actually I had done this several times, but what I was looking for as I neared my final decision, was which best fit my hands. My final choice was based on this one final criteria. I chose the camera that felt the most comfortable to me. Its controls were conveniently laid out and worked seamlessly. This is how I chose and I have never regretted that process.
Fast forward to today and little has changed with my thought process. I am always looking for what best fits my hand and my way of working. In any device design there are always trade offs. To gain one feature may require some sacrifice in another. Keep in mind that if you are going more than 500 yards with that LF or ULF camera, item number three above just may be the most important consideration.
JB
 Way back when I first started getting serious about photography I decided to buy a new 35mm camera. I did a lot of research and settled on three major brand names. The trouble was, I could not decide which best suited me. I knew that there would be no appreciable difference in the finished print. I challenge anyone to look at a framed print on the wall and tell me what brand of camera was used.
SUN TO MOON GALLERY THIRD ANNUAL PRINT THROW DOWN
I DO NOT PHOTOGRAPH PEOPLE
 I find it odd that when you tell someone you are a photographer they immediately assume you are the local Olan Mills studio operator. They either want a family portrait or have a daughter that is getting married and want to hire you. I guess there is a mass disconnect when it comes to the word photographer. Should I introduce myself as a Fine Art Photographer?
Maybe Fine Art Photographer is a little too stiff for an opener. Perhaps it would be better if I told people I am a photographic artist. That should throw them into a tailspin. Or should I start off by saying I am a photographer that does not work with people? I seem to face this dilemma at times and it is hard to convince some that I only shoot rocks and trees. Should I ask a person if they have some interesting rocks or trees in their back yard that they would like me to photograph? How about a nice 11×14 contact print of that old barn out on granddad’s old farm?
I am not out to offend anyone. I have no need to place myself above any portrait photographer, it is that I just don’t do people. It takes a special kind of person to coax out those really interesting images of a person. The knack of catching that expression just so. I’m no good at it and I will be the first to admit that to anyone.
I don’t like photographing anything that moves. I hate the wind. Seems every time I find something really interesting and I check and see the wind is absolutely calm. . . well. . . you know what happens. You get the camera all in place, pull the slide, get the shutter release in hand and there is just this little hint of a breath of moving air. Just enough to make some little feathery leaf or weed wiggle. I shoot with big cameras. An 8×10 is my every day shooter. I shoot with very small apertures and very long exposure times. If anything I have chosen to be perfectly sharp moves, I have just wasted a sheet of film. Depth of field is very scarce. How do you get someone to not move a muscle? Guess if I were photographing people I would be best suited to work with the dead. Would that suffice as an inanimate object?
My hat is off to all you portrait shooters. I really don’t know how you do it. . . or I should say I could not do it with any degree of success.
So for those of you that are not familiar with Fine Art Photographers, the next time someone tells you they are a photographer, be sure to ask first if they do people. Don’t just assume that photographer translates to Olan Mills Portrait Studio.
JB
EDWARD WESTON AND HIS DAYBOOKS
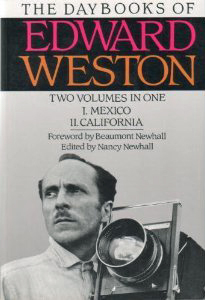 Have you ever wondered what the life of an artist would be like? Edward Weston was not only an artist, he was obsessed by his art. Every day before everyone else was awake, Edward would write in his Daybook. His journal has become a classic of photographic literature. At one point he destroyed some of his daybooks, but those that remained were eventually transcribed and published.
Weston was a towering figure in twentieth-century photography, whose restless quest for beauty and the mystical presence behind it resulted in a body of work unrivaled in the medium. John Szarkowski observes that “It was as though the things of everyday experience had been transformed… into organic sculptures, the forms of which were both the expression and the justification of the life within… He had freed his eyes of conventional expectation, and had taught them to see the statement of intent that resides in natural form.”
This is a fascinating and informative read. A look into the life of a dedicated artist. If you are serious about your photography. . . if you think you are serious about your photography. . . read “The Daybooks of Edward Weston” and see how you compare.
JB
JB


