NELFPC. . . FINE ART PHOTOGRAPHY AT ITS BEST!

We have just returned from the NELFPC 2014 fundraiser and amazing photography weekend.  Susan and I were extremely excited to be invited to participate in this year’s activities in Connecticut.   The New England Large Format Photography Collective (NELFPC) is an amazing group of the most dedicated photographers I have ever met.  This is truly THE model for any other similar organization to take a very close look into.  Rather than trying to explain further, let me quote from their web site;

The New England Large Format Photography Collective formed from a small but diverse group of photographers in October of 2003 to advance the craft of traditional photography and educate others on its traditional processes. We embrace those with a passion for large format photography, and strive to provide inspiration for others practicing our craft.

We believe Large Format photographers are unique people using unique processes to create the highest quality prints. Simply stated, if you derive considerable enjoyment while viewing something “upside down and backwards” in the dark you are unique! We wish to network with others who embrace this oddity.

For more information on NELFPC, take a look at their Mission Statement.

This is such a diverse and talented group. . . and I might add a light hearted, fun-loving bunch of really great people.  Trying to explain exactly how enlightening this experience was is difficult to put into words.  To be in the midst of so much beautiful photography, dedicated photographers and so much photographic talk, made this a truly inspiring event.  

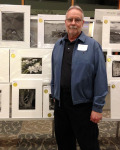
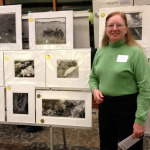
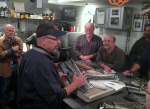
We began Thursday evening with a fundraiser, “Photographers Fighting Cancer.”  This is a fine art event to benefit the Middlesex Hospital Cancer Center and is hosted by NELFPC at the Valentine H. Zahn Community Gallery located at the Middlesex Hospital Shoreline Medical Center.  There were 80 Large Format photographs by 30+ LF photographers up for bids.  Susan and I were proud to each donate one of our prints to this worthy organization and this was a really fun evening that was to kick off a long weekend of more and more photography.

After the fundraiser it was off to Steve and Vicky’s, our hosts for the weekend, home for a meet and greet with all of the members of The Collective.  I got to put faces with numerous names I have seen and exchanged discussions with via the Internet over the years.  The LF community is truly a large and dispersed group, and we are all fortunate to be connected by our love of the medium, if only via the magic of the ether.  Getting to meet many of those people in person is an amazing experience in itself.  The amount of talent, knowledge and dedication to the photographic process within this group is amazing.


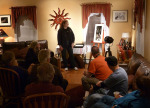
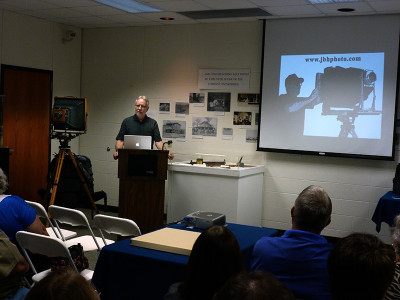
What followed, starting early Friday morning and continuing until well into the afternoon Sunday, was an intense immersion into the world of fine art photography.  Everyone brought photographs to share.   Steve and Vicky treated us like royalty. . . outstanding food. . . great refreshments. . .  we had access to Steve’s amazing darkroom for demonstrations. . . and did I mention photographs. . .  lots of photographs.  Each day was spent viewing each other’s work.  Susan and I brought about 30 prints each to show.  I did two KeyNote presentations, one on pyro developers and the other on how we travel for 30 days at a time with all those cameras.  Paul did a talk on collecting photography and Steve did a very informative darkroom demonstration on split toning.  We also had two field trips giving everyone a chance to break out the cameras and make a few large format photographs at two interesting locations.

Now it is all over, we are home and we have had time to absorb all that took place, believe me it went like a flash, I just can’t get over the dedication and talent contained within The Collective.  The amount of energy they put into their work and their organization is inspirational.  Only those that have been involved in such an endeavor can understand just how much time, thought and support it takes to put on such an event.  Steve did a bang up job on the schedule and was really on the ball in keeping things moving and on time.  The hospitality was second to none. . . the food outstanding. . . and. . . did I mention the refreshments?

I know I keep repeating myself, but the NELFPC is really a model for any group wanting to promote and sustain the art and craft of fine art photography.  Susan and I cannot express how much fun we had and how honored we are to have been a part of this year’s gathering of the NELFPC.  We would like to express our deepest heart-felt thanks to Steve and Vicky for opening their home to everyone for this truly amazing event, and everyone in The Collective, for your generous hospitality and such a great time!

The only regret I have is that we do not have this kind of a dedicated group here locally. . . it sure is a long way to Connecticut!

JB
. . . and Susan endorses these comments!


Posted by JB Harlin in Commentary, Events, Photography, Presentation

THE EW TEST

I am fascinated with all of the deeply technical discussions on some of the photography chat sites.  Seems there are those that want to dissect every minute detail of the process.  They want to over-analyze everything from camera focus, to lens sharpness, to even how a shutter works.  We have those that argue about filter factors, meter calibration, and one instance of bellows extension being calculated to one eighth of a stop.  All fine and dandy if you are into engineering.  But my question is, what does this have to do with the finished print?  That photo mounted and hanging on the wall either does it, or it fails.  If it fails, is it some technical problem?  If so, do you need to do some more math? If it is successful, does it matter what the technical details really entail?
 
I come from an engineering background.  I love photography because it is an escape from all of the numbers and rigid thinking involved in engineering.  Creating art is strictly a right brain experience. . . if you try to inject engineering, you kill the process.  Sort of like having to explain a joke.  It does not work!
 
It is true that I do engineer certain aspects of my photography.  But I do it for the purpose of eliminating the engineering from the creative process.  I want the act of making a photograph to be completely transparent with respect to all distractions of the mechanical process.  In other words, I do the engineering in the shop and when I go out to make images, I leave all that technical chatter behind.
 
As I said, I find all of the extreme dissection of the mechanics somewhat fascinating, but I believe it is totally unnecessary.  In fact I find it extremely detrimental to the process of creative art.  Yet, there are those times I just have to read the deeply technical discussions, mainly for my entertainment.  
 
This is where I think of Edward Weston.  If you have studied the man and his life work, you know of his dedication to the medium of the photographic art form.  You also know that he was extremely limited in his comprehension of anything mechanical.  He only drove a car once in his lifetime.  If his camera broke, he had no idea of how to repair it.  His darkroom was a place of extreme simplicity.  He was all about making photographs.  I really believe that for him, the mechanics was more of a hindrance than even a curiosity.  He did not understand it, and he was not interested.
 
When it comes to the way I work and think about photography I have devised a test that helps me sort out what is really necessary and what is just a lot of distraction.   I use what I call “The EW Test.”  In keeping with the Weston simplicity in thinking, when I encounter some deeply technical aspect of photography, I simply ask myself;  “Would this matter to Edward?”  If I can answer YES, then maybe I should explore it in more detail.  If the answer is NO, then I file it away as BS and not relevant.  I believe that our lives are complicated enough as it is today.  I have to borrow a quote that an old friend uses on his e-mail footer;
 
“Simplicity is the ultimate sophistication.”  -Leonardo da Vinci-
 
Think about it. . . you may find that more concentration on your art and less time studying the engineering just may be the ticket to more creativity and less time wasted engineering.
 
JB

Posted by JB Harlin in Commentary, Photography

CLAM SHELL PORTFOLIO BOXES

I am a big fan of vertical integration. . . the more parts of your business that you control, sometimes the better management you have of your product.  There are times you have to depend on the capabilities and expertise of some vendors. . . then there are times you just have to learn to do it yourself.

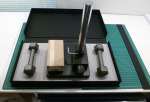
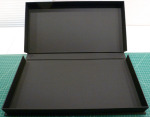
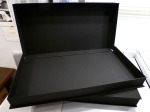
So, having said all that we have started another project.  Seems really nicely built portfolio boxes are hard to find and expensive these days. . . especially when you need something other than what would be considered a standard size.  Susan’s prints are mounted 12×24 and obviously, that is not a standard size.  She has been looking for some time for a supplier of really nice portfolio boxes.  She has had little luck finding anything. . . so. . . time to take another approach. . . Build It Yourself!

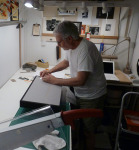
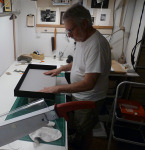
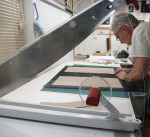
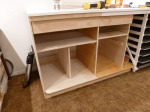
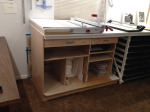
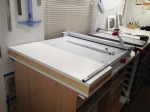
That is where we are now. . . building our own clam shell portfolio boxes.  This required a little updating to the work room.  Building another cabinet to hold a board shear, acquiring a suitable shear and stocking up on supplies.  Did I mention learning another trade?  Here is one more I can add to the resume.

I have successfully finished three 12×24 boxes for Susan and now I head off to make a few for my prints.  It is really nice to be able to roll your own!


Just in case anyone is interested. . . I might be talked into making some boxes. . . maybe.  If you are interested drop me a line. . . they will not be inexpensive. . . nor will they be cheaply constructed.  We use the finest acid free materials and high-quality book cloth.

JB

Posted by JB Harlin in Photography, Presentation

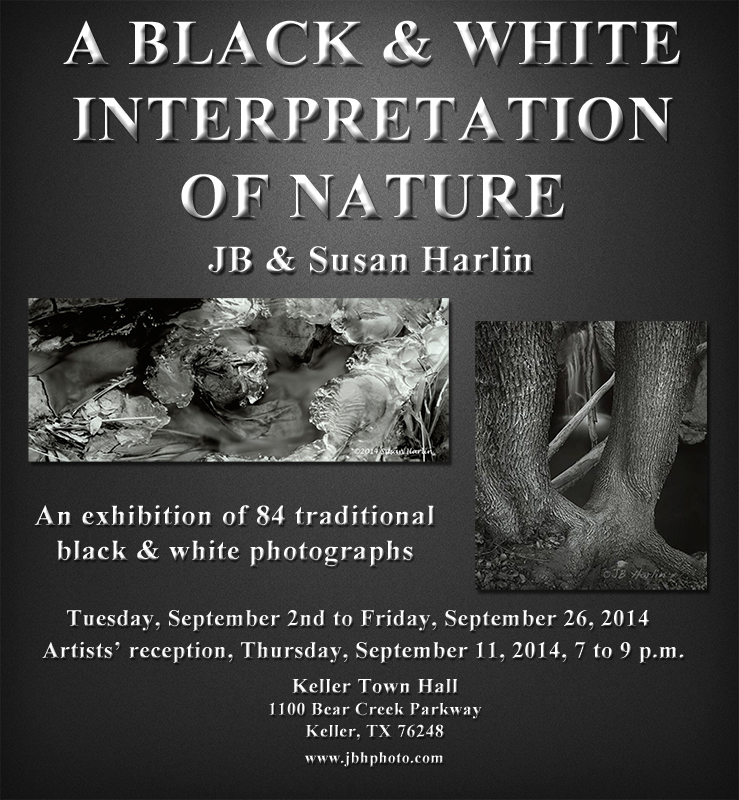
A BLACK & WHITE INTERPRETATION OF NATURE

If you’re in the Dallas/Fort Worth area in September, I hope you can stop by to see our Exhibit. The reception will be held on September 11th from 7-9 pm.

JB & Susan

Posted by JB Harlin in Events, Film, Photography

CRATES FOR TRANSPORTING FRAMED PRINTS

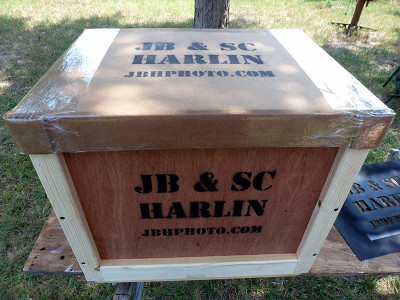
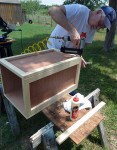
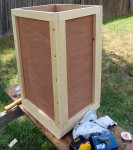
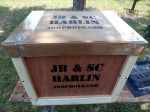
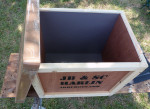
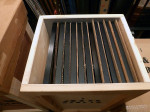
We seem to be doing more exhibitions and it is always a challenge to deliver framed prints.  For years we used heavy cardboard boxes, but they are not that durable.  It was always nerve racking to handle a box of framed prints on a two wheel dolly when transporting a lot of framed prints.  There comes a time when you just have to  build what you need.  Wood crates are by far the best and safest way to transport multiple framed prints.  This is not a difficult project and when you build your own, you can design custom-size transport crates that suit your specific needs.

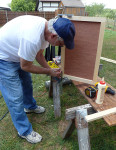
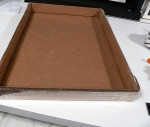
Building a custom transport box is nothing more than designing a simple wooden crate.  We also make a cover that slips over the top from regular corrugated board.  Gather a few pine boards and a sheet or two of 1/4″ plywood, some hardware and you are ready to start building.   I like to use an air brad nailer and a cutoff saw, but you can get by with a few hand tools.  I rip 1″x10″ lumber into 2″ runners and this requires a table saw.   You could buy pine in 1″x2″ and skip this step if you don’t have a table saw.   The side panels are made by cutting 1/4″ plywood to the desired size and then edging it by nailing and glueing 2″ runners on all four sides.  These panels are then assembled into the box using more glue, brads and deck screws.  The bottom of each crate is reinforced with wooden cleats and also have wooden skids with tapered ends.  Take a look at the photos to get an idea of how our crates are built.

Once the box is assembled, I will go over the outside with a belt sander to smooth things out.  Next I like to use a router with a 1/4″ round-over bit to round all edges.  A little hand sanding and any chance of splinters is pretty much eliminated.

The boxes we use are sized to be about one inch larger than the frames they hold.  Each box holds about 10-15 framed prints and are pretty heavy when filled.  I like to line the inside of the box with single-ply mat board.  This helps to keep the frames from scuffing against the raw wood.  We cut corrugated board just a little larger than the frames and use one sheet between each frame.

It is a pleasure to have nice crates to transport your framed photos.  A few nice sturdy crates protect your framed art and make moving much easier and safer for your work.

JB

Posted by JB Harlin in DIY, How-To, Photography

LED LIGHTING

We have finally started to transition into the 21st century.  I have been doing research into LED lighting for our darkroom and workroom for some time.  Not because I really care that much about the power use. . . I am more concerned about the useless heat generated by incandescent lighting.  In case anyone has never investigated this, your standard filament-type lamp produces more infrared heat than visible light.  We live in Texas and every bit of heat generated inside has to be pumped out with the A/C system.  Need I say, I really don’t care for hot weather, nor a hot house.

I have been intrigued by LED lighting and I have been following the technology for some time.  Up until recently LED lighting has been very expensive and not all that great as a replacement for the old reliable standard incandescent light bulb.  Cost not being factored in, there was still an issue of the color of the LED lighting and something completely new to me. . . CRI (Color Rendering Index).  When you are working with photographs, CRI becomes a very important consideration as well as color temperature.

Most everyone is familiar with color temperature.  Measured in degrees Kelvin, light is either warm or cold in appearance.  The standard incandescent lamp has a color temperature of somewhere between 2700K to maybe 3000K for some halogen lamps.  We have always used standard reflector flood lamps which inherently have a color temperature of 2700K.  LED lighting now is available with color temperatures that range from 2700K to 5000K.  This was an easy choice for us. . . what I wanted was something that matches what I have always used, so 2700K is the logical choice.

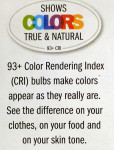
Seems that the newest specification for LED lighting is the appearance of CRI.  You will find very few lamp manufacturers that will specify the CRI.  CRI is a measure of how well a light source reveals colors.  The sun has a CRI of 100.  The very least you can expect anywhere near true color is a CRI of no less than 84 or so.  Most incandescent lamps have a CRI of about 93 to 94.  Many LED lamps have a CRI of about 80. . . not that great.

There is one more specification that is important and that is the lumens a lamp produces.  This is simply the amount of light created for the watts of electricity used.  The higher the number, the more light output.

That is a lot of information, but let it suffice to say that things have finally caught up with what I might call the Heat : Color : CRI : lumens : $$$ ratio, and it is finally time to seriously look into LED lighting.  We found a suitable replacement for the lighting in our workroom and proceeded to test the LEDs against the old incandescent lamps.  I first replaced random lamps among twelve 45W reflector lamps that light our work area.  Once on, I could not detect any difference in the light color, coverage or quality.  I looked at color under each light and saw no perceivable difference.  I had one more test. . . take a digital photo of the room and see if the camera could see any color difference.  We both looked at the photo and could not tell where the LED lamps were compared to the others.   The biggest difference we saw in the workroom was the blue of the light coming in the window from outside.  So far, so good!  Next we lived with the new light for a few days.  Did the color comparison several times.  Took more digital photos, both with the Panasonic digital cameras and with the iPhone camera.  Still, even the cameras were not showing any difference.  That was it!

Next. . . the darkroom.  We have had two fluorescent fixtures in the darkroom for as long as we have been here.  I hate those greenie-weenie light things know as fluorescent.  I have wanted to install track lighting above the sink for years, but did not want to put up with the heat.  We installed a track with four fixtures and 65W equivalent LED lamps. . . what a difference!  We also installed two, three-lamp fixtures for general room lighting.  We next repeated the tests with the cameras and there is not a detectable difference in the color of the light.  We did several visual color comparisons and there just wasn’t any discernible difference between the incandescent and the LED lamps.  That was pretty much all that I needed to see. . . fixed!

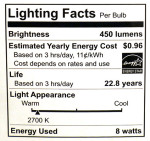
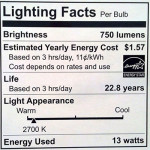
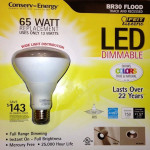
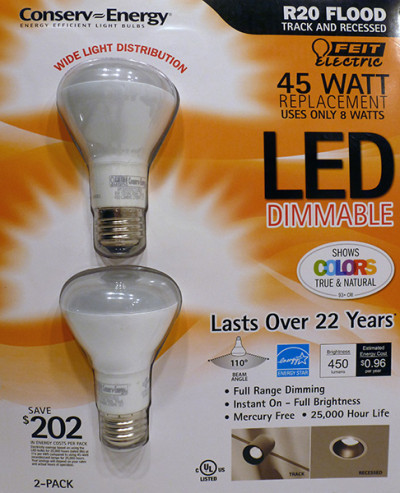
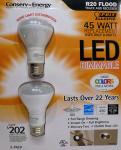
I know the question will come up as to what manufacturer and which lamps we selected.  We chose the Feit Electric R20, 45/8W, 450 lumen and BR30, 65/13W, 750 lumen LED lamps.  These are reflector lamps with a 110 degree beam angle and a CRI of 93+.

One of the most noticeable things about the LED lighting is the absence of searing heat.  The lamps themselves do get warm, but there is none of that burning IR heat that will even warm a black object on the table top.  I also need to add that these LED lamps are dimmable and do work with every dimmer we have tried them with here.

 
If you are looking to upgrade to LED lighting, these seem to be about the best at this time.  I am sure that as the technology matures, you will see even better performance and pricing.  It is like most all high-tech items today. . . you have to choose a point, then jump on the band wagon.  Tomorrow there will be a whole new ball game.  At least we have chosen to start now.  We have taken the leap into LED lighting.  We’ll see how well these hold up. . . the manufacturer claims their lamps have a 22 year life!

JB

Posted by JB Harlin in Darkroom, DIY, Photography

A DAY FOR CHOOSING

Negative Selector SheetsEvery time I head into the darkroom I learn something new. I learn another way of thinking, working, creating or just being a photographer. Everyone knows that the first thrill in photography is just being there. You are out in some visually exciting environment, suffering from optical overload. You know that the vast majority of the film you expose will never be printed, but still you shoot away. I cannot count the number of times that the one I really had hopes for really flops when printed, and the one that was just a wild guess is a keeper. That is why you shoot. . . even if you are not really confident the results will be worthy of the film. You just never know, but if you do not make the exposure, you are guaranteed to have nothing.

Once you have all of the film processed and proofed, then begins the arduous task of selecting what you want to print. This is always a tedious and mostly unforgiving chore. Making a finished print is time consuming. I would say that either of us will put in ten to twelve hours in a typical printing session.   And, generally we will produce, on a good day, four finished prints. Some days maybe less. That is why it is very important that the negative chosen needs to be well thought out, and you need to have some amount of confidence and a plan before you begin.

I don’t want to go into the darkroom and start haphazardly printing. I want to have some organization and a good idea of what I am going to be doing before I begin. Nothing is more frustrating than floundering around without a good starting point. It is bad for the head, it wastes time and materials. I would rather not print a day, spend that time getting prepared and then print the next day. I find that creativity is fleeting and if I am not in the mood, don’t even go there. Find something else to do till your mindset is correct. Negative Sheet

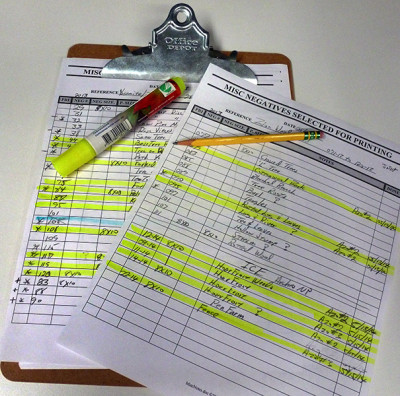
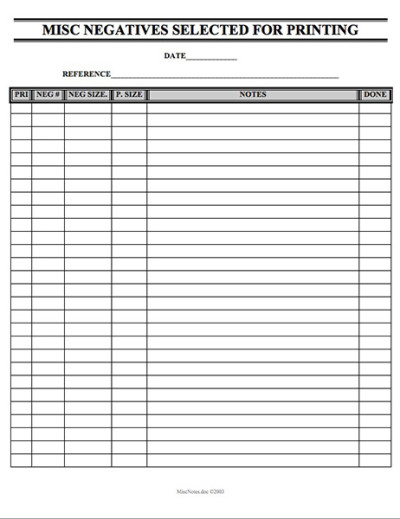
The process of negative selection begins by studying the proofs. We have worked up a sheet that we fill in with interesting photographs we would like to print. We call this sheet “MISC NEGATIVES SELECTED FOR PRINTING” and it is little more than a group of boxes to fill in with negative numbers, film size and notes. I ginned this up using a word processor years ago and we run off multiple copies and keep them on a clipboard in the darkroom.

As I said before, I keep refining my creative process. I have learned one thing that is even interesting to me. I have found that I print much better, have much greater success that is, if I concentrate on one particular type of photograph in a printing session.   For me, at least, if I am printing say wood and leaves and having a good day, it is not a good idea to switch to printing running water or snow. It just doesn’t work well for me.

So, I have begun grouping my selected negatives into those that are of like content. An example would be; on our last trip we were in Yosemite NP, Zion NP and Arches NP. I did a lot of wood details in both Yosemite and Zion, so I have grouped all of the similar subject negatives onto one sheet. This way, I will only print those negatives in one, or several consecutive printing sessions. I have quite a few snow and ice negatives from Yosemite and Arches. Those will be grouped and printed in another session.
This may sound strange, but for me at least, I find that I print better when I get into one sequence of thought and keep the subject matter similar. It just works better for me. . . maybe it would work for you also?

Finding something worth exposing a sheet of film to is one thing. . . the next step is selecting the very best of your film for the finished print. Anything you can do to help will be a great asset to your art.

JB

Posted by JB Harlin in Commentary, Darkroom, Photography

ART & CRAFT

“. . . art lifts off from craft.  Artist do things that craftsmen don’t know are possible.”  -David Vestal-

The photographic artist is a blend of craftsman and artist.  The finished print is the interpretation the photographer has chosen to display for consideration by the viewer.  This finished print is seldom a true representation of what was actually in front of the camera at the moment of exposure.  The photographer chooses, through the practice of craft, to present his, or her, interpretation of what they saw and felt at that exact moment in time.

The photographer must be a master of both art and craft.  There must be a confidence in the practice of the craft that allows him, or her, to be able to convey what is seen within their mind’s eye into the finished print.  The technology, limited by the mechanical and chemical boundaries, must be understood and used to the best advantage, or the image will fail miserably.  The craft is fused with the artistry by understanding its limitations and properties, then using them to their best advantage to create the fine art print.

Honing one’s craft allows for the seamless integration of the inherent limitations of the medium with the artistic creativity within the artist.  The craft should not be evident to the viewer.  The use of craft solely for the sake of craft is annoying and obvious. 

When the photographic artist is in the field, working with their subject, they should not be distracted by fumbling with their craft.  Having to think about technique or hardware distracts from creativity.  The photographer should know their tools to a point to where it is not a distraction.  When dealing with art and craft, neither should get in the way of the other.

Learning and mastering the craft of photography is the easy part.  Craft follows the exact rules of chemistry and physics.  The art of photography is the hard part.  There are no rules in art.  The artistic statement is simply correct when it looks right.  No amount of calculation nor measurement can be applied to art.  So the logical approach is to first learn, then hone one’s craft, then use that skill to its greatest advantage to create an artistic statement.  Simply put, in the creation of photographic art, the craft should be invisible.

JB

Posted by JB Harlin in Commentary, Photography

THANKS EVERYONE! W.K. GORDON CENTER TALK

We would like to thank everyone that came out today for our talk “PHOTOGRAPHY THEN TO NOW”  in Thurber.  And, a special thanks to the W.K. Gordon Center for inviting us.

It was great to see everyone. . . we had a great time!

W.K. GORDON CENTER

JB & Susan

Posted by JB Harlin in Events, Film, Photography

W.K. GORDON CENTER “PHOTOGRAPHY THEN TO NOW” JB & SUSAN HARLIN

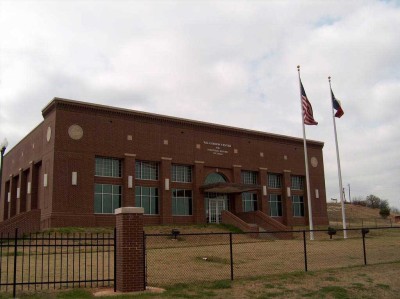
W.K. GORDON CENTERWe have been invited to speak at the W.K. Gordon Center for Industrial History of Texas in Thurber, Texas, Sunday April 27, 2014 at 2:30pm.  This will be a presentation titled “PHOTOGRAPHY THEN TO NOW” and will be a discussion of the photographic process and equipment used over the years leading up to modern film photography.  We will have a few older cameras from our collection and some vintage and modern photographs on display.  For more information click HERE.  Directions to the Center HERE.

Everyone is invited to join us. . . hope to see you there!

JB

Posted by JB Harlin in Events, Film, Photography