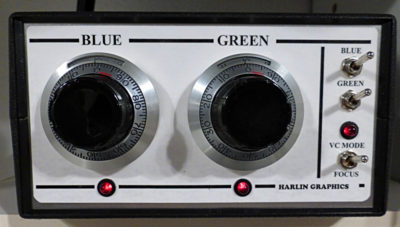
8X10 LED VC ENLARGER HEAD

8x10 LED VC Control Head
There are always those projects that you really want to undertake.  But there is sometimes hesitation due to doubt as to the feasibility, or maybe the availability  of the needed technology at the time to make the idea reality.  Here is one of those projects that has been in the pipe, yet on the back burner, for quite some time.  There were doubts as to whether this one would work.  What the heck am I talking about. . . OH. . . that?

We finally committed to doing the research and development of an LED VC head for the 8×10 enlarger.   This one took some time for research, design and testing, but it is finally a reality.  Want to read about what it took to build a working 8×10 LED VC enlarger head?

Look in the Articles Area of our web site for the story or, here is the direct link to the PDF ”

DESIGNING & BUILDING AN LED VC ENLARGER HEAD.”


Posted by JB Harlin in Darkroom, DIY, How-To, Photography

ZONE VI; THE END

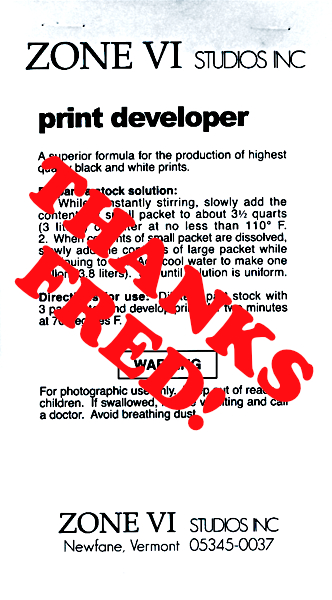
Zone VI Print DeveloperIt has finally happened!  I have used Zone VI chemicals for well over twenty five years now.  Though we have moved on to different formulations for finished prints, we have continued to use Zone VI Print Developer for proofing.  That is. . . until now.   I mixed the last bag for proofing our 2015/2016 trip and that is that.  This has been a looming change that has been in the back of my mind for several years now and it finally came time to do some testing.  OH Drat. . . TESTING!!!

Remembering a conversation from years back someone, somewhere, said that Zone VI Print Developer was just D-72. . . or maybe Dektol?  There is one sure fire way to find out. . . “TRY IT” as Fred would say.  And that is exactly what I did.

I mixed a liter batch of D-72 and used the last of the Zone VI Print Developer in a side-by-side test.  First I exposed two sheets of our proofing paper, set to Grade #2, to a Stouffer 21-Step Wedge.  Processed one sheet in each developer and finished as usual.  Both developers were diluted 1:3, all temperatures were matched and the Zone VI Compensating Developing Timer was used on each.

After the test sheets were dry, I measured them with an XRite 810 densitometer and plotted the curves with the BTZS Plotter app.  I knew from the numbers they would be a near match and the resulting graph shows very little difference.   That pretty much settled that.  (NOTE:  In the plot, the black line is D-76 and  the red is Zone VI.)
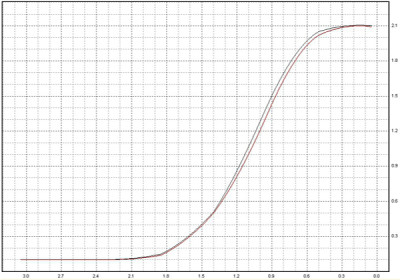
D-71 vs Zone VI Graph
There was only one more test required to convince me, and that was making a real proof.  I chose a familiar negative and exposed two more sheets of paper using this negative.  Each sheet of paper was developed in the same fashion as the step wedge prints and finished as usual.  The two proofs were a near identical match.  The Zone VI was very slightly less contrasty, but that could have been due to the fact that the developer was old.  The main thing I was looking for was to be sure the color of the two proofs were the same.  They are, to my eye at least, exactly the same color.  (NOTE:  The proofs below, on the left is the D-72 and on the right is the Zone VI.)

All that was left to do was to make a new paper grade test to confirm the enlarger VCCL settings required to print a grade #2 and that was the end of the testing.

FYI;  Here is how to calibrate a VC enlarger, “USING BTZS TO CALIBRATE A VARIABLE CONTRAST COLD LIGHT” originally published in the Sep/Oct 2007 issue of View Camera Magazine.  I have added the formula for D-72 to the FORMULAS area of the jpbhphoto.com BLOG.
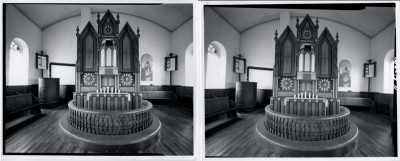
Zone VI & D-72 Proofs
It’s a sad day but finally Zone VI, as a supplier of darkroom chemistry for us, is gone forever.  The good news is, it is possible to mix your own developer and achieve the same results that we have become accustom to over the years.  Proper proofing is the control and the verification that your technique is working as you think it should.  It is important to keep the proofing process as consistent as possible.  I believe we are good to go without Zone VI now.  Thanks Fred for all you did for traditional film photography!

JB


Posted by JB Harlin in B&W Paper, Darkroom, Photography

TIME FOR A CHANGE & A NEW TRIPOD BOX

We decided to retire our 2006 Chrysler Town & Country minivan this year and move into something a little bigger for road trips.  This minivan has served us well for the last ten years.  It has traversed from the Pacific to the Atlantic coasts. . . more than once.  But, there comes a time when you need to look into making changes.  We have loaded this little Town & Country and the previous Plymouth Grand Voyager to the hilt and trekked off on road trips many times.  But, there comes a time when you need to reassess the situation.

We have worked out a loading scheme that allows us to carry the main cameras we use, but there is more!  I have not hauled the 16×20 camera in near 10 years now.  It is just too much to fit into a minivan.  Seeing how our Town & Country is now 10 years old and just turned over 100k miles, we started thinking about something new.

It has taken 3 months of research, a lot of looking and just thinking about what our traveling goals really are.  We wanted something a bit larger, without all the fluff of computed-out over the top luxury vehicles, like the current minivans all seem to be obsessed with.  What we wanted was a TRUCK!  We looked at a pickup with a topper, but that did not suit our goal.  Everything we found in a van was either massively big, or ridiculously small.

On the last trip to Utah we had the opportunity to see a lot of rental vehicles on the road and in the parks.  That along with a lot of searching the Internet, it was becoming obvious we were not finding anything that would work for us.  Near giving up, on a day lost to rain in Springdale, UT, I found something searching the Internet one more time.  There is one vehicle that fit between too much and too little.  More research, and then a visit to a dealer, after we returned home, pretty much sold us on the idea that we had found a vehicle that would work well for us.

We finally settled on the Nissan NVP 3500 12-passenger van.  This is a relatively new vehicle, just going into production in 2012.  The NV is basically a Nissan Titan truck built into a van.  They have several models that are sold with no interior for work trucks.  But, Nissan did something that makes real sense.  They build a passenger model, with full interior and seating for 12 people.  We drove one and decided this, minus the seats, would be just fine for us.

The NVP has become very popular with large families and are somewhat hard to find. . . at least if you want a particular color or configuration.  We made a request for what we wanted and sure enough, the salesman found one and had it brought in for us to see.  That did it. . . Sold!

We spent a few hours at the dealership and brought the blue NVP home.  First order of business. . . remove the seats.  They are removable and are just latched to the floor.  Into the storage barn they went.  Next we needed to build a new tripod box.  Took a little time and some CAD work to come up with a new box and a way to get it mounted to the floor.  Had to design a mount that would attach to the factory seat hold downs in the floor and then build a new box to hold four tripods.  

Some plywood, some glue, some aluminum bar stock, a few dozen deck screws, assorted hardware, sawing, machining and finally a luxurious covering with speaker carpet and there you have it.  The tripod box is installed and ready for the road.  Now we need to get out. . . and yes the 16×20 will be back on the road!

And not to forget the 2006 T&C. . . we removed the tripod box that has been in it for the last ten years and put the factory seats back in.  It now looks just like it did when we first got it.   The 1999 Plymouth Grand Voyager with near 170k miles had to go and was sacrificed as the trade-in.  

Yes. . . it is Time For A Change!

JB


Posted by JB Harlin in Photography, Travel

THANK YOU, EVERYONE!

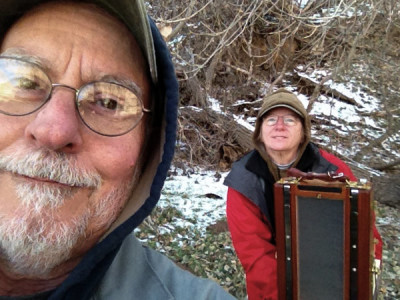
Susan and her 4x10 Zion NP

Susan and her 4×10, Zion NP


We spent the greater part of last December traveling in Southern Utah.  We visited Bryce Canyon NP, then traveled to Zion NP and the area surrounding Springdale.  Next we ventured to Moab, where we visited Arches NP and Canyonlands NP.  Hope everyone enjoyed our random From The Road emails and thanks for traveling along with us!  We will put up a travel album on our web site as soon as we get a little time.

Don’t forget the selfie!  That seems to be the latest fad and though irritating at times, the preverbal ‘selfie’ has its appeal.  We are no different, I guess.  We did make a few obligatory selfies on our last trip.  Saw a few people with those selfie sticks. . . some were pointed out car windows or an open moon roof while driving.  Really wonder what kind of images they got?  Having said all that, and not to be out done, we include a few here for your viewing pleasure. . .

Needless to say, we have quite a bit of film to process and that will take at least another month before we begin to see what we brought back.  In a world of instant gratification (keep that selfie stick out of my face!), there are those that can’t understand how anyone could be that patient.  This is one of the greatest attributes of LF and ULF film photography.  It teaches you patience.  You take your time when finding a subject.  You spend even more time composing the image.  Making that exposure is a one time thing.  You make sure. . . then you make doubly sure, before you expose that one sheet of film.  You know that you will not even get an inkling of what you captured for quite some time, so you give it your best and hope what you do pays off.

We continue to follow our passion for LF and ULF film photography and do send our deepest heart felt thanks to everyone for your continued support.  Each year there seems to be more and more interest in film and is extremely encouraging.  Happy New Year to all.  Hope everyone has a great 2016!

Agin, Thank You Everyone!

JB & Susan


Posted by JB Harlin in Film, Photography, Travel

DO YOU LIVE WITH YOUR PRINTS?

DO YOU LIVE WITH YOUR PRINTS?

It is always fascinating to see your finished photographs hanging in an exhibition space.  Mounted, matted, framed and properly lit, they always make me ask myself, did I really do that?  This is what fine art photography is all about.  It is not about the camera, the film, the tripod, the developer. . . it is all about that finished photograph.  Do you really care what brand of saw or chisel was used to craft a piece of fine furniture?

In today’s world of here today, gone in five minutes (or less), it seems people do not appreciate, nor are they particularly interested in long-term anything.  Quickly snap a selfie, post it to social media, laugh and move quickly to the next nothing.  No one prints photographs anymore.  We are losing that engagement that comes from holding a printed image in our hands. . . or enjoying it on the wall for days, years or a lifetime.   But, as usual, I have strayed way off topic and begun to ramble.

The print is what photography is all about.  I wish I could make more prints from the negatives I have, but it is a difficult task to make fine prints.  I find that I have to be in the right mindset to print.  If I cannot clear my mind and concentrate on printing, it is nothing but an effort in futility.  I would venture to say that I print, at best, 10% of the film I shoot.  I find that after printing for several weeks off and on, that I need to take a break and look at what I have done.

During the printing process, I really don’t take a lot of time to really deeply look at what I am doing.  I have selected the negative that I believe will make an image that I will like.  I have studied it carefully, made my best selection and feel the content of the negative is sufficient to warrant printing.  At this point I am in darkroom mode; involved in the process of shape, form, light and texture.  I have a good idea of what I want in the print and I am absorbed in the process of coaxing everything I can from that finished print.  But do I really look at the print?  Not in a sense of seeing what is there. . . not in a sense of living within the finished photograph.  That comes later.  I am concentrating on getting the print done and making sure the process is completed as it should be.  

DO YOU LIVE WITH YOUR PRINTS?
Days later, maybe even weeks later, once the print is dry and flattened, then I really get to study what I have done.  I can shuck away all that technical chatter and look objectively at the print. . . and only the print and its contents.  I like to look at the finished images and study them carefully for flaws, or mistakes I made in the darkroom.  I look carefully at the photograph and if I am happy with what I see, it is time to move to the next step.  

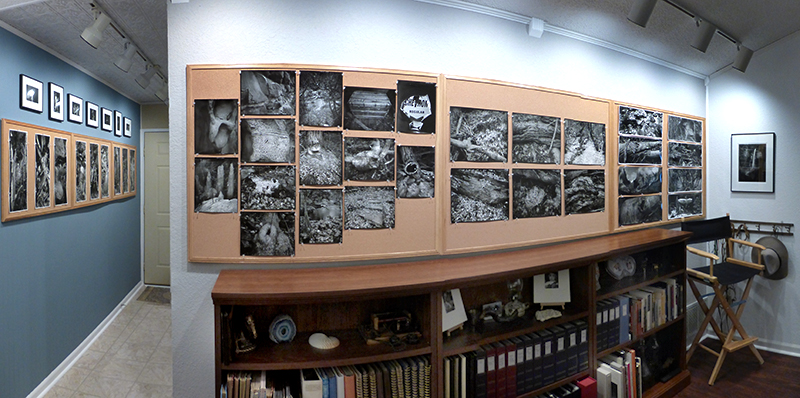
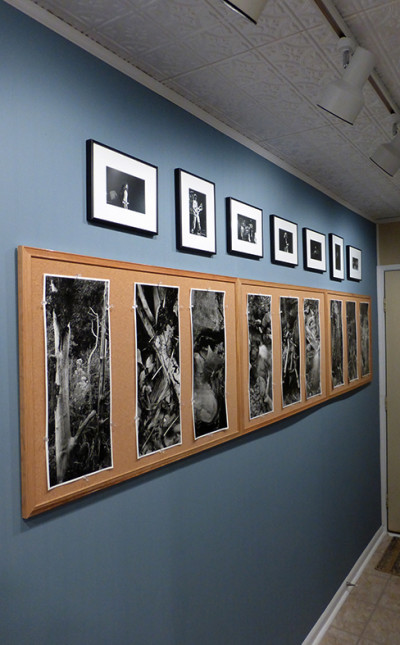
This is where Living With The Print begins.  We have two large cork boards illuminated with track lighting just for this purpose.  I like to pin up my finished images and look at them. . . on the wall. . . under proper illumination. . .  for an extended period of time.  How long?  Weeks; maybe multiple weeks; depends on many factors.  My wife and I both put our finished prints up and look at them. . . over some amount of time.  After a while it becomes obvious if something is not right.  Maybe the composition is just not acceptable; then discard the print, go back and try making another negative.  Maybe the printing is not what it could be; go back to the darkroom and print it again.  Maybe it just doesn’t work at all; discard the print and try something else.

These are all choices you have to make on your own.  It is up to you to determine whether your photograph is exactly what you want; or does it miss the mark?  Should it be reprinted; or should the entire idea be abandoned?  Sometimes, older negatives that didn’t make it the first time can be reprinted years later and make a more than suitable finished print.  You change. . .your vision changes. . . your skills as a printer change. . . or your idea of what you want to express may change.  Never say never!

The important thing is to Live With Your Photographs. . . that way you will know if you have been able to say what you want with your hard-earned finished work.

JB

Posted by JB Harlin in Commentary, Photography, Presentation

WHY COMPLAIN SO MUCH?

Why Complain So Much?It seems that I hear a lot of bellyaching about this or that when discussing getting out with a view camera.  I wish it really were that easy, but working with large cameras and sheet film is not something that is trivial nor easy.  Here are a few complaints I have heard;
  1.  My dark cloth is not dark enough
  2.  My dark cloth is too heavy
  3.  My ground glass is not bright enough
  4.  I want one of those inverting viewers
  5.  My lens is not exactly the one I want
  6.  My camera is not sturdy enough
  7.  My tripod is too heavy
  8.  It is way too hot (that one is mine)<
  9.  It is way too cold (not for me)

It is much too easy to complain rather than to just suck it up and get to work.  Nothing is ever perfect and if you really want to get out and expose film, you will learn to work with whatever you have, in whatever conditions may occur.  I believe most of this is more about using complaints as an excuse not to get out and make photographs as it is about reality.  As I said, making photographs is difficult hard work, especially with a large view camera.  It requires dedication and a stick-to-it kind of mindset.

Let me address some of these items from my viewpoint;
 

  1. I have never had a dark cloth that wasn’t dark enough.  If the cloth is black on the inside and relatively thick it is plenty good enough to see your ground glass.  The main purpose of the dark cloth is to cancel any light and reflections on the ground glass so you can see to compose and focus.  It will seldom be cave dark if you are out in bright sun.  Quit looking at how bright it is and concentrate on the ground glass.

  2. Yes, if you have a 100% opaque dark cloth, then the odds are it will be heavy and even cumbersome to use.  May not always be the case, but everything is a trade off.

  3. The ground glass is not a computer screen. . . it will never be as bright as a TV or computer screen.  In my experience everything I have tried makes things worse for me.  I tried a Fresnel. . . once. . . not for me.  Yes it was brighter, but the lines broke the image up to the point I could not easily focus.  I got rid of it and learned to use what I had.  I prefer a plain ground glass.  I have learned to use it.  Remember to let your eyes get accustomed to the dark when you get under the dark cloth.  The longer you stay under there the better you will see.  Be patient.

  4. I have said this before and I will repeat;  nothing will improve your composition any more than looking at your subject upside down.   This is a fact. . . get used to it. . . use it to your advantage. . . it is true!

  5. Don’t go there. . .  optimally you need, a short, a medium, and a long focal length lens.  If you can’t afford all three, compromise and learn to use what you have till you can afford something else.  Not a good excuse.

  6. Everything in a mechanical design is a tradeoff.   The lighter and smaller your camera folds, the less sturdy it will be. . . fact of life.  Remember: The camera only has to be still when the shutter is open!

  7. Tripods are another tradeoff.  Light tripod; less sturdy, more prone to vibration.  Heavy tripod: more sturdy, less prone to vibration.  You get to choose.  Me, I carry a 19 pound wooden tripod for 8×10 and 11×14.  I wouldn’t use anything else.

  8. This is my worst area.  So far as I am concerned, when it gets to 80F, it is way too hot for humans to function.  Working with a large camera, I begin to draw the line at 50F.  And, I am not going to get over it!  Being sick and suffering heat exhaustion is not a fun time, nor is it creative.

  9. Too cold. . . what is that?  I prefer to work well under 40F.  We have worked at near 0F and survived.  My rule; if I break a sweat, time to head home.  See, I also whine!

 
Nothing is ever perfect and the lack of perfection is not an excuse for not making photographs.  You can always find some reason not to get out, how about finding something worth exposing a sheet of film on instead of complaining?   When I wrote this it was the middle of July, 103.8F, with a dew point of 62F on the back porch.  I don’t even want to look outside, let alone go outside in this kind of weather.  I have whittled my list of complaints and excuses down to hot weather. . . how about you?
 
JB

Posted by JB Harlin in Commentary, Photography

DALLAS PHOTO SWAP MEET: OCTOBER 24

For one day the studio space at DCP will be stuffed full of photo gear for you to buy or trade. Expect to find the usual and the very unusual on 24 tables of cameras, lenses, lighting, bags, doodads. . . we’re not sure what will show up! If you’ve never been to a photo swap meet then you’ve been missing out!

DCP is hosting this event with help from Don’s Camera, the best used camera store in the region.

Whether you’re a professional dealer, full time photographer or just a hobbyist with a spending habit and a closet full of stuff to get rid of then rent a table and come be a vendor. If you just want to sell or trade a few items you can buy a ticket and see what kind of deal you can make with one of the vendors.

Doors open at 10am and close at 4pm. Entry is $5 cash at the door. Kids 12 and under get in free.


Posted by JB Harlin in Events

NORTH TEXAS MEETUP AUGUST 1ST

We have arranged for DFW area photographers to have a meet up and print share at a space in the Deep Ellum area of Dallas.

We will meet Saturday August 1st (2015) at 11:00 AM at;

GET REEL GOODS 

2614 Elm St. Suite #120

Dallas, TX. 75226

… then go to lunch afterwards somewhere in the area.

As we’ve done before, lets’ start with bringing as many prints as you like (or none), but let’s limit our presentations to 4-6 photographs and 5-10 minutes time, depending on how many we have. We want to make this a monthly thing, and now that we have a space (always the problem before) we are in a better position.

Thanks to Augusto Schillaci for arranging the space!!!

Hope a large group can make it. Come whether you have anything to show or not. See you there!


Posted by JB Harlin in Film, Photography, Presentation

UPDATE TO FORMULAS

We have just updated the FORMULAS area here on the jbhphoto.com BLOG (click the link at top of the page).  What you will see is mostly cosmetic with a few corrections here and there.  The formatting of the older area was made of screen grabs of notes and was not that well organized.  Hopefully it is now a little more tidy.
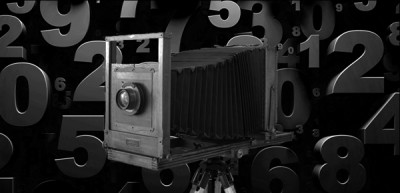
Very little changes in the realm of the wet darkroom and film photography.  There are no fads. . . no here today, gone tomorrow. . . no high-tech gadgets. . . no amazing updates.  Traditional film photography is a craft you learn; fine tune; then use.  The bottom line is the finished fine print.  Traditional film photography is very old fashion and grounded in down-to-earth proven techniques, that once learned are the backbone of the art form.  Bottom line; not a lot to stand in line or camp on the street to be the first for some new-fangled gadget or upgrade.  Once you master the technique, there are no excuses not to produce finished work.  Film photography is a craft; you learn it; then you use it; for the rest of your life; and you pass on what you have learned.

In our Formulas area you will find the mixtures we use.  Nothing very special about anything we do, and it would be a good assumption you will see little new there.  Take what you can make work for you; leave anything else for the next interested photographer.

JB

Posted by JB Harlin in Darkroom, DIY, Film, Formulas, How-To, Photography

LOOK, FEEL, PRESENCE & NUMBERS

Numbers can not quantify a feeling. . .

A fine photograph has A LOOK; A FEEL; A PRESENCE; there are qualities that cannot be measured or codified.  They are seen and felt, yet have no tangible attributes. . . some things are impossible to put into words.  You can run tests, plot curves, generate computer models, but the emotional response, if any, to a photograph is an experience and not a quantifiable known.

In the process of making the fine photograph there are subtle adjustments that the photographer literally pours into the image.  These fine adjustments may actually not even be perceivable to the viewer, but they make or break the finished image.

In the creative process of making a finished print, there are no hard and fast rules.  There are photographs that take on a completely different atmosphere than may have been seen or felt at the time the film was exposed.  These are those “happy little accidents” as the painter Bob Ross would say.  You may follow one direction you believe will make the image speak when in the field, which is totally abandoned in the darkroom at the time of printing.  You make your best estimate as to what you believe you will eventually end up with, but you will not absolutely KNOW for sure what a film, paper, developer combination is really doing until you make a real photograph.  It is all about that feeling.  Do not allow yourself to get locked into any preconception.  Allow your creativity to guide you.  Do not get hung up on numbers or any hard and fast rules.

I keep coming back to the same point; you can not calculate feeling.  There are some things that just exist and are not possible to be explained by a mathematical expression. . . they are emotional expressions. . . emotional responses. . . subject to any number of personal preferences of the individual. . . these preferences are the product of what make each person an individual. . .  you cannot measure these things. . . they are subjective.    Think about it. . . can art really be created and expressed by numbers???

It is about personal taste. . . Ford or Chevy. . . Coke or Pepsi. . . red or blue. . . one size does not fit all.  What you may find perfectly acceptable in a film developer combination may not suit my taste at all.  My father used to say, “that is why they paint cars different colors.”

Keep in mind that any hard rules or numbers are only a starting point. . . only a suggestion.  Creativity comes from reaching far beyond hard figures and rules.  The creative spark reveals the inner feeling by stirring the imagination with creativity.

JB

Posted by JB Harlin in Commentary, Photography