KEEPING NOTES

KEEPING NOTESI have written quite a bit about LF and ULF photography here on the jbhphoto BLOG since we started back in January of 2009. A lot of it is my rambling about this or that, and sometimes I tend to repeat myself. Oh well, must be old age??? One thing that I do not remember writing about is keeping notes. We are both meticulous about keeping records of our travels and detailed notes on the film we shoot.

We do several things when we go out on an extended trip. One is to make a lot of snapshots. They are an excellent way to keep track ofKEEPING NOTES the places we visit and are used to plan future trips and serve as a visual reminder of the places and things we discover. We also keep a daily diary/travel log of what, when, and where we were on a particular day. I have to admit that Susan is better at the diary than me, but at the end of every day before we drop off to la-la land, we try to type a few paragraphs. We keep this on a laptop computer and entries continue till the trip is over. It is a great resource, along with the snapshots, later when trying to come up with exactly what happened on any particular adventure.

But, the most important notes are those that pertain to the film we shoot. I experimented for some time when I first started shooting sheet film and eventually came up with a record keeping scheme that works. We have both used this method for many years and it has given us detailed records that, when needed, are invaluable.

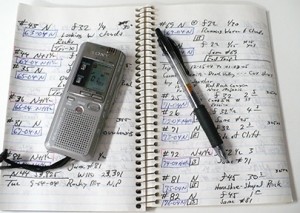
When I first began seriously trying to keep film notes I started off with a small notebook. For me though, having to fumble with pen and paper was just not working. So I came up with the bright idea of using a small voice recorder. This worked great! I would record one entry for each exposure and later transcribe the information into a notebook. We both used a micro-cassette recorder for years, until mine just flat quit working. It was worn out and had to be retired.

At this point the digital voice recorders were available and they opened up an entirely new way of record keeping. With the digital recorders it is even easier to keep up with the daily notes. We make one entry for each exposure. The digital file is date and time stamped and it is easy to upload them to the laptop computer. This we do every evening along with updating the daily travel log.
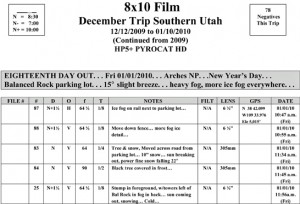
Originally we transcribed each film audio entry into a notebook by hand, but starting about three yeas ago we began typing this information into a computerized form. This form has spaces for Negative Number, Film Holder Number, Development, Image Orientation, f Stop, Shutter Speed, Notes, Filter, Lens, GPS and Date and Time.

This is a somewhat complex way of keeping film data, but it has proven to be well worth the effort, especially when you need to recall the what, when, or how of a particular photo that you made years back. I can go to my film notes and tell you most anything about a particular negative, including the weather.

Keeping notes is also a way to track mistakes. If a particular negative did not turn out as expected, you have all of the information that can provide a clue as to what went wrong. I also record information on my audio entries about location, the light, temperature and anything else that might affect the image, or the photographer. Your notes can be a lifeline to help you track problems.

Detailed records of each sheet of film are not hard to keep up with if you are diligent and keep the process current. Next time I will talk a little about keeping notes in the darkroom. . . and. . . yes, we also keep pretty detailed records of the prints we make.

JB

Posted by JB Harlin in Commentary, DIY, Film, How-To, Photography

A NEW CANHAM 4X10

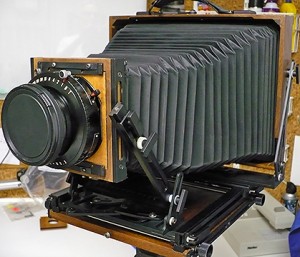
CANHAM 4X10Almost forgot about the other little project we undertook a few months back. Susan found a KB Canham 4×10 and it ended up in our possession. Because we strive to keep our equipment as homogeneous as possible, the new camera required a few modifications just like my 8×10.CANHAM 4X10

Everything around here seems to end up in the shop before it hits the road. So, here is another little story about camera modification. Take a look at the article WHY MODIFY ANOTHER CAMERA? to see what happened this time.

The good news is we took the cameras on a little outing a few weeks ago and the negatives were just fine. No light leaks, nor any other strangeness. Guess this one is ready for the road. Time for fall, then winter, and much cooler weather to get out and haul some equipment around.

JB

Posted by JB Harlin in DIY, Photography

COOL WHITE. . . MAN

Seem things continue to change at an alarming rate. Several years ago, maybe 12-15 to be honest, I bought some supposedly daylight balanced fluorescent lamps for the kitchen fixture. They put out this really annoying, kind of brownish light that I just could not stand. They were eventually banished to the garage where they finally burned out and were discarded. It was back to the old standard Cool White fluorescent lamps and that awful color cast they generate. Fast forward to our current world and I saw some information about a Compact Fluorescent (CFL) lamp that is 5,000k and touted to be Full Spectrum. Wow! Now that is more what I was looking for.

I bought a CFL lamp that is dimmable, 5,000k and Full Spectrum for another project I was working with. I was so impressed with the light that I searched out some four footers for the kitchen fixture. Once installed I was really impressed with the fact that the room no longer had that sick green/blue light I have become so accustom to from the run-of-the-mill Cool White lamp. The kitchen light looked so good compared to the ones in the darkroom, I knew they were next.

I did take the time to look at a few photographs under both lights and the difference is remarkable. It is always difficult for me to judge print color cast under fluorescent light. These new Full Spectrum lamps deliver a much more natural light that I really like. If you haven’t looked into these new generation lamps, you might just get a pleasant surprise.

Little else to say, other than the latest batch of Full Spectrum fluorescent lamps are impressive and I really do not want to go back to Cool White. . . Man!

JB

Posted by JB Harlin in Commentary, Darkroom, Photography

DUST. . . A Four Letter Word!

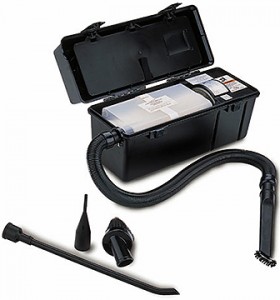
3M field service vacuumYes, the number one adversary of the LF photographer is DUST! Dust is a four letter word in the world of photography. Seems we are always fighting Dust. It gets into everything. The one place you absolutely can not tolerate the pest is on your film. A tiny speck of dust or lint in your film holder will always find its way onto that one area of smooth even texture.

So, the question is how to battle dust? One thing to do is, as mentioned in my previous post titled “Wax On. . . Wax Off” is to wax your equipment. Waxed surfaces are easier to keep clean. Also, vacuum out all of your bags, cases and packs regularly. Before every outing, take the time to disassemble your camera and clean it. Remove the bellows and vacuum out all of the folds, inside and out.

Next comes your film holders. Before you begin loading, dust the table top. I like to go over the surface with a damp cloth just to be sure. Your best friend when it comes to your film holders is a good vacuum. We travel and have to deal with film loading in all sorts of, less than desirable situations. Our number one tool is a small portable vacuum.

I first saw these small commercial vacuums being used by copy machine techs years ago. The vacuum they carry is a small, self-contained, field service vacuum and the most popular seems to be one made by 3M. We searched around and bought a 3M SV-497AJM vacuum on that auction site years ago. One of the best purchases we have made for sure!

A little searching on the Internet turned up this from 3M, “Designed by 3M Corporation for its own office products service department, this durable, reliable vacuum cleaner set the standard for all others. Designed specifically for cleaning toner from copy machines, it also is great for cleaning printers, floors or just about anything else a field engineer might encounter.” The unit is self contained with hose and attachments housed in the top and is 17″ x 6.5″ x 7.5″ weighing 9 pounds.

Our 3M field service vacuum has logged many miles with us over the years and we would not consider travel without it. It is also great to have around the darkroom to help keep dust under control.
JB

Posted by JB Harlin in Darkroom, Film, How-To, Photography, Travel

INDEPENDENCE DAY

Hope everyone had a great Independence Day!

Posted by JB Harlin

WAX ON. . . WAX OFF

Well. . . that was a cheap shot, but maybe it got your attention. Care and maintenance of your photo equipment is something that is important. Take care of your equipment, and it will take care of you. We use a lot of gear that is made of wood. We spend a lot of time outside in harsh environments. But, all of our equipment needs protection from the elements. We wax everything. Wood, metal, plastic. . . they all get a generous application of wax.

Wax keeps moving parts moving smoothly and a well waxed surface is easier to keep clean. Dirt and contaminants do not stick to a waxed surface. A slick, waxed surface is easier to keep clean. Also moisture is not as much a problem. I can say that we wax most everything except the lenses.

So, what kind of wax should you use on your expensive equipment? We use only the highest quality Microcrystalline waxes on our gear. Microcrystalline waxes are far and away, the finest wax you can use.

They offer excellent resistance to moisture, food acids, alcohols, moderate temperatures and are pH neutral naturally. Another benefit is that they will not show fingerprints on treated surfaces. Microcrystalline waxes also dry crystal clear, never yellow, leave no chalky residue and resist dust as well!

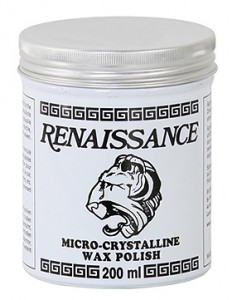
What brand of Microcrystalline wax do we use? RENAISSANCE WAX-POLISH has been the #1 choice of museums, art galleries and institutions for the preservation of precious items for over forty years. Professional conservators, retailers, restorers and private individuals throughout the world depend on RENAISSANCE WAX to protect their collections and for in home use.

All I can say is, this stuff is great and highly recommended. It is SAFE to protect all of these Materials:

Wood; raw & finished. Leather, Parchment & Paper. Metal; Silver, Silver Plate, Gold, Copper & Copper Alloys (Bronze, Brass, Tin, Zinc, German Silver, Nickel), Lead & Pewter, Iron & Iron Alloys, Tin & Tin Alloys. Damascus; Stone, Marble, Onyx, Limestone, Granite, Brick, Tile, Terrazzo, Obsidian, Alabaster; Gems, Glass, Porcelain, Holloware, Bone, Ivory, Horn, Shell & Mother-of-Pearl, Gutta Percha. Dammars; Gilding & Gold Leaf, Patinas. Enamel, Lacquer, Japanning, Cloute, Pose d’Or, Pique Point, Varnish, Marbleizing, Stains & Artificial Graining. Plastics, Formicas, Paints, Polyvinyl Acetates, Esters of Polymethyacrylic, Polycyclohexanones, Fiberglas Epoxy Resins, and much more!

Guess you can say that we are sold on Microcrystalline RENAISSANCE WAX. You can find it at most woodworking supply stores and on line. A quick Google search will turn up a lot more information. Well worth the cost and time it takes to apply. A little “Wax On. . . Wax Off” and you are good to go most anywhere.

JB

Posted by JB Harlin in DIY, How-To, Photography

COVER YOUR BACK?

COVER YOUR BACKDo you cover the back of your view camera with the darkcloth before you pull the darkslide? I certainly do!

Have you ever experienced these pesky little light leaks along the edge of the film that seem to come from nowhere? Gremlins?CLIP Not really. They are caused by any number of things that can go wrong in LF. A holder that has a small leak only when the slide is out, one that does not fit tight in the camera back, a light trap that is worn, or maybe you stress the holder as you remove or replace the darkslide. Thing is, it always seems to show up on that one piece of film you really want to print. Light leaks were seldom a problem as long as we were shooting 4×5, but when we moved to larger film sizes it became more evident. I will say, without reservation, as the film size goes up, the problems multiply exponentially!

The good news. . . the solution is simple, and for us, solved 99% of the light leak problems. Leave the darkcloth on the back of the camera while exposing the film. This way, even if there is a problem with the holder seating or the light seal being broken when removing or replacing the slide, you greatly reduce the probability of a leak.

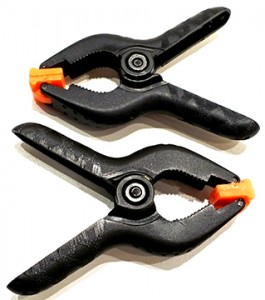
It has become a habit to clip the darkcloth to the camera back once it is setup, and it remains there till the exposure is finished and the darkslide is back in the holder. We both use small, inexpensive, plastic spring clamps available at the local hardware store, to clip the darkcloth to the camera back. Simple, quick, easy. . . and. . . it works!

JB

Posted by JB Harlin in Film, How-To, Photography

PHOTO EQUIPMENT FOR SALE

FOR SALEWhat are you looking for? A new camera? Pieces and parts? A new lens? We are cleaning out our equipment closet and it is time for some things to go to someone that can use them. The excess equipment we no longer need may be just what you are looking for.
Drop by the new area on our web site FOR SALE and take look. There just may be something you really need. And you will be helping us with our spring cleaning!

JB

Posted by JB Harlin in Photography

WHERE DO I START?

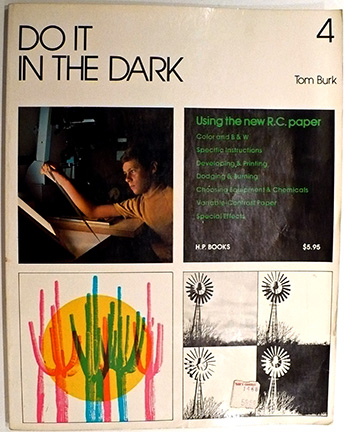
The question comes up every now and again about getting started processing and printing B&W film in the wet darkroom. Seems that as more and more people come to photography via the digi-snapper route, they eventually become interested in that antiquated art form known as Film. I have said this so many times, have been cursed and belittled by some for my comments, but here it is again. Digital is not a replacement for film. It is simply another art form. There I have said it one more time. If you don’t get it, too bad. Get over it.Do It In The Dark

Now, back to the subject for today, how to get started processing and printing film in the wet darkroom. The question is, where and how do I start? What do I need? Is it hard to do? There are many answers to these questions. You can take a class, find a workshop, or study with someone that is willing to teach you. Or, my favorite method of doing anything. . . find a good book and learn on your own.

If you choose my method the next question is, what book? There are many good books on getting started with film. Also, there are a lot of good web sites on the Internet that will help you. My recommendation is to start where I did over thirty years ago. I found a great book that is geared to the rank beginner. This book does not outline anything that is set in concrete, but if you follow it you will process a roll of film and make prints. Wherever you go from there is up to you. This is where I started and I can say it worked the first time and though I do not use much of the techniques or materials in the book anymore, this was the launching pad for me to move to more advanced techniques. Some of the materials and chemicals are no longer available, specifically the chapters on color, but the basic B&W techniques still apply. This book is a bare-bones, get you started text.

OK. . . enough of my book review, time to get down to brass tacks. First I have to say that the book I recommend is long out of print. But, the good news is the title is readily available on the used market and it is not expensive. I found several copies on the Internet for $1.00! If you are interested in getting started in the wet darkroom, here is a good place to begin. It worked for me, I am sure it will work for you also. Here it is;

“DO IT IN THE DARK”
by Tom Burk
H. P. Books 1975
ISBN 0-912656-28-X

This is one place to start. . .

JB

Posted by JB Harlin in Darkroom, Film, How-To, Photography

THE VARIABLE CONTRAST COLD LIGHT

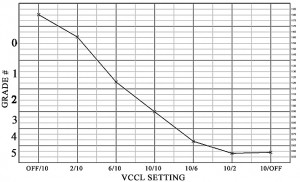
PAPER GRADEThe dual grid, Variable Contrast Cold Light head (VCCL), is a great device for your enlarger if you print on black & white VC papers. These heads allow you to dial in any contrast grade your VC paper is capable of producing. You have continuously variable contrast at your fingertips. And, yes they do work. The trouble is, every paper is different. Setting the dial on the head to any random equal setting may or may not produce a grade #2 contrast. Worse yet, what two settings should you choose?

When you start using a new VCCL head you are now faced with a quandary. How do you calibrate this thing so you have some idea what paper grade you are actually getting? Did you know you can calibrate a VCCL head to a known standard? You can know what settings of the blue and green grid will give you an equivalent grade #2, or #3, or anything within the range of the paper!

Yes you can calibrate a VCCL head, and here is how it can be done. Look at the article “USING BTZS TO CALIBRATE YOUR VARIABLE CONTRAST COLD LIGHT HEAD” originally published in the Sep/Oct 2007 issue of View Camera Magazine in the ARTICLES area of our web site.

Posted by JB Harlin in Darkroom, How-To, Photography