A LITTLE SELECTIVE BLEACHING

Selective bleaching is a technique that uses a very dilute solution of Potassium Ferricyanide, which is brushed on specific areas of a print to lighten the tone and increase contrast.  It must be done very judiciously and anyone practicing this technique must be prepared to ruin a few prints.  But, with a little patience and practice, bleaching is a powerful tool in the darkroom.  Selective bleaching can open up an entirely new avenue of expression.  Here is an example from a recent printing session.

First, here is the subject;  a blind cave between two large sandstone fins in Arches National Park.
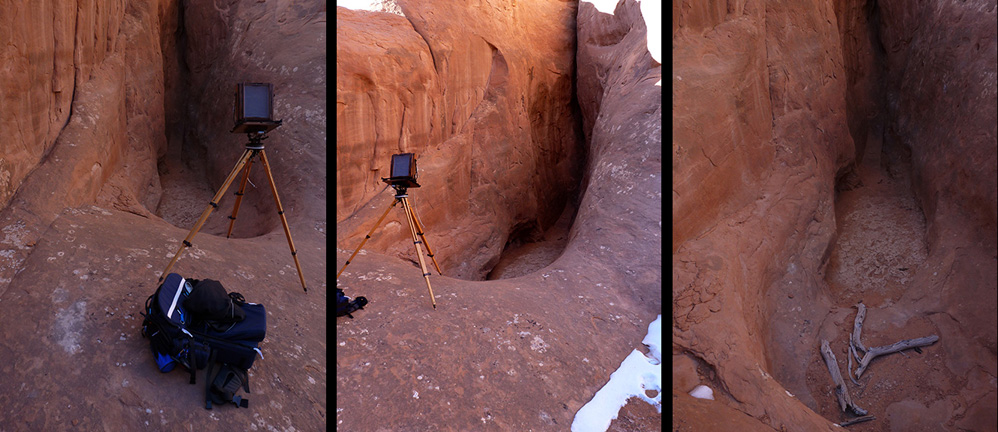
 

Selective Bleaching

Next, the printing session;  the negative printed quite easily, without any manipulation.  It is quite interesting, but lacked depth and was somewhat depressed, especially at the bottom.  Also the wood and cracked mud needed to be lighter to draw the eye and enhance the feeling of depth.  Here is a side by side comparison of two prints, one before,  the other after selective bleaching. . . (this is a quick snapshot of the wet prints on the viewing stand before toning)
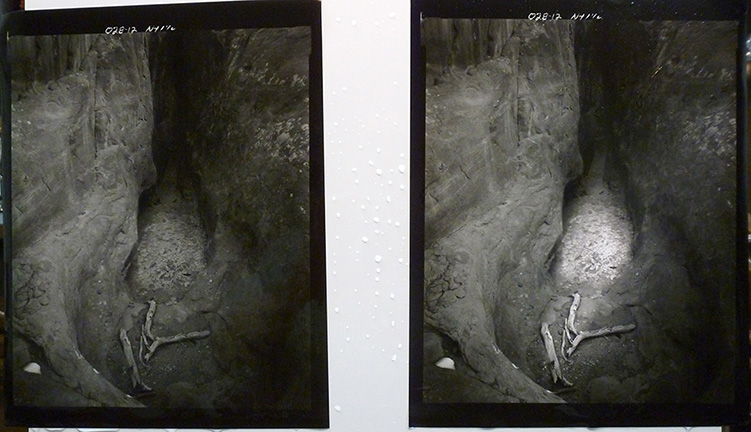
Selective Bleaching

Finally, the finished print;  we selenium tone every print we make, not only for permanence, but for the slight tonal shift and deepening of the contrast of the image.   Here is the finished dry print.  Note the change in color and contrast after selenium toning.
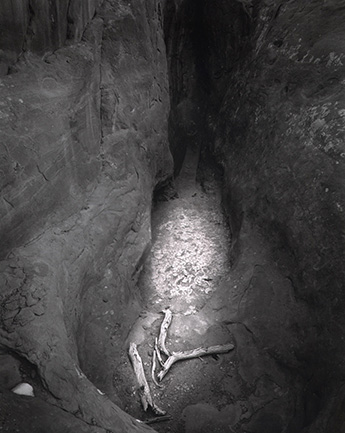
Selective Bleaching

I will not get into the technique employed, since selective bleaching is deceptively simple and is beyond the scope of this short article to adequately explain.  As I said before, be prepared to ruin a few prints.  This is another tool you can add to your arsenal of darkroom techniques. . . remember, it is always about the finished print.

JB


Posted by JB Harlin in Darkroom, How-To, Photography, The Darkroom Workshop

OLD TIME CAMERA PHOTO SHOOT

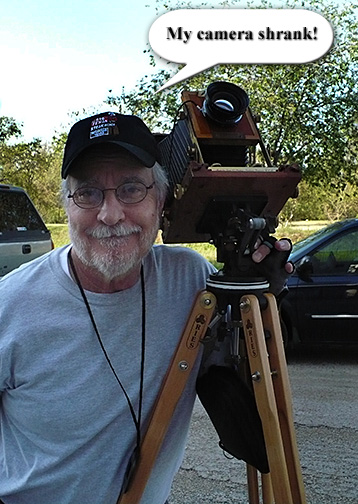
JB Harlin with 4x5 view cameraSee why these film cameras could help you with your photography skills as well.  Metering, composing, keystoning, and hyperfocusing will be discussed and demonstrated.  It will be a fun morning!

Come out and see some of the ancestors of your digital camera that still produce magical images.  There will be a few of the Large Format cameras – You know the ones with the cape you pull over your head, tripods that could hold a truck, yep those cameras.  They will be out and taking photos and explaining how they work for anyone that wants to know.

You will also see some medium format film cameras as well.  These cameras still produce 145MB digital scans with more detail than the largest dSLR!

Although the Large Format cameras are a work of art in themselves, the Nash Farm is also a very beautiful farm that’s just great for a day out. Farm buildings, tools, even a small cemetery are all on the grounds of this city park.

When:  Saturday, September 22, 2012, 8:30 AM to 11:45 AM

Where:  Nash Farm, Grapevine, Texas  Google Map

Parking: Park on the side street – Homestead Drive – Stay on the Farm side of the street – DON’T park in front of someone’s home.  Please don’t pull into the farm.  Take a look at the parking map.

Posted by JB Harlin in D/FW LF GROUP, Events, Film, Photography

ROLLING YOUR OWN FIXER

Zone VI GoneThey say the more things change, the more they stay the same.  Whatever that means.  It seems like only yesterday I standardized my chemicals for printing and started using Zone VI Fixer.  That was over twenty years ago.  But you know, things do change, and they are not the same.  We are down to our last box of the old standard Fred Picker Fixer and it is time to start rolling our own from bulk chemicals.

Actually, I started researching this over a year ago and we have obtained several hundred pounds of Sodium Thiosulfate in anticipation of this day.  This is the principle chemical used in fixer and though not difficult to acquire, it is expensive to ship.  Sodium Thiosulfate Pentahydrate is used in water treatment to remove chlorine.  It is available from many pool supply sources.  Also, check the Internet and eBay, there are sellers there that will ship to your door.  You will need about two pounds per gallon of fixer.  We go through anywhere from half a gallon to a gallon of fixer during a typical printing session, so we need a lot of the raw material.  But, this is the price you pay when you work in the wet darkroom and we believe it is more than worth the effort.

The next question is what formula should I use.  Since we are only talking about paper fixer, then there is no reason to even consider a formula suitable for film.  We just need a good, dependable fixer for processing fiber base papers.  Now we get into the discussion about acid vs. alkaline fixer.  Boy, does that ever stir the pot.  Almost like asking film or digital. 

Well, I want to change as little as possible and using a running water stop bath instead of acetic acid is just not what I want to mess with.  I did not want to change anything, or at least, I wanted to change as little as possible.  So, it was immediately determined that an acid fixer was best for us.  There are many formulas out there, and everyone has their favorite.  I have tested several and settled on what we intend to use.

Also, we needed a formula for plain hypo for second fixing bath and pre-selenium toning.  I found what I needed there also, thanks Ansel.

So, if you are interested in what we use, I have added our fixer choice to the Formulas Area of this BLOG.  Drop by and take a look.  The formulas we have chosen work fine, are simple, easy to mix, and does the job as needed. Obviously, I am not a chemist, and I am not into discussing chemical formulas.  For me, working in the darkroom and mixing chemicals is only a matter of finding a recipe that reliably works, sticking with it, and getting on with making photographs.  I don’t care much about the innards of chemistry. . . I’ll leave that to the chemists.

Things do change, and they are not the same, but who cares, as long as the results are the same.  Fred Picker said, “different is not the same.”  I miss ol’ Fred! 

JB

Posted by JB Harlin in Darkroom, How-To, Photography

THOMAS DUPLEX SUPER SAFELIGHT FILTERS

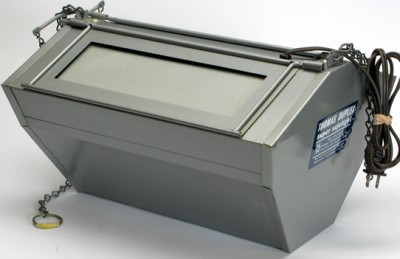
Seems the last couple of times I have tested the darkroom safelight I have had to cut down the illumination.  That should be a clue that the filters are fading and it is time to replace them.  We use a Thomas Duplex Super Safelight that I rebuilt many years ago.  Since we have a small  darkroom I knew I needed to attenuate the light.  My original safelight was modified when I rebuilt it and the 35 watt lamp was replaced with a 18 watt lamp.  Note:  You have to replace the ballast and start capacitor if you change the lamp wattage.  Wasn’t that big a problem seeing how the original ballast was no good.  I purchase the safelight many years ago not working for little to nothing.
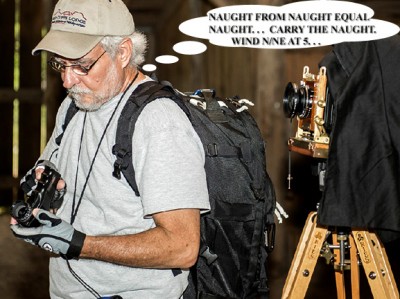
So, now I needed to replace the filters.  Since I am only interested in B&W, work that simplifies things for sure.  All I need to find is the correct filter and then I can assemble my own replacement.  I have plenty of scrap glass, and tape.

With a little research on the Internet I discovered that the hard part had already been done.  Seems a Rosco #19 “Fire” filter has the necessary bandwidth to filter out the annoying green and blue spikes in the low pressure sodium lamp spectrum.  And, seems that others had proven this the best way possible. . . they tested it in their own darkroom.

All I needed was to order some filter material.  Rosco filters are the industry standard for stage and film production and readily available.  That was way too easy.  The thing that I was still toying with was how to adjust the light output.  It finally came to me.  Why not put the #19 filter in the body position and then add a Neutral Density filter to the vane?  Yep, that would do it.  So I ordered a sheet of Rosco #19 filter and a sheet of 0.30 ND.

We have a lot of scrap glass around.  I cut new glass to fit the body and vanes using TruVue Conservation Grade UV glass.  Thought it wouldn’t hurt to add even more filtration.  I also found out why the factory uses tissue paper.  Without it, the filter material does not look that great against the glass and I could see that if any moisture were to condense in there, it could be bad for the filter.   I really didn’t want to use tissue paper and I had a roll of Gila frosted window film from another project.  This stuff is a self-adhesive plastic material used to frost windows.  It was exactly what I needed to put a smooth textured surface on the inside of the glass to keep the filter from sticking.  It also works well to diffuse the light.

One of my favorite tapes is the aluminum HVAC ducting tape.  It is lightproof, sticks and stays in place.  Slit a few pieces of tape, peel the backing and it will hold the filter sandwich in place with ease.

I placed the #19 filter in the body and 0.30 ND in the vanes.  My first test showed there was still too much light.  I was testing at my closest point to the safelight for the worst case situation.  I ended up adding a second layer of 0.30 which made for 0.60 ND, which is two full stops attenuation.  But remember, I was testing with the most sensitive VC paper we use at a very close proximity to the safelight.  Always test for the very worst case scenario. 

Once finished, I found that the darkroom is much brighter than before.  This proves that the filters do fade.  Now we are back in business.   With the vanes fully closed all VC and standard papers are safe.  I like to print on Azo, which allows me to open the vanes for even more light.

I will test again in a year or so and if I need new filters they are easily replaced.  I have plenty of material, the Rosco filter comes in a 24 x 24 inch square.  Enough for several more safelight filters, if and when they are needed.

JB

Posted by JB Harlin in Darkroom, DIY, How-To, Photography

D/FW LF GROUP OUTING; Cedar Hill State Park, Sat 10/20/2012

It’s been a long HOT summer. . . Time to break out the cameras. . .  Let’s go back to Cedar Hill State Park!

Cedar Hill State Park

NOW, IF I CAN JUST REMEMBER. . .

Sunrise is at a much more reasonable 7:25AM  —  Sunset will be at 7:04PM.  Park is open 6:00am to 10pm.  There are several wonderful spots that will be good for both times of the day. 

Some of us are planning on spending the day at the park.  We will do lunch around noon, there are restrooms and picnic areas in the park.  You can either bring your picnic basket or head into town.

As usual, we will have a variety of cameras in play. . . everything from LF to handheld digital.  We will be working on more details as we plan this outing.  Stay tuned for more info.

See y’all there!

Posted by JB Harlin in D/FW LF GROUP, Events, Photography

OLD CAMERAS BACK IN ACTION

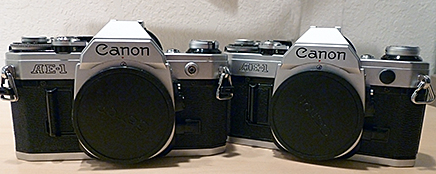
CAMERASAs I said the other day,  gather your kids and grandkids and show them something that was built to last. . . here are two cameras that are near 35 years old and still work!

The other day I drug out my first camera bag from the storage closet.  Inside was my two Canon AE-1 bodies and three lenses.  They have seen little use in the last 20 or so years and at least I did remove the batteries from the cameras and the winders.  Smart move there for sure!

The first thing I notice on inspection was the mirror damper and the body light seal material had turned to black goo.  Yep, they used some of that open cell foam that over time deteriorates into a sticky mess.  Seems that is the norm for these cameras, and others.  I had a friend ask me about this several years back.  I directed him to a seller on eBay that had seal replacement kits and he was able to resurrect his camera and is still using it.  I had all intentions of doing the same, but just never got that round-to-it.

I decided that it was time to rework my 35mm cameras.  They both still work, and neither has ever had the dreaded shutter squeak problem.  I have my first AE-1 that I purchased in about 1978 and a second that I found later used.  They have both seen a lot of action, yet I feel they are still as good as they ever were. . . just need to fix that goo problem. 

Took a little digging, but I found a place that sells seal kits on the Internet.  I ordered two kits and began the process of cleaning up the mess.  By far, the hardest part of this is getting all that goo out of things, but it is something that can be done.  It just takes a little patience, perseverance and denatured alcohol.  If you have some vintage cameras laying around that need some light seal work, here is a place to purchase what you need;

 Camera Seal Kits  http://camerasealkit.com

Camera Seal Kits has light seal kits for most popular cameras.

This is a great project for the summer when it is 100+ outside.  Now I have my two 35mm cameras back in working order, guess I will have to use them for something.  Maybe fall soccer (when it is much cooler) and some action photos of the grandkids on a roll or two of Tri-X.

JB

Posted by JB Harlin in DIY, Photography

D/FW LFG An outing without Dark Cloth

Mary's Cafe  Strawn, TXWe are heading out to Strawn, Texas this Saturday (7-14) to Mary’s Cafe for the best Chicken Fried Steak in Texas.  Some in the group are heading out early to scout the area and we will be meeting for lunch.  Plans are to be at Mary’s for the real thing at 11:30AM this Saturday.

 Mary’s Cafe
119 Grant Ave.
Strawn, TX 76475

Bring some photos to share, equipment to show or sell and let’s have a fun lunch.

Hope to meet some new members!

JB

Posted by JB Harlin in D/FW LF GROUP, Photography

A GREAT STORY

Story

Posted by JB Harlin in Commentary, Photography

A 4X10 TREASURE

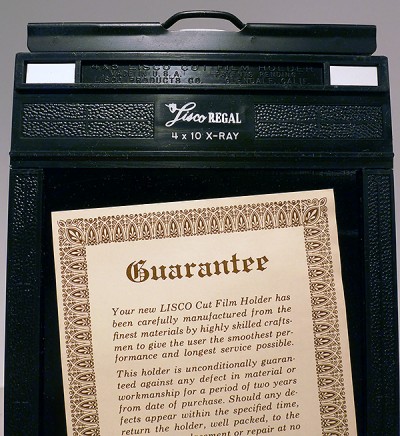
4x10 Film HolderThere are times when things fall into place. . . then there are those times when everything seems to just fall apart.  My Mother used to say, “even a blind hog will pickup an acorn every now and then.”  We struck on some good fortune recently and found something extremely rare.   I found six, in-the-box, never-used, Lisco Regal 4×10 medical film holders.  In case you didn’t know, Wisner designed his 4×10 camera around these extremely rare and difficult to find film holders. 

Susan started out with the Wisner 4×10 camera and a handful of holders, since we have forever been searching for more holders.  She has found Wisner-style holders off and on and has collected a good assortment, but we are still on the lookout for more.

This group popped up on one of the photo chat sites and I couldn’t resist asking questions.  The seller said he purchased them from another person that acquired them from a medical supply house and they were pristine.  Pristine is an understatement!  I still can’t get over how these holders look.  The boxes were shelf worn, but the holders were absolutely un-used and still had the warranty cards.

It is strange how things sometimes happen, and here is one of those times I stumbled upon an acorn.  These holders have found a good home and will be well cared for and put into service doing what they do best. . .  holding film!

Happy hunting everyone!

 JB

PS  Just in case anyone asks, NO these 4×10 holders are not for sale. . . But. . .  we do have some new, in-the-box, Fidelity Elite 4×5 holders and some lightly used, with-the-box, Toyo 4×5  holders for sale.  Drop by our For Sale area to take a look.  Thanks!

Posted by JB Harlin in Film, Photography