CONTROL IS SIMPLE

Transfer GraphLet me begin by qualifying what I am about to discuss by saying that I am a traditional B&W photographer.  I shoot film and print in a wet darkroom using traditional materials and techniques.  Whenever I talk about photography, I am talking about traditional B&W.  I know little about color photography and even less about digital.

I have often heard the argument that traditional B&W is so complicated.  I actually heard that from several old-time wet darkroom color photographers.  The truth is, working with traditional B&W, wet darkroom materials is very simple.  But, there is sometimes a complex deception in simplicity.  Keep in mind that the most complex machine, or procedure ever devised is little more than a lot of simple things all working together to create a seemingly complex outcome.  True, as you add more steps, each step can interact with the others, but if you break each piece of the greater puzzle into less complex, bite-size pieces, it is understandable and controllable.

When it comes to traditional B&W photography, you only have four basic controls to worry about.  There are only four simple things that have power over the major aspects of the end product. . . the B&W photograph.

  1. Film Exposure

  2. Film Development

  3. Print Exposure

  4. Print Development

1.  Film Exposure:  This is the first, and is a very important aspect of photography.  You can manipulate how a scene is captured through the way you meter and expose the film.  There are numerous manipulations you can employ, including zone placements and filters. 

2.  Film Development:  The tonal range captured on the film at the time of exposure can be further manipulated by development.  Different developers and times will yield different results, but so far as the film goes, this is all you can do.

3.  Print Exposure:  Next comes the process of printing.  You can vary the way in which the paper is exposed.  Matters not whether you are enlarging or contact printing.  You can further manipulate print exposure by dodging and/or burning, and you can adjust the paper contrast, either by paper grades or by using VC papers. 

4.  Print Development:  The only other control you have during printing is the choice of developer, dilution, time, and maybe some additives.   But in reality, these are the only two fundamental controls available for making prints.

Certainly there are numerous smaller adjustments and techniques that can be employed in B&W photography, but these four major areas are where you start.  Anyone that tells you traditional B&W photography is difficult, simply does not have a good understanding of the process.   If you are interested in delving into traditional photography, do not be intimidated.  It is not that difficult.  What is difficult is learning the subtleties that make the process beautiful.  

You need to begin with the fundamental steps.  You can only learn by doing.  Fred Picker said, “ you can learn to talk about something by talking about it, but you can only learn to do something by doing it.”  These four basic areas are where you start.  Then proceed to fine-tune your technique as necessary.  You will soon find that you can easily control the basic processes and develop a photographic approach that suits your vision.

JB

Posted by JB Harlin in Commentary, How-To, Photography

ZONE LANGUAGE

ZONE LANGUAGEThe Zone System is always a controversial subject among serious B&W photographers.   Seems there are numerous versions and sub-versions of the system devised by Ansel Adams and Fred Archer.  Each artist must choose what works best for them.  Like most everything in photography, it is a very personal choice.

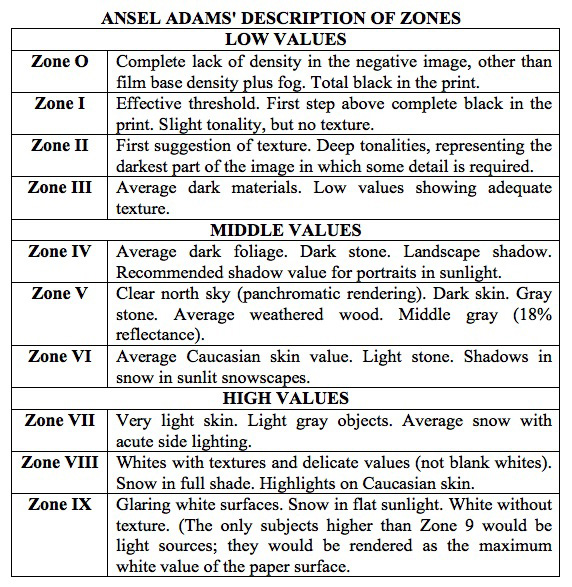
In the Zone System, the tonal scale from black to white is divided into even steps that are either twice or one half of the previous value.  This allows the photographer to translate, or visualize, meter readings into finished print values, or Zones. 

Zones

Certain elements of the scene to be photographed are sometimes used as a standard reference.  Here is how Ansel described Zones;

ZONE LANGUAGE

No matter whether you practice the pure AA Zone System, or any of its variations, there is one aspect that I believe is an invaluable tool for everyone.  Speaking in Zones is a universal language, much like math or music.  Speaking in Zones allows everyone to find a common way of communicating what they see, what they feel,  what they want their interpretation of a subject to be, or what they wish to say.

I am not a Zone System purist in any way.  I practice what I have found works best for me.  But, I do use Zones, and use the Zone language in everything I do photographically.  I prefer its simplicity and ease of expression.  I know that if I am discussing an image with a fellow photographer and I say that I placed this area on a particular Zone and this other area fell on another, we are communicating in a common language.

So, whether you are a true-blue ‘Zonie’ or not, I believe everyone should be well acquainted with the language of Zones.  In photography, it is a universal language.

 JB

Posted by JB Harlin in Commentary, Film, Photography

MY FIRST CAMERA

MY FIRST CAMERABeen some discussion lately about getting started in photography.   We seem to have a lot of people interested in film photography.  Everyone started somewhere and everyone has a story.  I had written earlier in another BLOG post about the book that got me started doing my own darkroom work, but I never mentioned my first camera.  I used my Mother’s Kodak No. 2A Hawk-Eye folder for my very first photographs.  My Mother always had to break out the camera and make a quick snapshot when anything interesting was happening, mostly family gatherings, maybe a trip or school event.  She always said, “now let me get back a little farther so I don’t cut your head off.”  I have many snapshots of the great scene with these little tiny people in there somewhere.  I never could break her of that habit.
 
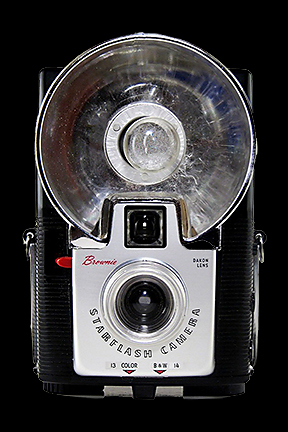
But when I was somewhere around eight or nine years old I received my first camera as a Christmas gift.  My very own Kodak Brownie Starflash that came in a presentation box, with a roll of B&W film, flash bulbs (remember those?) and batteries.  I was only allowed to use B&W film, since it was so much cheaper than shooting color.  I never did get the hang of color for anything but casual snapshots anyway.
 
There was a major train derailment just outside of the town where I grew up and I have two rolls of that.  When I was in the fourth grade we got to bring our cameras to school.  It was the annual school Easter Egg Hunt and I have photos of that and even some in the classroom.  I made the usual snapshots you would expect from a very young beginner.
 
So, that is where I started camera wise.  I have to credit my Mother for getting me hooked on photography.  I have had numerous cameras since my first.  Don’t know what happened to my original camera.  I suspect it was sold in one of my Mother’s garage sales.  But,  I was able to find an identical Brownie Starflash at a local camera show, and it hangs on the wall in our darkroom as a reminder of where I started.
 
JB

Posted by JB Harlin in Commentary, Photography

D/FW LF GROUP OUTING TO CEDAR HILL STATE PARK

Finally got in a fall outing, but it didn’t really feel like fall.  The day started out nice, but by afternoon the humidity and heat were back.  But, we made the best of it.  Had a good group to start the day, but by noon Susan and I were the only ones left.  We visited the Fall Festival that was going on in the park and stayed for the day.  We finally caught up with Michael, who had another photography engagement for the first half of the day, and had a late lunch about 3:00.

The light as the sun rose above the horizon was really nice on the old barns and wood, but it was even better toward sunset.  We made several photos, I with my 8×10 and Susan was testing some new 4×10 holders.  Got to check out Mike’s Ritter 7×11 camera, a new format for me, and Robert was exercising his, new-to-him, 8×10.  We had a lot of the usual photo chat and talk, showed some photos, and I believe everyone had a great day.  We didn’t get home till nearly 8:00pm.

It was a fun, but hot day, and might just have a couple of keepers!

JB

Posted by JB Harlin in D/FW LF GROUP, Events, Photography

MORE CROPPING

I had made an earlier post on the merits of cropping your image and the subject has come up again.  I will stick to my original thoughts on the process of cropping.  Use it if necessary!

CROPPINGI ran onto an article by David Vestal published in an old Photo Techniques magazine from 2002 that seems to sum things up very well.

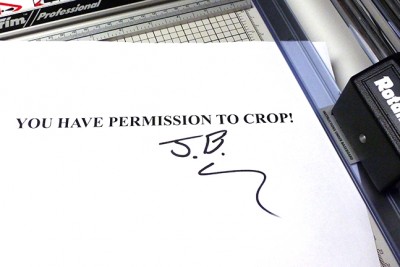
“Some people say that we should never crop photos.  They’re wrong.  When cropping will help the picture, it’s better to crop it than to leave it uncropped.  If it doesn’t help the picture, then why bother?  But it is an option, and it’s not a moral issue.  We don’t need anyone’s permission.  If you do it, do it well.”  *

I couldn’t have said it better. . . thank you Mr. Vestal!

JB

* David Vestal, Advanced B&W Printing, Photo Techniques Magazine, 2002

Posted by JB Harlin in Commentary, Darkroom, Photography

WHY THE WET DARKROOM???

WET DARKROOMNOTE:  I wrote this little rant over a year ago and never published it.  Guess it got lost among all the other posts and I have just resurrected it today.  I know I am repeating some things here, but I do so only to make my point.  My views have not changed.

I am forever asked, why the wet darkroom? Why would you want to work with film and photographic paper when you can just click the mouse and let the magic box (computer) create a visual paradise? I am perpetually searching for the answer. . . an answer that makes sense to me, and at the same time explains why to those that ask. I have to begin by saying that nothing is ever as it is advertised. Those that have something to sell always tout how easy it is when you buy their products. If you are looking for quick and easy, then photography may not be for you, matters not what the hype says. In all of those slick commercials and magazine ads things just fall into place without any effort. Everyone has a big smile on their face and all is well. Can this be reality?WET DARKROOM

A lot of what we see today is a continuation of the biggest lie ever told about photography back in the early days of the medium. George Eastman, founder of Eastman Kodak Company, came up with a catchy slogan when he introduced the Kodak camera in 1888. His little box camera was the first camera intended for the general public and his slogan was simply, “You Press The Button, We Do The Rest.” This catch line implies that the person making the photograph need do nothing but be there, of course with a Kodak camera, and that person need know nothing, nor do anything, other than press the button and send money to Kodak. This slogan was a work of sheer genius. It made photography easily accessible to the general public and made ‘ol George very wealthy. There is absolutely nothing wrong with any of this, except for that little phrase, which implies that the operator hardly even be present. Anyone that has used a camera knows for themselves that there is more to it than just pressing that little button.
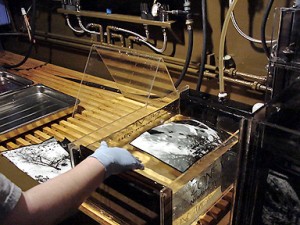
WET DARKROOMNow I can mention the next biggest lie ever told about photography, this one somewhere in the early 21st century. I am not sure exactly where this came from, but I venture to say it came from large corporate marketing gurus, better known as Harvard MBA’s. When you have large companies run by people that know nothing about the products they produce, you have idiots at the helm. They worship at the altar of the share holders and the quarterly report. Enough said! The next big lie in photography is, “Film Is Dead.” I still believe this was nothing but a marketing ploy to guide the easily persuaded customer to purchase more equipment and new technology. This time based on the layman’s misunderstanding that the computer can do anything with only the click of the mouse. You need do nothing, but supply the money. The old slogan could have been upgraded to read, “You Press The Button, The Computer Does The Rest.” I believe that by now, anyone that has tried this knows, again from hard experience, that it just isn’t that easy. No matter what the hype from any manufacturer, there is no quick and easy way to photographic success.WET DARKROOM
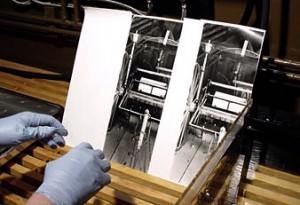
Having said all of this, I feel that the art of photography is something that requires dedication and perseverance. You have to choose your tools carefully and make sure you have the correct tools for your creativity. I have my own opinions as to the validity of what I do and why I do it in a way that suits me. For what I am about to say I have been belittled, scorned, laughed at, and cursed. Makes no difference to me. Anyone small-minded enough not to accept and respect my choices make no difference in the grand scheme anyway. My father used to say that people that use curse words have a narrow vocabulary and an even narrower mind. So my favorite description as to the validity, use, and purpose of digital imaging. . . there I said that word, Digital. . . is to simply say, “It Is Only Another Art Form.” Simple as that! Choosing the wrong medium will turn into nothing but a waste of your time.
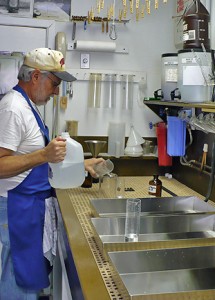
WET DARKROOMDigital imaging is not a replacement for anything. It is its own entity, has its own strengths and weaknesses. If you choose to work in the Digital arts, good for you! If you are a hybrid photographer, shooting film, scanning and printing digitally, then great for you! If is suits you and you are happy with what you create, then that is just fine with me. If whatever you create suits you, no matter what the medium, then you are on the right path. But, whatever you do, Do Not belittle me for not buying into the farce that Digital is a replacement for Film! And please do not propagate this lie to others that are new to photography. You are doing them a great disservice by funneling them into believing there is only one path. Nothing is more degrading and discouraging than to find out, much later, that you could have done something else that was much more to your liking. People need choices, and need to be able to see all of the different options that are available in the world of photography. One size does not fill all.WET DARKROOM

I realized I still have not answered the question, why the wet darkroom? All I can honestly say is, this is my choice. This is what I choose to do with my life. I can also say without reservation, that for me, a computer screen, keyboard and mouse comprise a place to work. This is where I go to get things done, find information, communicate, write (like this little rant) and to get my days work accomplished. This is not a place for me to create art. There is nothing artistic for me in front of a digital display. I do not feel anything artistic sitting at my desk, and creating art does not happen if I am not in that mood. I see the computer as a place for 100% left brain activities. When I go into the darkroom and close the door, I am immediately in right brain mode. This is where I create. Same as when I duck under the darkcloth behind that view camera. That little LCD screen on my snapshot camera is just for record keeping. There is nothing artistic there for me either. This is how I think. This is how I work. And this is the best I can do to describe why. If you find digital motivating and productive, then by all means use it to your best advantage. I find nothing about it in any way creatively stimulating for me. That is my choice. Do not belittle me if you do not agree. Creativity is fragile and is only where you find it. Use it wisely!
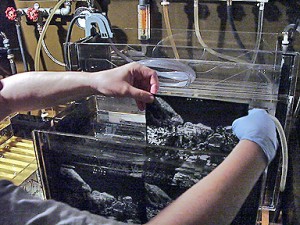
WET DARKROOM

One more thought. I am not on a crusade to convert the world to film. I am only on a quest to try and show everyone that there are choices. . . that the wet darkroom is still alive. If you are interested, you can still choose the medium that best suits you. Matters not whether it is the mouse or the photo tray. What is really important is that everyone knows there is a choice and they should be aware of the strengths and weaknesses of each. To be boxed into that one size fits all world is not good for anyone. Hopefully by now you understand why I choose to work in the wet darkroom.

And, one more final thought. Just in case you believe the hype that film is gone forever, take a look at my earlier post titled, “FILM IS NOT DEAD.” You can special order both B&W and Color film in any size imaginable! No matter what photographic medium you use, the next time someone asks you about photography, do not propagate the lie that film is dead.

JB
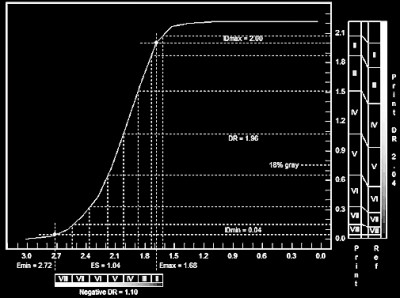
Posted by JB Harlin in Commentary, Darkroom, Film, Photography

GRAPEVINE CAMERA SHOW

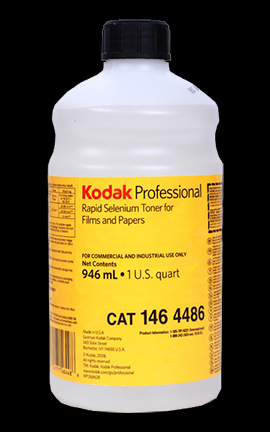
We had a fun time today at the Grapevine Camera Show.  Actually found several things that we didn’t already have laying around.  Funny how many things are FREE. . . especially when related to film and darkroom. A full bottle of selenium toner, and a near full bottle of Photo-Flo, and six rolls of very old 35mm film for David’s darkroom workshop.

You never know what you are going to find.  There have been times we have walked out without a thing to carry home, but not today!

Posted by JB Harlin in Darkroom, Events, Photography

WHEN WILL YOU GIVE UP FILM PHOTOGRAPHY?

FILM PHOTOGRAPHYThis is an interesting question that comes up all the time and seems to keep reoccurring.  When will you give up film photography and move to digital, is something that is asked of me from time to time?  My answer has been consistent since digital photography moved into the mainstream.  Personally, my answer is, “I will give up photography completely if I have to go digital.”  Plain and simple. . .  I will never be able to create serious art with a computer.

My entire life has been spent in and around the electronics world.  I began using a computer when the first Commodore Vic 20 hit the market.  I had to learn computing in order to stay current in the engineering world.  I see a computer as an engineering tool.  It is not a toy, not a game machine, not a source of entertainment.  It is a tool for designing complex machines and circuits. . . for navigating to the moon, and the stars.  One thing is certain for me, it is not a device for creating my art.

I use a computer for work; I use it to write; I use it to access the Internet;  I use it to communicate with others; I use it to update my BLOG;  and I use it to host a web site.  These to me are not artistic endeavors.

In my mind, a computer is not where I go to express myself visually.  It is not where I go to create my art.  In front of a monitor I am in a working mindset, mostly thinking in left brain mode.   Creativity requires a catalyst.   Only out in the field with my camera under the dark cloth, or in the darkroom does my mind really shift into right brain ‘creative’ mode.  It is impossible for me to think in an artistic manner when clicking a mouse and looking at a monitor.

I know I have written about this before, but the same question keeps coming up, and my feeling about the subject does not change.  This is how I work and how I think.  The creation of art is a very personal thing and requires you think in a particular way.  For me, I can only create when I am in the proper environment, and cyberspace is not the proper environment for me.

So, if that day comes when there is no other alternative than to twiddle bits, and if I am still around, I will have to give up my passion for photography.  I will just have to find contentment and enjoy the art that I have created, and know that there will never be anything like it again.  I have spent a lifetime refining my technique.  Take a close look at my prints and maybe you will see a glimmer of what I have spent so much time fine tuning to suit only me.  I feel very fortunate to have lived in a time where I could participate in such a beautiful medium.  Personally, I have no interest in learning anything new. There will never be a replacement for traditional photography!

JB

Posted by JB Harlin in Commentary, Darkroom, Film, Photography

THROUGH THE LENS OF THE VIEW CAMERA

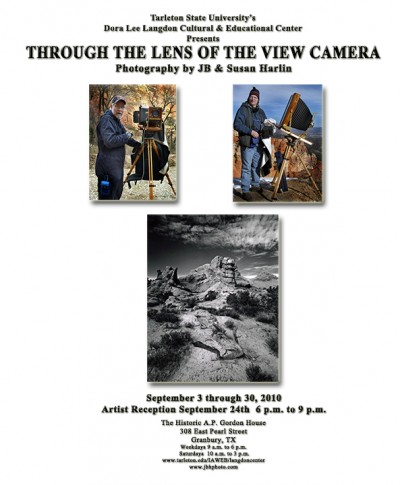
THROUGH THE LENS OF THE VIEW CAMERA“THROUGH THE LENS OF THE VIEW CAMERA”  is an essay originally published in the 2010-2011  “LANGDON REVIEW OF THE ARTS IN TEXAS” published by Tarleton State University’s Dora Lee Langdon Cultural and Educational Center in Granbury, Texas.  This was in conjunction with an exhibition of our photography by the same title in 2010.

A PDF version of the essay is available for download in the ARTICLES area of our web site.  Scroll to the bottom of the page and click on the link there, or go directly to the PDF HERE.

JB

Posted by JB Harlin in Commentary, Photography

SELENIUM TONING

SELENIUM TONEREveryone has their personal way of doing most anything.   I have sorted through what works for me and it may not be the only way to do things, but it is the way I have refined and standardized my working habits.  (I hate the term ‘workflow’ sounds way too digital for me.)  What I have tried to do is explain how I work in the darkroom.  You can use my methods as a starting point and determine what works best for you.

Selenium toning of finished prints is a given for what we do.  Every print is toned in selenium, for permanence, a slight shift in print color, and to enhance tonal range.  We have used numerous dilutions of toner and what works for one paper and developer combination, may not work for another.  When it comes to the dilution and time, you have to experiment.

Here is how we selenium tone prints.  Not sure exactly where all of this came from.  Some from Ansel Adams, others from Fred Picker.  Never the less, here is our standard procedure.

Prints are developed, stopped in acid stop, then fixed in an acid sodium thiosulfate fixer for four (4:00) minutes.  The finished prints are rinsed in running water for five (5:00) minutes or so, then transferred to an archival washer.   The washer is used as a holding bath during a printing session that may last all day.

Once printing is finished, each print is evaluated and may receive further processing by some selective bleaching.  After bleaching, the prints are washed again in running water and again end up in the archival washer for storage.

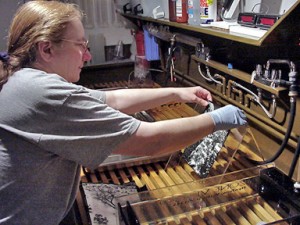
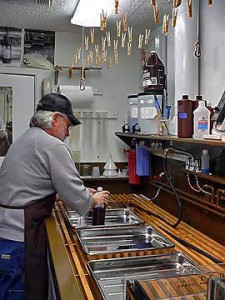
At this point it is time to start toning.  We use three trays when selenium toning.  The first contains plain hypo (Hypo), the second selenium toner at some predetermined dilution (Toner), and the third tray is hypo clearing agent (HCA).

Prints are removed two at a time and placed, back to back, in the Hypo tray for about four (4:00) minutes.   This is your second fix.  The Hypo is an alkaline fix and is necessary to prevent stains, since any acid in the toning solution will result in undesirable stain.  If you use an acid first fix as we do, be sure to wash well before placing into the Hypo.  You do not want to carry any acid into the alkaline Hypo.

After the plain Hypo, prints are drained and transferred to the Toner tray.  Start the timer. . . Toning times vary.  We adjust the Toner dilution to yield a Toning time between two (2:00) to about four (4:00) minutes.   The Toner tray requires continuous agitation by tipping front to back and side to side.  As soon as the prints are in the Toner tray, two more prints from the washer are added to the Hypo tray.  The prints in the Hypo tray are used as a reference to judge the amount of change that is happening in the Toner tray.

When the prints in the Toner tray have reached the desired tone, they are drained and moved to the HCA tray.  The prints in the Hypo are moved to the Toner and two new prints are added to the Hypo.  When the HCA tray gets its second set of prints, the set that has been in the longest are rinsed in running water, then moved back to the washer.

This is a daisy chain process that continues until all of the prints have been process and are back in the washer.  The idea is to fix the prints for about four (4:00) minutes in the Hypo. . . Tone for two to four (2:00-4:00) minutes. . . then about four (4:00) minutes in the HCA.  These times may vary, and is not that critical.  You need to second fix, in Hypo, for no less than three (3:00) minutes and HCA for the same amount of time.

Once all of the prints are back in the washer, wash as usual. For us, our tested time is about one hour.  Be sure to test your washer for optimum wash time.  You will find the mixtures we use posted in the FORMULAS page here on this BLOG.

This is a whole lot more complicated to explain than to actually do.  It is a rhythm you pick up as you work through the prints and is really quick and easy.  One word of caution; once you begin to selenium tone your prints, you will never be satisfied if you don’t.

JB

Posted by JB Harlin in Darkroom, How-To, Photography