SPOTTING MICROSCOPE UPGRADE

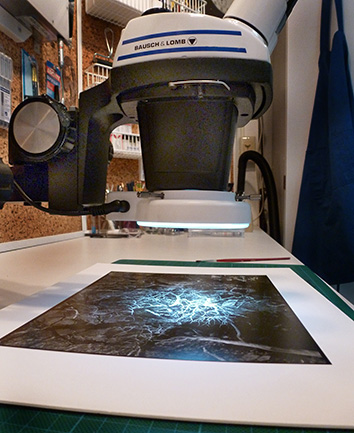
SPOTTING MICROSCOPEI have been doing some upgrades to my spotting microscope and due to the interest this seems to have generated, here is more of the story of what I use for spotting prints and negatives and what I have learned.

STAND

The boom stand that came with the original microscope was more than adequate when spotting smaller prints, but the large base sitting on the table top was always in the way when working with larger mounted prints. I was forever having to turn the print to get to the area that needed work. The large, heavy base was always the problem, even though the boom arm reaches out 16 inches. I toyed with several ideas that would have attached the boom I had to the wall, but it still would not have been long enough, nor have enough range to be very workable. What I wanted to do was to get the stand off the table, and make the microscope more mobile.

I did some research and found that you can purchase an articulating boom for microscopes that can be clamped to a table edge or bolted to the wall. The articulating boom arm I found has a reach of 36 inches and will support loads up to twenty pounds. Certainly robust enough for my setup. I found the dimensions of the arm on the manufacturer’s web site and made a quick mock-up from wood to see exactly how the boom would fit on my table. The wall mount version turned out to be exactly what I was looking for. We ordered one and had it in hand by the end of the week. It was a simple matter to locate the appropriate place to bolt the mount to the wall and the entire installation took less than an hour.

The articulating boom is certainly robust enough, it weighs nearly 20 pounds and is made of very heavy steel. This is exactly what I was looking for. It provides a stable support that allows the microscope to cover most of the work table. Positioning the unit is extremely easy now.

ILLUMINATOR

One thing I really wanted was a more even illumination under the microscope. The Bausch & Lomb 31-35-28 Microscope Light Nicholas Illuminator that came with my setup is a simple miniature spotlight. It is certainly bright enough, but the light is very harsh and directional. The unit fits into an angled hole in the back of the Focus Mount and illuminates a small circle of light just below the work area of the microscope. I found that I had to remove the print from under the microscope, find the spot under another light, mark it with the end of my gloved finger, then return the print under the microscope to complete the spotting process.

I replaced the B&L Nicholas Illuminator with a 144 LED ring light. What a difference! The print surface is now evenly illuminated. I can see spots without moving the print by looking around the microscope, then move that area into view and start work on the area. This is much better for sure. The LED ring light is dimmable and generates little to no heat. The lighting is extremely bright, even, and easy to work under.

The B&L SZ4 pod is threaded on the bottom to accept 38mm attachments. In order to mount the ring light you will need an appropriate mounting collar that fits the pod. The ring light I purchased came with a 48mm mounting ring, so I was off to the shop to spin out my own 38mm version. Found a hunk of aluminum and a couple of hours later I had my custom mount ready. Note: You can purchase a 38mm adapter if you prefer not to machine your own.

EYE PIECES

The last thing I did was to upgrade the eye piece set. The original unit came with a pair of very old B&L 10x eye pieces that I really wanted to replace. I have to admit the originals work extremely well, but after replacing them with a new set of wide angle 10x units, the difference was well worth the expense. The newer ones have a larger size that makes it easier to use wearing glasses.

AUXILIARY LENS

So, once I had everything setup one concern I had became reality. The ring light was in the way of my brush due to the very low proximity of the bottom of the microscope to the work surface once focused. I measured the distance from the lip of the ring light to the work surface and found it to be only three inches. But, there is a fix for that also. There are auxiliary lenses that screw into the bottom of the pod case that change the magnification ratio. I purchased a 0.50x lens which does three things. First; it acts as a mounting collar for the ring light (so much for my custom-made ring, oh well). Second; it reduces the magnification of the unit by one half. Third; and most important, it doubles the height of the unit above the work surface.

I now have plenty of room to work under the microscope without bumping it with my brush. Cutting the magnification by one half is not an issue, since I nearly always used the unit at its lowest magnification anyway. Cutting the magnification by one half now gives me a range of 3.5 to 15 x. The single most helpful thing about using a stereo microscope for spotting is not high magnification, but the ability to really see the area you are working on and precisely place the spotting dye on the spot and not the surrounding area.

FINAL THOUGHTS

For most users the tabletop boom stand will be more than adequate for working with prints up to 8×10 inches or even larger. If you have a deep enough work table, placing the base directly in front of you will allow you plenty of working room. My work table is not that deep, so I needed something different, hence the articulating arm and wall mount were my best choice. The tabletop boom stand weighs 34.5 pounds and is very stable.  The bulk of the weight is the 0.50 inch thick steel base plate.  You can see from the photo below that it supports the microscope at full extension without any danger of tipping over.  I have used that setup for years on both prints and negatives.

My new setup is much more user friendly for my work space.  The boom swings against the wall, out of the way when not in use and is easily swung out when needed.  One more thing you need to do is cover your microscope when not in use.  Dust is the worst enemy of all optics.  I use a small plastic bag that fits around the microscope body and works well to keep nasty dust away.

I would like to thank Christopher Burkett for his help. He was the first photographer I saw using a microscope and was very helpful in answering my questions and helping me select a unit suitable for print and negative spotting.

I can highly recommend the B&L SZ4, since that is the unit I use. There are many other stereo microscopes that are more than suitable for the photographer. The used market is full of units that have been taken out of service in laboratories or manufacturing. A search on the Internet should find more info on what to look for and what to avoid when purchasing a stereo microscope.

As always, a very good place to look for used microscopes and accessories is the old standby, eBay. There are several instrument sellers that deal in used equipment that have stores you can browse. Again, a Google search will turn up even more used and reconditioned equipment.

Keep in mind that what I have done is upgrade my original microscope that has been in service for over five years and has been very useable in its original configuration. You do not need anything but the basic unit as described in my two previous posts titled “SPOTTING MICROSCOPE” and “MORE SPOTTING MICROSCOPE INFORMATION” to get started.

These are the refinements that I have found that make things easier and more convenient for the way I work. Be good to yourself and your eyes, let alone your art. I keep saying the same thing over and over, you can’t go wrong using a stereo microscope for spotting prints and negatives! Any microscope is better than none, or struggling with another type of magnifier. Hopefully this information will help get you started.

NOTE: I have placed the no longer needed pieces of my original microscope setup in our For Sale area. If you are piecing a setup together, you may be interested in some of the parts I no longer need.

JB

Posted by JB Harlin in Darkroom, How-To

Dallas / Fort Worth LF Gathering, Saturday March 16, 2013

Amon Carter Museum We are heading to the Amon Carter on Saturday morning, March 16. There is a new exhibit, “Big Pictures“, that opened on last week Tuesday and runs through the 3rd week in April. We will meet at the museum at 10AM. Following our visit we’ll head over to Lucille’s for one of their wonderful lunches. I figure about 11:30 at the latest.
And, yes we need to firm up some Spring photography dates. Before we know it, it will be 100+ degrees again.

Please let me know if you can make it to Lucille’s;  I will call them Friday morning to reserve a table.  

Have a great week y’all

Michael

Drop us an e-mail or post to Michale’s thread on the LF Forum HERE.


Posted by JB Harlin in D/FW LF GROUP, Events

ARTISTS’ RECEPTION, GOODRICH GALLERY, MARCH 3rd

We had a great turnout for our opening reception of our current exhibition, “A B&W INTERPRETATION OF NATURE” March 3rd at the Goodrich Gallery in Dallas. A heartfelt Thank You to everyone that came out for the opening.  Also, remember that the photos will be on display through the end of the month.

We would like to sincerely thank our good friend, Becky Scott, for sharing her photos of the event!

More Information HERE.


Posted by JB Harlin in Photography

THE LEARNING WORKSHOP

School WORKSHOPLast summer at Yosemite I lent a boy my 4×5 camera.  He said, “what do I do with this now?”  and I said, “unscrew it and find out for yourself.”  Why shouldn’t he learn how to collapse a camera?  Why should I teach him that?   You mustn’t treat a child as if he’s a nitwit; tell him something and let him go to it.  I don’t believe we do enough self-education.

Interview, Imogen Cunningham, “Dialog with Photography”

I personally have always been one to learn on my own.  I have never been much to attend classes nor workshops.  I do enjoy meeting with other like-minded people and talking shop, and exchanging ideas and techniques, but serious learning for me is a very personal thing.  When I need to learn something new I find a book and start to read.  In this modern world of high-tech, I can also do an Internet search.   I have always been a self starter and learner, that is just how I think.  I do love the atmosphere of a workshop though.  A good workshop is short and sweet.  An intense few days of focused study.  But, it seems that the idea of the photography workshop has changed over the years.

What has happened to the old-fashion photography workshop?  It seems that most every workshop now days is more about the destination, than the art of photography.  For me, learning anything new, or honing the skills you already possess, can be accomplished just about anywhere you can find a comfortable, and appropriate place for learning.  I find it hard to understand why in order to attend a photography workshop you have to trek to some far and picturesque location.  This is expensive and if you believe you are going to bring back a portfolio of prize winning prints. . . well. . . I just don’t see it happening.

A workshop is a place to go to learn.  It is a place to expand your skills, learn new skills, interact with like-minded people, and learn from an experienced instructor.   You need to attend a workshop for the purpose of learning and this can be done anywhere.  Why not spare the expense of exotic travel and attend a local workshop?   All you really need is a classroom. . . most any classroom will do.   It would be nice to have an interesting place near by to go outside and get some hands-on field experience, but this need be nothing more than a small park.  The idea is to learn procedures that you can use when you do travel to some great place and find something interesting.

Once you have honed your technique in familiar territory, then you can head to the beautiful places.  I can never make meaningful images amidst the distraction of a group of people.   My concentration is continually interrupted and I find it difficult to stay focused.  Only when I am out alone with my subject can I think artistically.   The workshop environment is too cluttered and the distractions are far too great.  You need to be paying attention to the message, as Fred Picker said, “steal with your eyes.”   Watch others, especially the instructor, and note how they approach a particular situation.   Ask questions as to why he chose to work in this manner.  Watch intensely and make notes, both mentally and physically. . . yes carry a notebook and a pencil.    Take notes, make diagrams and sketches, whatever it takes so that you can remember and learn.  Do not expect to make meaningful images at a learning workshop.  Whatever images you make within the workshop atmosphere are for the purpose of learning.  Leave the really serious photography for when you are alone and are not distracted.  You will make images that are more meaningful and be more focused when you are able to concentrate on your subject.  This is when you put into practice those things you learned in the workshop.

I would love to see more local, small workshops that teach the basics through advanced photographic technique.  A classroom-type workshop, where those that are interested in learning the how-to, can learn the ins and outs.   Where one can hone those skills necessary for serious work when they do travel to those wonderful places and find things that inspire them to be creative. A learning experience, not a travel experience.  How about more workshops that are a learn now, travel later event?

JB

Posted by JB Harlin in Commentary, Photography

MORE SPOTTING MICROSCOPE INFORMATION

Spotting Microscope Since I had posted my original piece titled “SPOTTING MICROSCOPE” I  have received numerous additional questions.  Seems everyone is looking for an easier way to spot prints, and I will tell you one thing;  there is nothing better for print spotting than a good stereo microscope!  There just is no better way that I have found to see and eliminate those pesky spots we all have to deal with.
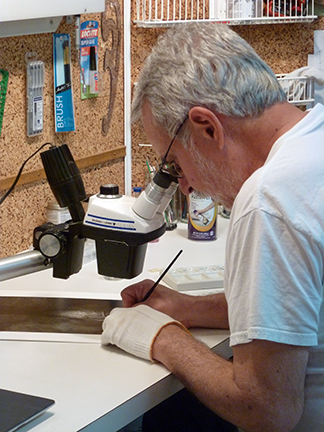
First a little information on what to look for.  The microscope is a modular device and you can configure it to suit your needs.  There are five main items you will need.

  1. POD:  this is the main body of the microscope
  2. EYE PIECES:  these are where you look into the unit and their design sets view and magnification (I use the Wide Field 10x)h4>
  3. FOCUS MOUNT:  this holds the POD and allows you to move it up and down in order to focus the unit (like focusing a view camera)
  4. g>STAND:  the stand holds the entire microscope assembly
  • ILLUMINATOR:  a concentrated light source you will need for spotting prints

Most of the questions I have received pertain to what microscope I use.  I had to do a little research as to the exact model I have.   What I use is not the latest model and is probably at least 30 years old.  The good news is quality microscopes are well-made and will last a lifetime if taken care of properly.

The unit I have is made by Bausch & Lomb and is the StereoZoom 4.   Here is a brief description;  “One of the most popular stereo microscopes of all time is the Bausch & Lomb StereoZoom 4 (SZ4), later taken over by Leica and also marketed under the Cambridge Instruments name. It was introduced in 1959 and made until 2000.”

They must have made many thousands of these units in many configurations.  They are plentiful on the used market.   Another question I get is how much do they cost?  That depends on condition and where you find the unit.  We have had ours for some time now and it seems we paid about $450.00 from a seller on eBay including shipping.
reconditioned and fully guaranteed unit from a specialty company will be more expensive.  Keep in mind that the stand is very heavy and adds to shipping cost.    My best recommendation is to purchase a unit with a good return policy if possible.JBH Spotting Microscope

Here is a great site with instructions on how to service and adjust the StereoZoom 4:

http://www.covingtoninnovations.com/stereozoom

I will add a few more comments that might be helpful.  When it comes to the Illuminator there are numerous choices.  The unit we use is an incandescent-type that uses lenses to focus the light into a concentrated beam that illuminates the print surface.   It mounts in the Focus Mount and works very well.  You can also use a Ring Light mounted to the bottom of the Pod.   There are numerous illuminators and some even use LEDs.  I am going to try a Ring Light that I have to see how well, and evenly, it lights the print surface.  Another thing I have not tried so far.

Another thing to consider is the Stand.  There are times I wish the arm of the stand was longer when working on larger prints.  I have been seriously looking at an Articulating Boom mount that attaches to the wall.  Wall mounting will free up work table area and the boom has a reach of about two feet.  Just something else to consider.

Hope this helps to clear up some of the questions.  As I said in my PREVIOUS POST, “. . . a stereo microscope is the Rolls Royce of spotting magnifiers.”

JB

Posted by JB Harlin in Darkroom, How-To, Photography

TALKING ABOUT FILM PHOTOGRAPHY

TALKING ABOUT FILM PHOTOGRAPHY

We would like to thank Larry and the TCC Exposure Club for inviting us to speak to their group last Wednesday.  We had an enthusiastic crowd, with plenty of questions and discussion about big cameras and black & white film.

JB

Posted by JB Harlin in Events, Photography, Presentation

A B&W INTERPRETATION OF NATURE

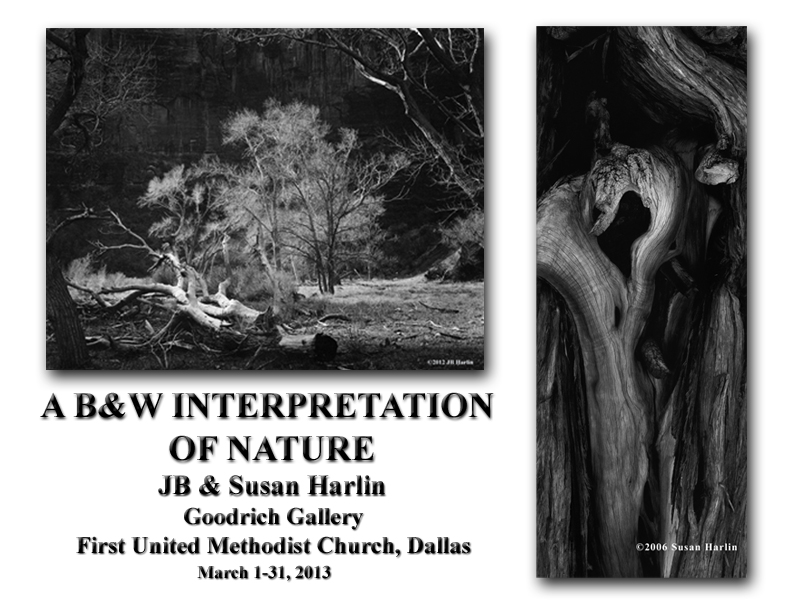
We would like to invite everyone to drop by and see some of our latest work on display in Dallas.  We are traditional B&W photographers working exclusively in the wet darkroom.  We work with LF and ULF cameras shooting film sizes of 8×10, 11×14, 4×10 and 8×20 inches.  We work exclusively in the wet darkroom; our finished prints are all traditional silver gelatin.  We will be at the gallery for the reception Sunday, March 3rd, 12:00pm to 2:00pm, we would love to see you there.

A B&W INTERPRETATION OF NATURE

“A B&W INTERPRETATION OF NATURE”

Traditional B&W Photography by JB & Susan Harlin
Goodrich Gallery
1928 Ross Ave
Dallas,Texas 75201
March 1st through 31st, 2013
Reception: Sunday, March 3rd, 12:00pm to 2:00pm


You will find a map HERE.

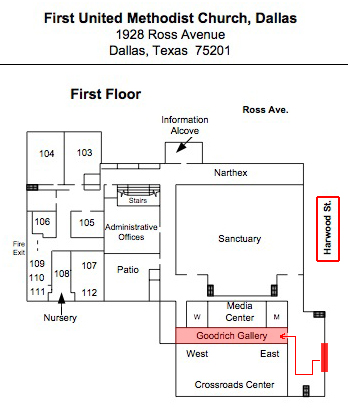
For those of you coming to see our exhibit, or attending the reception this Sunday, March 3rd 12-2pm, (Note: we will be in the gallery till closing time Sunday) here are directions to find the gallery.  Enter the building through the glass doors on Harwood St.  Go up the stairs, past the receptionist desk and the gallery will be on your left as you walk toward the Sanctuary.

Posted by JB Harlin in Events, Photography

EDGE B&D CARD

Edge Bruning CardI keep harping on the same old line, but it is true that everyone has their own way of doing things and I am no different.  But it seems that I continue to get questions about how we work.  There seems to be a misconception that when you contact print that Burning and Dodging (B&D) are not possible.  That is 100% malarkey!   Whether you use a spring back or vacuum frame, the image on the negative is visible against the white printing paper.   Burning and dodging is exactly the same as enlarging.

Now having dispelled the myth about contact printing, and understanding things work the same, I find there are two B&D tools I use all the time.  Yes, there are times you will have to cut strange shapes to make a particular B&D tool for a certain image.  No matter what special shapes I may need, I find two shapes that are universally used most of the time.

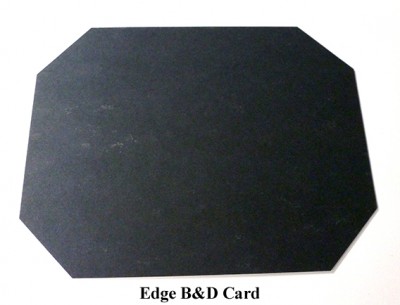
By far my most used B&D shape is a rectangular piece of mat board.  I use this for edges, sides and most any other large areas.  The second most used B&D shape is a specially modified rectangle for edge burning.    I seem to forever need to burn all four edges of most prints and why burn each edge one at a time?  I cut a piece of mat board smaller in both dimensions than the print I am making.  Then I cut off all four corners at a 45 degree angle.  This is my Edge B&D tool and it sees a lot of use.  I can burn all four sides of a print in one exposure.  The farther you hold the tool from the print, the larger the area that is held back.  Moving the Edge B&D card either in a slow circular motion, or moving slowly up and down, yields a nice even edge burning all the way around the print.

I mostly print 8×10 and 11×14 negatives, and I mostly contact print, so I have two Edge B&D cards for those size prints.   I use a custom handle to hold dodging shapes fashioned after Fred Picker’s Lawton Dodger.  Most of the time, I have my Edge B&D card taped to my dodger.

This is something to think about and may work as well for you as it has for me.  And, this is not just for contact printing.  It works equally well for enlarging.  Try making your own Edge B&D card, you may like using it!

JB

Posted by JB Harlin in Darkroom, How-To, Photography

CALIFORNIA & UTAH 2012-2013 TRIP

Mine ShaftWe went on another December and early January expedition to the Southwest again this year.  This time we trekked to California and the Eastern Sierra, then backtracked to Utah to visit some of our favorite places to photograph.  We saw mild weather and very cold weather on our journey.  We had blue skies, cloudy skies, rain and snow.  Susan and I shot a lot of film, and now it is time to get the notes in order and begin the darkroom work.

We photographed 20 days of the 30 days we were out.  We drove 4,102 miles and made a lot of snapshots.  HERE is our latest trip album. . . enjoy!

JB

Posted by JB Harlin in Film, Photography, Travel

GRAPEVINE CAMERA SHOW, SAT 01/26/2013

The Group will be meeting in Grapevine, TX for breakfast at The Original Pancake House, 8:30am.  Everyone is invited to join us for breakfast, or meet up at the Camera Show, which opens at 10:00am.   Also, follow this LINK and print the page for $1.00 off the show admission.

Hope to see you there!

JB

Posted by JB Harlin in D/FW LF GROUP, Events, Photography