 Like most everything I do when it comes to photography, I am not the source of the technique, idea or clever device. I would say that 95% of what I do is something I learned from someone else. I may add my own twist, but I cannot take credit for the idea.
Mounting photographs is a tedious and time-consuming task that we all must master if we want to display our photographs. Dry mounting is our chosen method of print presentation. Anyone that has dry mounted photos knows what is involved. You tack dry mount tissue to the back of the photo, trim the edges, then align the image on the mount. It is, at best, a nerve racking chore and one slip then you have just ruined a print.
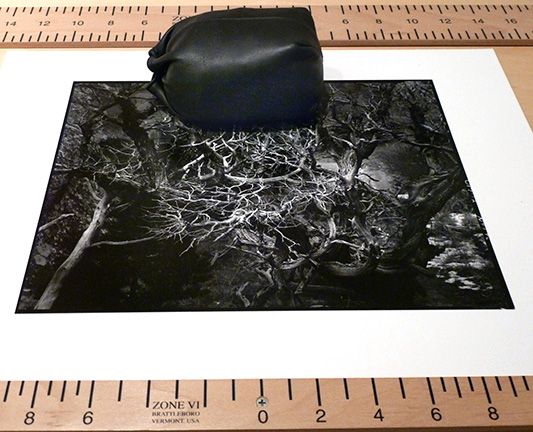
It is imperative that you get the photograph aligned properly on the mount. This is a tedious process of measuring and measuring again. . . and. . . maybe you should measure again! Nothing is more frustrating than when you get everything just right, you bump the print and have to start again. What you need is something to hold the print in place while you do the final tacking to the mount. This is where a weight bag comes into play. For a small print only one small weight bag should be enough. With larger prints a larger weight bag might be better, or possibly two smaller ones would be better to hold things in place. Either way, a good weight bag is a big help.
So, now that we have solved the problem of what to do, we need to look at how we can construct a suitable weight bag. For me, simple is always better. . . inexpensive is even better than simple. So here is how I solved the mounting weight bag predicament.
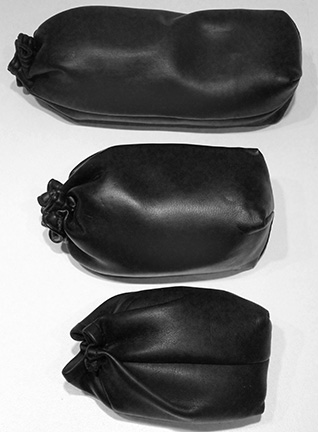
A weight bag for mounting photographs must be made of some very soft material so as not to damage the print surface. The perfect material is a synthetic Naugahyde-type material that lens bags are made from. A good place to look for lens bags is your local camera show. There is nearly always a box under some table full of such things that range from really cheap to even free. What you are looking for are the bags that are made of very soft, supple material. A lot of the bags are made of very stiff, rough material that will damage a print. I have several size bags ranging from those that were intended to carry large, long, lenses, to those that would hold a small normal lens. See if you can find several large bags and a couple of the smaller ones.
Once you have the bags it is only a matter of stuffing them with a suitable weight material. I have heard suggestions from sand to marbles. I would suggest using Aquarium Gravel from the local pet supply as a great weight material. Any of these items should work well, but I did something completely different. First, I just don’t like the idea of rocks, sand or gravel in or around my work area. Second, I did not have that many marbles (some say I lost all of my marbles years ago). There was one thing I did have an abundance of and that was pennies. I had several large jars filled with pennies in the back of a closet. Why not use them, since they are heavy and should work well for my purpose.
No matter what material you choose for filler, I would highly recommend that you first load your weight material into a heavy plastic bag. I would even further suggest that you double bag your weight material, just in case. You will have to adjust the amount of filler needed to fill the lens bag and still allow you to close the drawstring end closed. Once you have the correct amount of filler in a plastic bag, close them securely with twist ties, or use a heat sealer. Note: Do not stuff the inner bags too full. You want them to be about 90-95% full.
All that is left to do is stuff the bagged weight material into the lens bag and close the draw strings. I tie the drawstrings off then cut off the excess.
I have had my weight bags, stuffed with pennies, for years and they have served me well. I use them for print mounting and for weight when flattening prints under a sheet of 1/4 inch glass. Weight bags are a handy tool to have around. The next time you are at your local camera store or a camera show, look for used lens bags. Pick up a few soft bags and make your own weight bags.
JB

