Zone VI

THE PROPER PROOF; AN IMPORTANT STEP

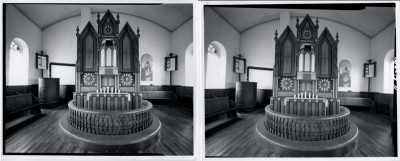
‘Before making a print, let me remind you again that you must first make the proper proof in order to select the negative for printing.’


‘Please do not short cut this step.  An outstanding print is always the product of an outstanding negative.  No one can positively translate negative densities – as seen on a viewing table – into emotional values.  You must see the way it prints.  The proper proof identifies the qualities of the negative.’

-Fred Picker, ZONE VI WORKSHOP; The Fine Print In Black & White Photography,  Amphoto, Garden City, NY, 1974, p. 44-

Proper ProofWhile working on all of the negatives from our last trip, and a couple of local outings, I began thinking about proofing and just how important the proof is to the fine art photograph.  I guess I take a lot of what I do for granted and seem to believe that everyone else understands the process.  This may not be all that true and maybe it would be a good idea to emphasize in a little more detail the importance of proofing.

I gained the most in my creative photographic endeavors when I discovered Fred Picker and his little book titled “ZONE VI WORKSHOP.”  This little book is short and sweet, yet packed with a lot of information.  You might say it is deceptively simple and short.


I believe the above quoted paragraphs from the chapter titled “THE FINE PRINT” pretty much sums up one of the most important steps in the photographic process.  You have to see what you have captured on the film before you can decide to make the finished fine print.  The proper proof is your absolute verification as to the validity of the negative.  It is your guide, your control and provides the necessary information for the next step. . . the finished print.

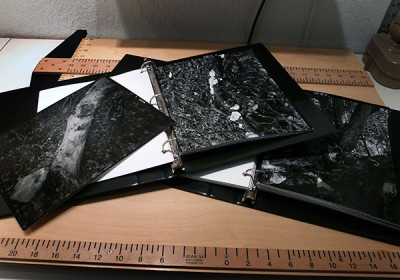
We proper proof and file our proper proofs into 3-ring notebooks.  This is where the second half of the creative process begins.  (The first step is finding something worthy of capturing on film.)  I highly recommend you proper proof every negative you make.  This way you will know what your are doing and what you have to work with.  The proper proof will also reveal any shortcomings or problems you may have with your equipment or technique.  As Fred says, “Please do not shortcut this step.” I agree and feel it is a very important step in the creative photographic process.

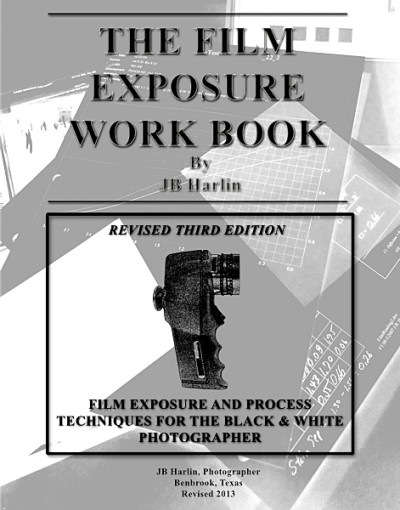
Are you interested in learning more about the art and craft of black & white photography and Proper Proofing? We have created an e-book series especially for you. Within in the pages of “The Film Exposure Work Book” you will learn how to preform your own film tests and how to make proper proofs. You will find more information at our BOOK STORE.

JB & Susan


Posted by JB Harlin in Commentary, Darkroom, Film, Photography

PENTAX DIGITAL METER SCALE MODIFICATION

I have been going through and updating this blog site and I have found several entries I have never posted. This is a project that was completed way back in 2007. Enjoy this blast from the past!


Pentax Digital Meter Mod
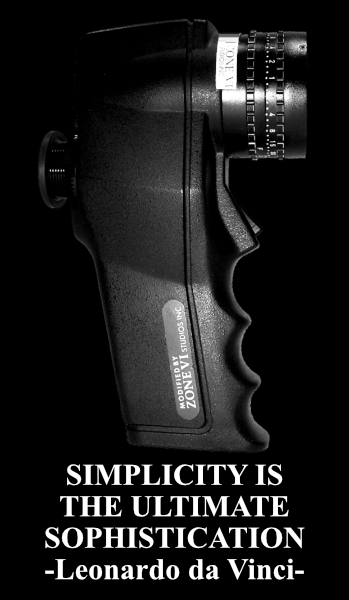
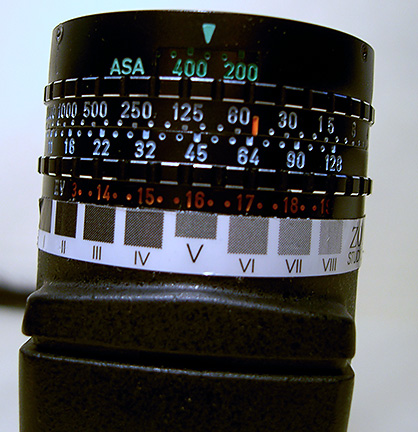
So, I know that I really should spend more time talking about photography, but it is so much easier to talk about equipment and modifications. . . so. . . here we go again.  I know I have said several times before that little around here has not been modified in some way.  I have to say that my Pentax Digital Spot Meter is about my number one tool when photographing.  Maybe I should say it is my only tool that has a battery.  No wonder Paul Horowitz chose it to modify for Zone VI.  I like everything about it, except the Zone Dial.  Now don’t get me wrong here, the old Zone VI Zone Dial was plenty useable.  It was just that the label was not that durable and though we had purchased replacement Zone scales, I wanted something that was more rugged.   So, this is how it all started.  I just wanted to make a better label.  And, another complaint I had was that part of the Zone Scale was covered by the meter barrel.


What I wanted was a more durable scale, and the ability to see the entire scale from Zone I to Zone X against the EV numbers on the dial.  I had an idea about the scale and I thought I might open up the barrel of the meter a little.  Turns out the scale was not that difficult, but in order to open up the barrel on the meter required I machine an entire new part.

First I needed to design a new meter scale and see how it would fit.  The nice thing about doing your own modifications is you can design for the way you think.  I set off first laying out a Zone Dial that I liked.  I wanted a few symbols to jog my memory without clutter.  I wanted to see ten full stops.  It would include markers for N as well as N+1 ½ and N-1 ½, so I would not have to do any counting of Zones or EV numbers, just dial up whatever you want with little thought or counting.  I also added a marker for Zone III to remind me of deep shadows and one at Zone IV for lighter shadows.  Of course I added my name, website and copyright and there it was.  I did the artwork in TurboCad and laid out the spacing to match the EV dial on the meter.  I printed out a paper model and proceeded to check for fit and functionality.

Next I needed to rework the rear part of the meter barrel.  I first thought I could modify the original, but it became obvious that if I were to cut away metal on the factory part, I would then have to strip the original anodize and re-plate.  That usually does not work too well, so I opted to just make an entire new ring.  This wasn’t that hard to do.  The lens barrel is easily removed and the rear part that I needed to modify was simple machining.  All I had to do was measure the original and make the replacement, adding my modification.  I turned out the new part and made several test fits to make sure everything worked as planned.  Once I was satisfied with the new ring, it was just a matter of some black anodize and assembly.  I should note that we have four of these meters and I modified all of them at the same time.

I ordered some light sensitive, adhesive backed, aluminum that is mostly used for trophies and name plaques.  I have used this material for panels on prototype devices before.  This would serve as my new meter dial.  I printed out a negative on clear film and this was used to expose the metal plate.   After development, I had my dials ready to be cut to size.  All that was left at this point was positioning the dials onto my new, opened up, meter barrel and one more project was done.

Zone System Dial

This was another one of those projects that was a little more involved than originally anticipated, but turned out to be well worth the effort.   I did the modifications in 2007 and our meters have seen a lot of use since.   My slightly encoded Zone Dial has worked very well, allowing me to work quickly and hopefully with fewer mistakes.  Like I have said before, I like to keep things as simple as possible when working.  Too much technical chatter gets in the way of creativity.  I would rather do the technical work in the shop so I can get on with making my art without too much distraction.

JB

Posted by JB Harlin in DIY, How-To, Photography

ZONE VI; THE END

Zone VI Print Developer
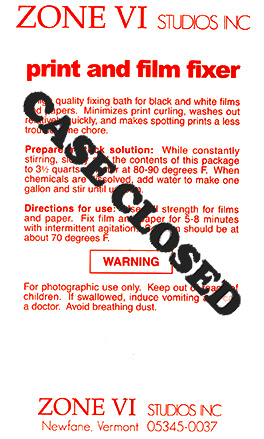
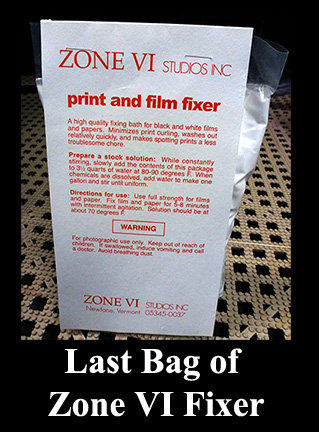
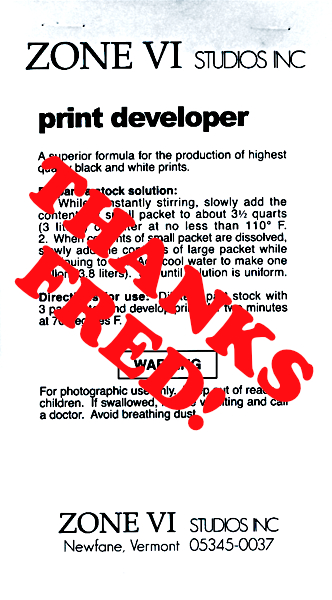
It has finally happened!  I have used Zone VI chemicals for well over twenty five years now.  Though we have moved on to different formulations for finished prints, we have continued to use Zone VI Print Developer for proofing.  That is. . . until now.   I mixed the last bag for proofing our 2015/2016 trip and that is that.  This has been a looming change that has been in the back of my mind for several years now and it finally came time to do some testing.  OH Drat. . . TESTING!!!

Remembering a conversation from years back someone, somewhere, said that Zone VI Print Developer was just D-72. . . or maybe Dektol?  There is one sure fire way to find out. . . “TRY IT” as Fred would say.  And that is exactly what I did.

I mixed a liter batch of D-72 and used the last of the Zone VI Print Developer in a side-by-side test.  First I exposed two sheets of our proofing paper, set to Grade #2, to a Stouffer 21-Step Wedge.  Processed one sheet in each developer and finished as usual.  Both developers were diluted 1:3, all temperatures were matched and the Zone VI Compensating Developing Timer was used on each.

After the test sheets were dry, I measured them with an XRite 810 densitometer and plotted the curves with the BTZS Plotter app.  I knew from the numbers they would be a near match and the resulting graph shows very little difference.   That pretty much settled that.  (NOTE:  In the plot, the black line is D-76 and  the red is Zone VI.)

D-71 vs Zone VI Graph
There was only one more test required to convince me, and that was making a real proof.  I chose a familiar negative and exposed two more sheets of paper using this negative.  Each sheet of paper was developed in the same fashion as the step wedge prints and finished as usual.  The two proofs were a near identical match.  The Zone VI was very slightly less contrasty, but that could have been due to the fact that the developer was old.  The main thing I was looking for was to be sure the color of the two proofs were the same.  They are, to my eye at least, exactly the same color.  (NOTE:  The proofs below, on the left is the D-72 and on the right is the Zone VI.)

All that was left to do was to make a new paper grade test to confirm the enlarger VCCL settings required to print a grade #2 and that was the end of the testing.

FYI;  Here is how to calibrate a VC enlarger, “USING BTZS TO CALIBRATE A VARIABLE CONTRAST COLD LIGHT” originally published in the Sep/Oct 2007 issue of View Camera Magazine.  I have added the formula for D-72 to the FORMULAS area of the jpbhphoto.com BLOG.

Zone VI & D-72 Proofs
It’s a sad day but finally Zone VI, as a supplier of darkroom chemistry for us, is gone forever.  The good news is, it is possible to mix your own developer and achieve the same results that we have become accustom to over the years.  Proper proofing is the control and the verification that your technique is working as you think it should.  It is important to keep the proofing process as consistent as possible.  I believe we are good to go without Zone VI now.  Thanks Fred for all you did for traditional film photography!

JB


Posted by JB Harlin in B&W Paper, Darkroom, Photography

OVER 25 YEARS OF MPD & STILL GOING

Simplicity
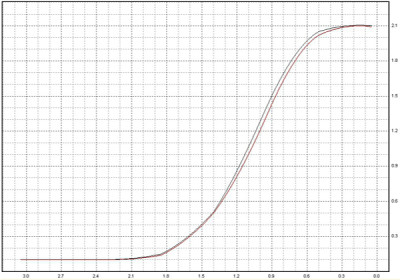
Seems everyone has their favorite method for exposing and developing film. You do shoot film, don’t you?  If not, you should!  But I digress for sure. . .  There are as many ways of working with film as there are opinions. . . maybe more.  None are better or worse than any other, if they work; if they give you the results you insist on within your own vision, then you are already there.    But, in this day and age there are a lot of people coming into photography and just now discovering film and the traditional darkroom.  In the beginning film is a mystery and requires some time to begin to master.  Of course, the most important thing is that you shoot film and make finished photographs.  How you get there is a very personal thing and you need to choose what works best for you.  But, you have to start somewhere.

For me, I prefer simplicity when I am out making photographs.  I do not want to get bogged down with a lot of complexity.  I struggled with film exposure and development, like I would speculate that most everyone has when they first start out trying to understand film photography.  It was way back in the mid 1970’s when I realized I could process and print my own photographs.  This was a big deal for me.  It started a lifetime involvement with photography and the wet darkroom.

I stumbled around, trying this and that looking for that magic technique that would give me a negative that would print what I saw in my mind’s eye in the finished print.  I read everything I could find on the subject.  I even toyed with the idea of becoming a strict Zone System practitioner.  Thing was, everything I looked into was just way too complicated.  There had to be a simpler way. . . at least, that is what I thought.

Somewhere in the 1980’s I discovered Fred Picker and his “Zone VI Workshop” book.  This was exactly what I was looking for.  It made sense and contained a simple approach that I found worked!  Having found someone that was also into simplicity, I subscribed to the Zone VI Newsletter.  I remember really getting excited when I discovered the latest issue in the mailbox.  Plenty of opinion and advice that really made sense.  To this day I still have my complete set of these newsletters.  About 25 years ago when I seriously decided to start working with large format photography, I read the entire set again. . . three times. . . every issue, #1 through #83.

MPD; THAT SIMPLE

I had experimented previously with what Fred called MPD (Maximum Printable Density) back in my early days in photography.  I had very good results, but I drifted away from the darkroom for a while to concentrate on a career.  When I moved back into photography after a brief hiatus,   I dove right into large format.  I needed to relearn my darkroom skills, at least to the point where I had left off and establish a sound working technique.

MPD is such a simple approach to exposing film that most think it will not work.  It is deceptively simple for sure!  I did some experimenting to get back into the groove and continue my experiments with simplicity.  I found that MPD was just what it claims to be. . . SIMPLE. . . and well-suited for any film format!   I am a big fan of ‘simple’ for sure.  As with anything, it is ludicrous to use something that does not work.  Why make it worse on yourself.  I approached MPD with the idea, that as long as it works, I will use it.

It is funny how there are things that just seem to fit you and continue to do so.  It has been over 25 years now and I still use MPD. Why?  Because it works!  My wife uses it and she is sold on the idea of simplicity also.  If you have seen any of our original prints from LF negatives, you have seen film exposed using MPD.

Oh, guess I forgot to mention exactly how simple MPD is in practical use.  Here goes, don’t blink;  1. Find your subject, compose as you wish.  Not much new there.  But, here it comes.  2. Meter the area you wish to render as a Zone VIII.  White painted wall, snow, sand. . . whatever you wish to print as finely textured white (Zone VIII).  Meter that area.  3. Open up three stops, or place the reading on Zone VIII if your meter has a Zone Dial.  4. Set your exposure and expose the film.

It is actually even easier than that;

1.  Meter

2.  Place VIII

3.  Expose. . .  DONE!

Now, don’t believe this is a haphazard way of working.  First, you must do your film testing.  You need to establish your working EI (Exposure Index) and your normal (N) developing time.  You need to establish a proper proofing regiment.  Your proper proofs are your control.  They tell you just how you are doing with film exposure and developing.  Study your proper proofs and make fine adjustments on the fly.  Thing is, once you find a starting point, things get much easier.  You do not have to engage in never-ending testing.  Test once. . . find that starting point.  As Fred Picker said, “Get one foot on a rock.”  Then you use your proper proofs for fine tuning and a constant check on how you are doing.  Simple!

The Film Exposure Work Book

Are you interested in making really good negatives?  Want to understand proper proofing,   personal film speed and developing times?  How about getting started using MPD?  Interested in getting the technical stuff behind you?

I was asked how to use MPD and what testing was necessary years ago.  I wrote “THE FILM EXPOSURE WORK BOOK” specifically for those interested in learning where to start.  This 44 page book is now available for download in e-book format from our online store.  You will learn how to establish your working EI.  Determine your N and N+1 1/2 developing times.  Proper Proofing is covered and much more.  You will also get a printable 12 page Work Sheet to record your testing results.

Is MPD right for you?  If you are just starting out with film, it just might be if you are interested in a simple, reliable method for making the best possible negatives.  Fred Picker had a large rubber stamp that said TRY IT.  He used it to answer letters people wrote to him asking questions.  You will only know if you TRY IT.  It has worked well here for over 25 years!

JB

Posted by JB Harlin in Commentary, Darkroom, How-To, Photography

OUR FOR SALE AREA IS OPEN

Hope everyone had a great Holiday, a Merry Christmas & Happy New Year!  Our store is open again. . .  looking for a nice 4×5 camera?  Take a look HERE  at this nice Zone VI Walnut camera. . .


Be sure to drop by our For Sale Area for more items.

JB & Susan

Posted by JB Harlin in Film, Photography

MY REPLACEMENT FOR ZONE VI PRINT & FILM FIXER

ZONE VI PRINT & FILM FIXERI had written earlier about the demise of Zone VI chemicals and how it has now become necessary to mix our own chemistry from raw supplies.  Take a look at the previous post titled, “ROLLING YOUR OWN FIXER.”  Since that post I have done quite a bit of research and testing.  I am convinced that the fixer formula we chose is not exactly a direct replacement for the old reliable Zone VI product.  Not that what we have been using is not a good fixer, it just is not the same.  Fred always said, “Different is not the same.”

I have mixed up several concoctions, but have always come back to the Looten Acid Fixer for its simplicity and close match of pH.  I kept bypassing some of the more well known formulas for some reason, possibly because everyone says they have a very unpleasant odor.  I don’t believe any could be any worse than the Looten Acid Fixer we have been using. . . this stuff will take the hair out of your nose.

I want to use an acid fixer for paper, because that is what I have used for years.  All I wanted to do was find a 100% replacement for the Zone VI Fixer I have used for as long as I can remember.  Zone VI Fixer was stable and it had little to no odor.   I have searched all over and have never found the exact published formula used by Zone VI.  

I looked through all of the old Zone VI Newsletters and finally resorted to watching the Picker videos.  Finally in the printing video Fred talks about his fixer being Kodak F-6.  The only problem is that the Zone VI Fixer I have used for years always came in a single bag as dry chemical.  If you check the formula for F-6 you will find it contains 28% Acetic Acid.  I am no chemist, but as far as I know, 28% Acetic Acid only comes in liquid form.  Plus, F-6 is a hardening fixer.   I have no reason to believe that Zone VI is a hardening fixer, let alone all instructions for F-6 say that the hardener, Potassium Alum, must be dissolved separately and added after all other ingredients have been completely dissolved.  Again, the Zone VI Fixer came in one bag containing only dry chemical.  So, I really do not believe that F-6 is the correct formula for what was sold as Zone VI Fixer.

There are a lot of guesses, but I do not want a guess.   I measured the pH of Zone VI Fixer to be 5.5.  None of the other concoctions that I have tried matched this pH, nor did they lack a strong odor.  My original choice of Looten Acid Fixer had the closest pH coming in at 5.0, but has a strong odor, where the Zone VI Fixer has little odor at all.  I still found myself going in circles.ZONE VI PRINT & FILM FIXER

I finally got tired of having to run the vent fan on high to get away from the smell.  Time to put on the apron, roll up the sleeves, and do more research.  This time I decided to investigate the Kodak F-24 formula.   Why I bypassed this one before is beyond me, but I did, and it was a mistake.  There is an alternative mixture that is suppose to be ‘low-odor’ that substitutes Citric Acid for the Sodium Bisulfite of the original Kodak formula.  This mixture still had a very strong smell.  So much for the alternative, low-odor mixture!

Next, I mixed up a two liter batch of the original F-24 formula, and surprise. . . it smells just like Zone VI Fixer.  Next to no odor at all.  I measured the pH. . . well whaddya know. . . it was exactly 5.5, just like Zone VI.  Next I needed a stability test.  I put two liters of F-24 in a four liter jug and let it set for a week.  No change!  That does it for me.  So far as I am concerned, there is no difference.

Wow!  Have I solved the great mystery?  Could it be that Zone VI Fixer is nothing more than Kodak F-24?  I have changed our FORMULAS AREA to reflect the formula for F-24 Fixer since it is now our chosen formula for paper.  Note, that the only difference in the new formula is the addition of 10 grams of Sodium Sulfite per liter to the original Looten Acid Fixer formula.  Not that difficult, but it does make a difference.  Even if F-24 is not the exact same formula as Zone VI, it is plenty close enough for me.  I will add that Gordon Hutchings also recommends F-24 for film and paper in “The Book Of Pyro.”   So, now you know what I have learned about fixer.  

There is one more thing to be aware of; be very careful with the temperature of the water when mixing Sodium Thiosulfate.  The most common Sodium Thiosulfate is the Pentahydrate (crystalline type) which requires 240 grams per liter.  You need water at about 100-125°F, because it is extremely endothermic and will rapidly cool the water as it dissolves.  This I knew from experience.  What I didn’t know is that Sodium Thiosulfate Anhydrous (fine grain like table salt), which requires 152 grams per liter, should never be mixed in water above 90°F, because it will decompose and form a precipitant.   Just so you know, if using Sodium Thiosulfate Pentahydrate (large crystals) use hot water.  If you are using the Anhydrous (fine grain) type, mix at about 80-85°F.

CASE CLOSED. . . at least for me.  I have found what I was looking for.  If you were a Zone VI Fixer user and are looking for a suitable, easy replacement, this should work just fine.  Now, back to making photographs. . . and. . . I can turn that vent fan down to low again!

JB

Kodak F-24

  • Water (at about 125°F)…………………750.0 ml
  • Sodium thiosulfate, crystalline………240.0 grams
  • Sodium sulfite, desiccated……………10.0 grams
  • Sodium Bisulfite………………………..25.0 grams
  • Water to make……………………………1.0 liter
Note:  If anhydrous thiosulfate is used, the water temperature should not be over 90°F (80-85°F) to prevent decomposition.


Posted by JB Harlin in Darkroom, Formulas, How-To, Photography, 0 comments

ZONE VI DEVELOPING TIMER PROBE BRACKET

ZONE VI DEVELOPING TIMER PROBE BRACKETI am a firm believer that necessity is the mother of invention.  Let’s face it,  most people do not design and build just for the enjoyment of designing and building. . . at least I don’t.  Many years ago I decided to purchase the Zone VI Compensating Developing Timer and I have used it ever since.  This is a great darkroom tool, and I would not process film nor paper without it.

The biggest problem I had when I first got my timer was trying to come up with a way to mount the sensor to my trays.  Since by this time in my photographic career I was tray processing sheet film, I had no use for tanks and what was sorely missing was some sort of bracket to hold the sensor in the tray.  I tried tape and even a plastic close pin.  Nothing seemed to work, so it was off to think a bit.  I do my best thinking while taking a nap.

After some time contemplating the situation, I finally visualized a clamping device that could be attached to the lip of a tray.  I decided that it needed to be made of a tough material that wasn’t affected by chemistry and would be easy to keep clean.  So I chose to make my clamp from a chunk of Acrylic.

I dug out an old hunk of scrap Acrylic from the junk box and began working it into shape with a band saw and vertical mill.  What I eventually came up with was a prototype temperature clamp that I have been using for over ten years now.  Take a look at the accompanying photos and you will see a very well used piece of darkroom equipment.

I have always wanted to improve a little more on my original design, but just never got around to it, until now.  Though my prototype shows no signs of degradation, it is well stained from the Amidol days and my biggest concern is that there might come a time when the Acrylic would fail.  You know how nothing ever fails except when you really need it.  I could envision this thing breaking in the middle of a printing session or even worse, in total darkness during a film run.  Though from careful examination of the original, I can see no signs of failure.   Still, I always like having a spare on hand.

So, having decided I need a spare clamp it was time to do a little redesign and then off to the shop to cut up some Acrylic.   I beefed up the clamp a little and reworked it so it could be drilled for both sizes of probes that came with the original timer.  Yes, we do have a spare timer also.  The only thing is the spare is the newer unit and uses the larger probe.  My original Zone VI Compensating Developing Timer came with a probe with an OD of 0.1875 inches, while the newer model has a probe diameter of 0.250 inches.

As with most projects of this type, it is just as easy to make several as it is to make one.  I cut up all of the Acrylic that I had on hand and made a handful of Probe Brackets.  I still have some hardware on order, but I already feel better knowing I have spare parts on hand.

JB

Posted by JB Harlin in Darkroom, DIY, Photography

CONSISTENCY IS THE SECRET

Fred Picker QuoteWorking in the wet darkroom processing both film and paper is nothing more than simple lab work. You are a lab technician in charge of performing a series of processes. These processes must be done exactly the same way each and every time in order to guarantee consistent results. Any variation in process or mixtures will affect the end result.

You have to keep track of exactly how you process both film and paper. Consistency is of paramount importance when processing film. You only have one chance with your film and if you make a mistake there is no going back. If you happen to make a mistake when printing you can always start again. You only lose a sheet of paper. With the film, you loose the image forever.

It is imperative that you do everything exactly the same every time. Any variation, even down to the tray sizes and volume of chemical can affect the end result. Film processing is not hard, but you have to do everything exactly the same every time. It is also worth mentioning that you have to be scrupulously clean. Contamination of any of the processing chemicals can cause disastrous results.  One thing that is easily overlooked is mixing up the stock solution tops when using developers that have more than one part.  Only remove one cap at a time and replace each before opening the next.  Also, mark each cap and never mix them up.

Good darkroom habits begin with keeping notes. I keep a three ring binder containing notes on all of the procedures that I use in the darkroom. I have notes for each film size that includes the size of the trays, chemical mixtures, volumes of chemicals, and number of sheets of film for each processing run. When I begin a film processing session, the first thing I do is grab my darkroom notes. I make sure that I do the exact same thing every film run.

Even the printing process needs to have order and a plan to ensure you do not end up chasing your tail. My darkroom notes also contain information that pertains to printing. Though not as critical as film, I want to be sure I do things in an orderly and repeatable manner. I also want to be sure I mix all of my chemicals correctly, so everything is written down.

One of my favorite darkroom stories comes from Fred Picker. In his information packed little book titled “ZONE VI WORKSHOP” he describes his early days trying to get a handle on the process of B&W printing. If you have a copy of this gem of a book, turn to page 40 and read the chapter titled “THE CUSTOM LAB.” This is a really good account of how NOT to print.

I keep notes on most everything I do in the darkroom. There are times when I cannot remember exactly how I did something. With my notes there is no question as to how to remain consistent. As Fred Picker used to say, “DIFFERENT IS NOT THE SAME!

JB

Posted by JB Harlin in Commentary, Darkroom, Photography

PHOTO EQUIPMENT FOR SALE

FOR SALEWhat are you looking for? A new camera? Pieces and parts? A new lens? We are cleaning out our equipment closet and it is time for some things to go to someone that can use them. The excess equipment we no longer need may be just what you are looking for.

Drop by the new area on our web site FOR SALE and take look. There just may be something you really need. And you will be helping us with our spring cleaning!

JB

Posted by JB Harlin in Photography

THE VARIABLE CONTRAST COLD LIGHT

PAPER GRADEThe dual grid, Variable Contrast Cold Light head (VCCL), is a great device for your enlarger if you print on black & white VC papers. These heads allow you to dial in any contrast grade your VC paper is capable of producing. You have continuously variable contrast at your fingertips. And, yes they do work. The trouble is, every paper is different. Setting the dial on the head to any random equal setting may or may not produce a grade #2 contrast. Worse yet, what two settings should you choose?

When you start using a new VCCL head you are now faced with a quandary. How do you calibrate this thing so you have some idea what paper grade you are actually getting? Did you know you can calibrate a VCCL head to a known standard? You can know what settings of the blue and green grid will give you an equivalent grade #2, or #3, or anything within the range of the paper!

Yes you can calibrate a VCCL head, and here is how it can be done. Look at the article “USING BTZS TO CALIBRATE YOUR VARIABLE CONTRAST COLD LIGHT HEAD” originally published in the Sep/Oct 2007 issue of View Camera Magazine in the ARTICLES area of our web site.

Posted by JB Harlin in Darkroom, How-To, Photography