Darkroom Formulas

EXHAUSTION; OR, IS THIS STILL GOOD?

Fixer does not soon become “exhausted” in the sense that it can’t dissolve more silver salts. Instead, the trouble is with silver/sulphur complexes that build up as the hypo is used. They can’t be washed out of paper. One of Alfred Stieglitz’s sins was that in spite of excellent training in photographic sciences at the Berlin Technische Hochschule under the great Wilhelim Vogle (whose discoveries made orthochromatic and panchromatic film possible), Stieglitz told the young Ansel Adams that a gallon of fixer is good for thousands of prints. He thought that Kodak’s advice to change the hypo frequently was just corporate greed-anxiety to make big profits selling more dirt-cheap hypo. No doubt that’s why some Stieglitz prints are turning funny colors.*
* Photo Techniques Magazine, “Advanced B&W Printing” 2002, “Photo 303, The Pratt Institute Handouts” by David Vestal, p.40

EXHAUSTION
Nothing lasts forever. And, this is even more true when it comes to photographic chemistry. The question is, how long does the chemistry used in the darkroom last once mixed and what is the exhaustion rate? I firmly believe that trying to milk photographic chemistry for every last little bit is a recipe for disaster. Think of it this way. You have invested a lot of time and money by the time you get into the darkroom. Is it really worth it to try and save a few dollars by pushing your luck with chemistry that may not be up to par? Honestly, the least expensive item you use in the photographic process is the chemistry and water. Why scrimp, and risk disaster?

We calculate the exhaustion rates of all chemical formulas we use. It is very important to know the capacity of the film developers you use. If you try and stretch the chemistry beyond its useful capacity you will ruin your film. Same thing happens with the fixer. Printing paper is the same, except if you make a mistake you can always start over. But with film there is no do-over.

We very closely watch the capacities of the chemistry we use. The basic rule in our darkroom is to assure that we seldom go beyond 50-60% capacity. Film developers are used one-shot, making sure to use an adequate volume of chemistry for the number of square inches of film being developed. Film fixer is ran to 50-60% capacity then discarded. The same criteria is used when printing. Paper developer is used to maybe 60-70% capacity then discarded. Paper fixer is never used more than 60% of capacity.

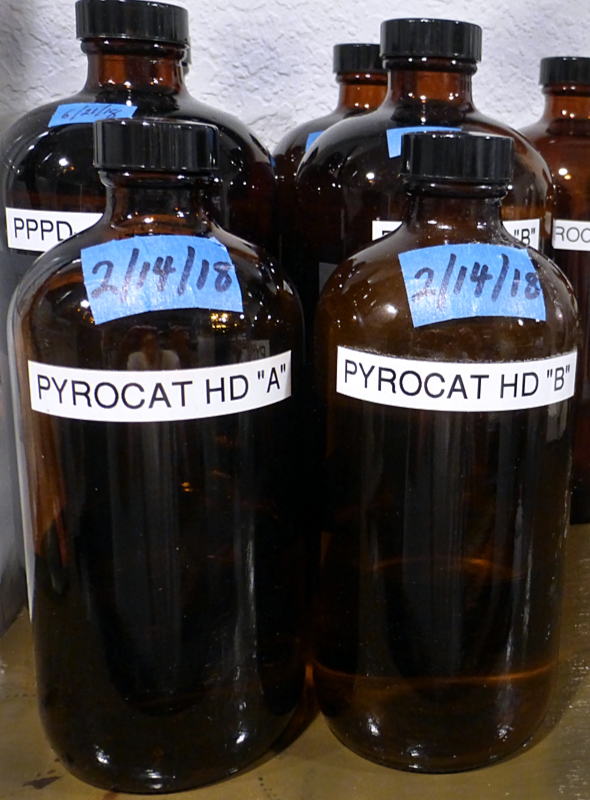
In our darkroom there are few chemicals that are not discarded after a darkroom session. The only fixer we keep is the rapid fix used for film and it is discarded at 50-60% capacity. The only other chemistry we keep is Selenium Toner. All chemistry is labeled with the date it was mixed. Those that are kept for reuse are marked with the number of sheets of film or paper it has seen.

There is no need to run the risk and facing the consequences of exhausted chemistry when it comes to your photography. As said before, the chemistry is the least expensive item you will use in the whole photographic process, from film to the finished print. It is not worth the possible disaster that scrimping can cause. It is important to know the capacities of every formula used and never run any to full exhaustion. Nor is it a good practice to keep mixed solutions too long. Some formulas deteriorate rapidly once mixed. Know your chemistry and use it wisely!

JB

Posted by JB Harlin in Darkroom, Film, How-To, Photography, The Darkroom Workshop

PYRO DEVELOPERS; SUBTLE YET DIFFERENT

When you go into your darkroom year after year and print your negatives, you slowly become acutely aware of the most minute changes in image quality. It’s this intimate contact with your craft and subject that allows you to see the minute changes that the materials and process make. The prints you made in years past may now seem to be lacking. Even those negatives you were never quite able to interpret into a suitable finished image may somehow come alive when you apply new wisdom and technique. Everything in the chain of events, from the camera to the finished photograph can and will make a difference. Some can make a vast amount of difference; others can be very small. Yet they all add together in the finished print.

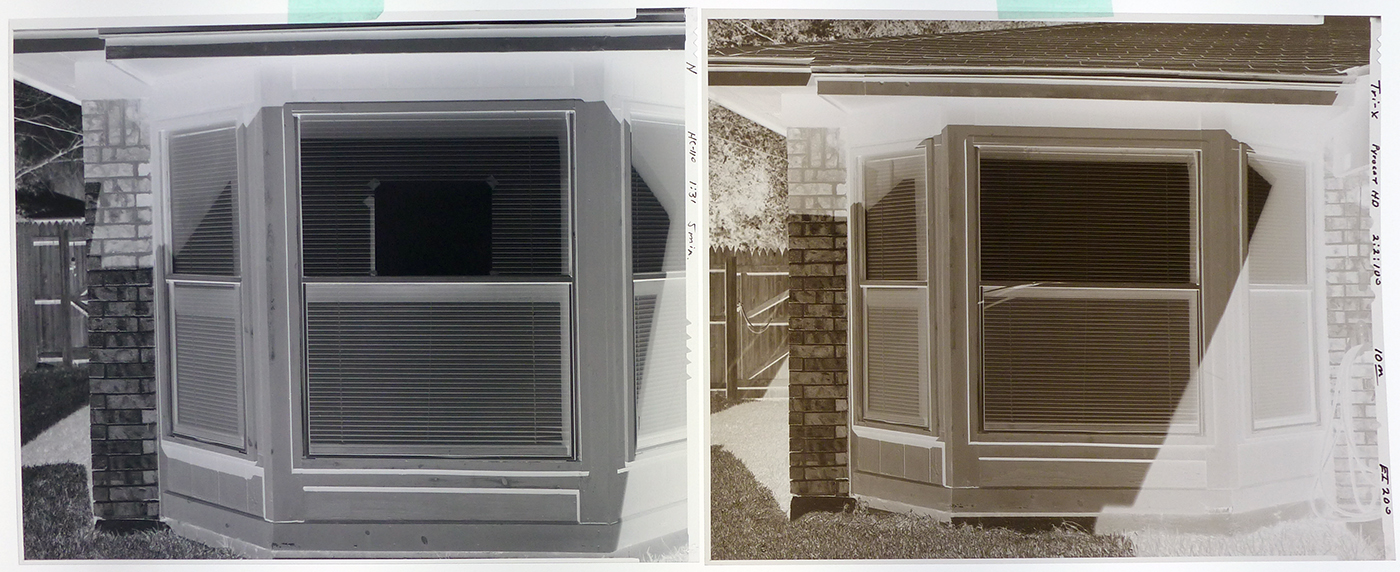
When we first started working with Pyro developers it took some time to realize exactly how the different look and feel of the film would translate into the finished print. There are those that say there is no difference between different film developers. They may also say there is no difference in the film you choose. That is like saying there is no difference between Ford and Chevy; no difference between red or white wine. Maybe for some this may be the case. But for those that take the time to really look and absorb the image, there is always a difference. Fred Picker said, “different is not the same!”

Never let the opinion of someone else dictate your choices; either in life or photographically. You need to prove all things for yourself. Never fall prey to hearsay. Test everything for yourself. If you feel the need to explore Pyro developers, by all means take the time to do your own testing. To really know, you have to find the answers for yourself. A quick dabble will not do. You need to establish your personal film speed and developing time. Then go out and make photographs in the real world. And not just a few photographs, but a lot; over time; test; adjust as needed. Give yourself at least a years worth of real photography. Then you will have enough experience to make a really personal and informed decision.

Is there a real difference in a Pyro film developer? This is a question you will have to answer for yourself. Just do not fall into the trap of depending on someone else to make the decision for you. Pyro was good enough for Edward Weston, Morley Baer and many others. If we could only ask them their opinion.

Pyro Do Your Testing
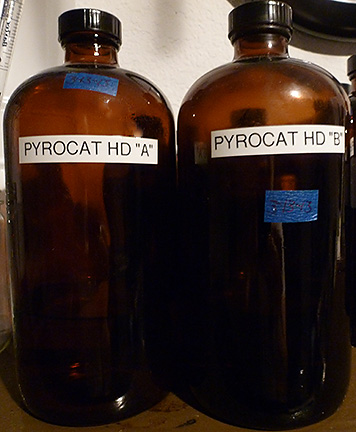
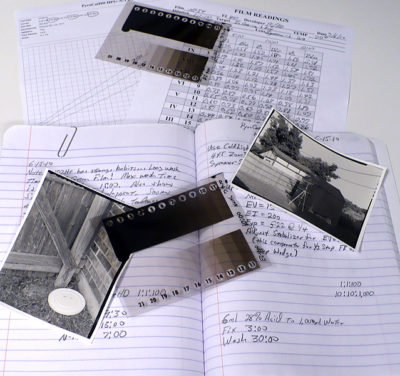
Over the past 20 or so years Pyro film developers have again become popular, with modern reformulations for modern film. John Wimberley, Gordon Hutchings, Sandy King, Jay DeFehr, among others, have done a lot of research and have formulated numerous reincarnations of Pyro film developers, specifically designed for use with modern film. Steve Sherman, Bob Herbst, Michael A. Smith and Steve Simmons have written extensively about Pyro developers and their unique qualities. Susan and I have made our choice based on our own real world experiences. We join with the many others that are also Pyro developer users.

Posted by JB Harlin in Commentary, Darkroom, Film, Photography, The Darkroom Workshop

ZONE VI; THE END

Zone VI Print Developer
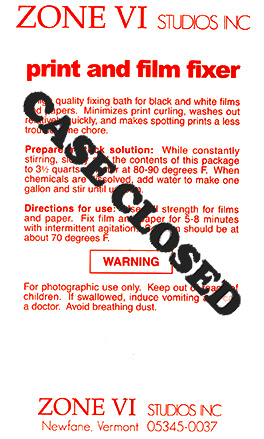
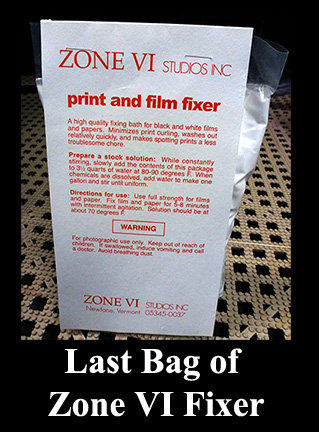
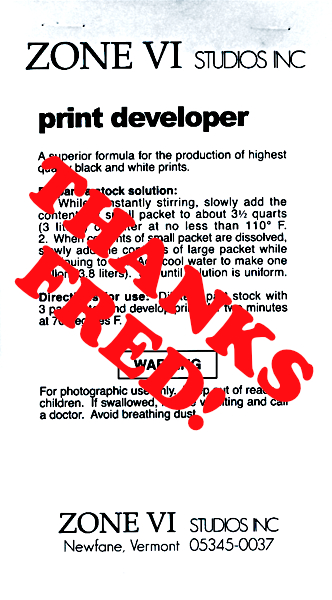
It has finally happened!  I have used Zone VI chemicals for well over twenty five years now.  Though we have moved on to different formulations for finished prints, we have continued to use Zone VI Print Developer for proofing.  That is. . . until now.   I mixed the last bag for proofing our 2015/2016 trip and that is that.  This has been a looming change that has been in the back of my mind for several years now and it finally came time to do some testing.  OH Drat. . . TESTING!!!

Remembering a conversation from years back someone, somewhere, said that Zone VI Print Developer was just D-72. . . or maybe Dektol?  There is one sure fire way to find out. . . “TRY IT” as Fred would say.  And that is exactly what I did.

I mixed a liter batch of D-72 and used the last of the Zone VI Print Developer in a side-by-side test.  First I exposed two sheets of our proofing paper, set to Grade #2, to a Stouffer 21-Step Wedge.  Processed one sheet in each developer and finished as usual.  Both developers were diluted 1:3, all temperatures were matched and the Zone VI Compensating Developing Timer was used on each.

After the test sheets were dry, I measured them with an XRite 810 densitometer and plotted the curves with the BTZS Plotter app.  I knew from the numbers they would be a near match and the resulting graph shows very little difference.   That pretty much settled that.  (NOTE:  In the plot, the black line is D-76 and  the red is Zone VI.)

D-71 vs Zone VI Graph
There was only one more test required to convince me, and that was making a real proof.  I chose a familiar negative and exposed two more sheets of paper using this negative.  Each sheet of paper was developed in the same fashion as the step wedge prints and finished as usual.  The two proofs were a near identical match.  The Zone VI was very slightly less contrasty, but that could have been due to the fact that the developer was old.  The main thing I was looking for was to be sure the color of the two proofs were the same.  They are, to my eye at least, exactly the same color.  (NOTE:  The proofs below, on the left is the D-72 and on the right is the Zone VI.)

All that was left to do was to make a new paper grade test to confirm the enlarger VCCL settings required to print a grade #2 and that was the end of the testing.

FYI;  Here is how to calibrate a VC enlarger, “USING BTZS TO CALIBRATE A VARIABLE CONTRAST COLD LIGHT” originally published in the Sep/Oct 2007 issue of View Camera Magazine.  I have added the formula for D-72 to the FORMULAS area of the jpbhphoto.com BLOG.

Zone VI & D-72 Proofs
It’s a sad day but finally Zone VI, as a supplier of darkroom chemistry for us, is gone forever.  The good news is, it is possible to mix your own developer and achieve the same results that we have become accustom to over the years.  Proper proofing is the control and the verification that your technique is working as you think it should.  It is important to keep the proofing process as consistent as possible.  I believe we are good to go without Zone VI now.  Thanks Fred for all you did for traditional film photography!

JB


Posted by JB Harlin in B&W Paper, Darkroom, Photography

UPDATE TO FORMULAS

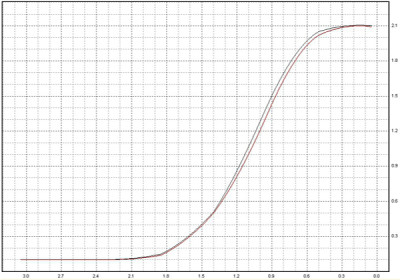
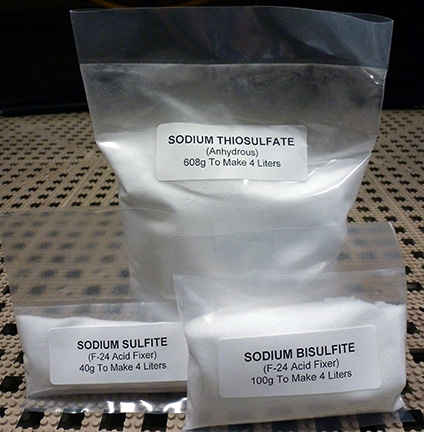
We have just updated the FORMULAS area here on the jbhphoto.com BLOG (click the link at top of the page).  What you will see is mostly cosmetic with a few corrections here and there.  The formatting of the older area was made of screen grabs of notes and was not that well organized.  Hopefully it is now a little more tidy.

Very little changes in the realm of the wet darkroom and film photography.  There are no fads. . . no here today, gone tomorrow. . . no high-tech gadgets. . . no amazing updates.  Traditional film photography is a craft you learn; fine tune; then use.  The bottom line is the finished fine print.  Traditional film photography is very old fashion and grounded in down-to-earth proven techniques, that once learned are the backbone of the art form.  Bottom line; not a lot to stand in line or camp on the street to be the first for some new-fangled gadget or upgrade.  Once you master the technique, there are no excuses not to produce finished work.  Film photography is a craft; you learn it; then you use it; for the rest of your life; and you pass on what you have learned.

In our Formulas area you will find the mixtures we use.  Nothing very special about anything we do, and it would be a good assumption you will see little new there.  Take what you can make work for you; leave anything else for the next interested photographer.

JB

Posted by JB Harlin in Darkroom, DIY, Film, Formulas, How-To, Photography

DIY PREPACKAGED DARKROOM CHEMISTRY

DARKROOM CHEMISTRYMixing our own darkroom chemistry has become the established method around here.   Since the demise of Zone VI chemistry, we are pretty much on our own when it comes to processing chemistry.  Things like PyroCat-HD can easily be mixed by weighing out the necessary materials each time, since you are mixing stock solutions and it is not something you have to do every time you process film.  I mix up the print developer as two stock solutions that are combined when a printing session starts.  I keep one and two liter bottles of part A and B mixed and ready to go.  That is just another element of the process.  On the days we are not doing darkroom work, I am in there cleaning and mixing solutions.
 
One thing you use a lot of when making large prints is Fixer.  We go through a lot of fixer, and I do not believe in skimping.  The F-24 formula will fix 25 8×10 prints (or equivalent area, 80 sq inches per print) per liter. . . that would be 100 per four liter batch.  I never run fixer more than 60% of capacity, so that would be 60 8×10’s per four liter batch.  Another darkroom rule is, we never pour anything back into the container. . . most of the time.   Used fixer is dumped into buckets in the garage and when I get a batch, it goes through the silver recovery unit.
 
Because we purchase Sodium Thiosulfate in 50 pound bags, this can present a storage problem, let alone a hassle for measuring and mixing.  It was obvious that we needed to find some convenient way of storing and measuring large volumes of dry material.  The solution is actually not that difficult.  We already had an impulse heat sealer, all that was needed was bag material.  You can purchase continuous rolls of poly tubing, and 4mil is a good choice.  Making a custom bag is easy.  Heat seal the end, cut off the length you need, measure the chemical, pour into the bag, squeeze out the excess air, and heat seal the other end.  The only other thing you need is a label, or you can write on the bag with a marker.
 
For the F-24 Fixer we use, I measure out the correct amount of all three ingredients and seal them into an appropriate size bag.  I use four inch wide 4mil tubing that comes on a 1,500 foot roll.  I print off an adhesive label for each bag and store the small bags in plastic shoe containers and the larger bags in five gallon plastic buckets.  When I need to mix fixer, just grab three bags, run water into a suitable container at the appropriate temperature, cut open the bags and stir.

You can purchase Poly Tubing from suppliers like ULINE in widths from 1 to 48 inches on large rolls.  They also sell Impulse Heat Sealers in various sizes.  The unit we have is the 12 inch model and has seen a lot of use over the years.  Be sure to order a spare heating element service kit.  Pick up some adhesive labels for your computer printer and you have everything you need to make your own prepackaged darkroom chemistry.
 
JB

Posted by JB Harlin in Darkroom, DIY, How-To, Photography

DILUTING PERCENT SOLUTIONS & STOP BATH

I was thinking about how you calculate percent solutions the other day when discussing Glacial Acetic Acid mixtures to make stop bath.  I knew I had seen an easy method, but I could not remember how it worked.  Certainly it is fine to just follow directions, but what if you want to know how the process works, or you need to calculate some dilution other than the norm?  I thought the equation was called the ‘X’ System or something similar.  A search on the Internet did not turn up what I was looking for though.  Seems things always come to me when I take a nap. . . this time I had to sleep on this one for several days before it came to me. 

The simple procedure for calculating percent dilutions is called the Criss-Cross method and is really easy, if you can remember how it works.  Once I had the right description, it was easy to find more information, and it is really quite simple.

Here is the Criss-Cross formula;

PERCENT SOLUTIONS 

To work the Criss-Cross formula do the following:

A = the % dilution of the solution to be diluted

B = the % dilution of the diluting solution (for Water this value is Zero)

C = the % dilution desired

X = C – B

Y = A – C

Diluting X parts of A with Y parts of B will yield a % solution equal to C.

I know it all sounds complicated and it really is much more difficult to explain than it is to actually work the problem.  So, lets go through an example that hopefully will make it more understandable.   Most all agree that an acid stop bath should be somewhere between a 1-2% dilution of Acetic Acid in water.  I have always used a 1% solution and that is what we still use today.  For example, let’s dilute 28% Acetic Acid stock to a 1% mixture for stop bath.  Plug in the correct values, then perform the calculation.  Enter 28% for term A, 0 for term B, 1% for term C, then perform the calculation.

You will find that if you mix 1 unit of 28% Acid with 27 units of Water you will get a 1% solution for your stop bath.  Remember, we are working with ratios and the Units can be anything desired, as long as they are the same Units.  It could be a mixture of 1:27 ounces, gallons, milliliters, liters, whatever units you desire.  You can change the values of X and Y if you want.  Just keep in mind that you have to change both Units by the same amount.  If you multiply the ratio of 1:27 by 2, you would have a ratio of 2:54 Units.  You could also divide the Units for smaller volumes.

For the sake of a working example, if you multiply the ratio of 1:27 in the example above by 40, you get a ratio of 40:1,080.   This is how I dilute 28% Acetic Acid to a 1% solution for paper stop bath.   I use even numbers of 40:1,000 milliliters.  Plenty close enough for photography.

Hope this helps. . . it is not difficult if you can remember the formula.

JB

Posted by JB Harlin in Darkroom, Formulas, How-To, Photography

MY REPLACEMENT FOR ZONE VI PRINT & FILM FIXER

ZONE VI PRINT & FILM FIXERI had written earlier about the demise of Zone VI chemicals and how it has now become necessary to mix our own chemistry from raw supplies.  Take a look at the previous post titled, “ROLLING YOUR OWN FIXER.”  Since that post I have done quite a bit of research and testing.  I am convinced that the fixer formula we chose is not exactly a direct replacement for the old reliable Zone VI product.  Not that what we have been using is not a good fixer, it just is not the same.  Fred always said, “Different is not the same.”

I have mixed up several concoctions, but have always come back to the Looten Acid Fixer for its simplicity and close match of pH.  I kept bypassing some of the more well known formulas for some reason, possibly because everyone says they have a very unpleasant odor.  I don’t believe any could be any worse than the Looten Acid Fixer we have been using. . . this stuff will take the hair out of your nose.

I want to use an acid fixer for paper, because that is what I have used for years.  All I wanted to do was find a 100% replacement for the Zone VI Fixer I have used for as long as I can remember.  Zone VI Fixer was stable and it had little to no odor.   I have searched all over and have never found the exact published formula used by Zone VI.  

I looked through all of the old Zone VI Newsletters and finally resorted to watching the Picker videos.  Finally in the printing video Fred talks about his fixer being Kodak F-6.  The only problem is that the Zone VI Fixer I have used for years always came in a single bag as dry chemical.  If you check the formula for F-6 you will find it contains 28% Acetic Acid.  I am no chemist, but as far as I know, 28% Acetic Acid only comes in liquid form.  Plus, F-6 is a hardening fixer.   I have no reason to believe that Zone VI is a hardening fixer, let alone all instructions for F-6 say that the hardener, Potassium Alum, must be dissolved separately and added after all other ingredients have been completely dissolved.  Again, the Zone VI Fixer came in one bag containing only dry chemical.  So, I really do not believe that F-6 is the correct formula for what was sold as Zone VI Fixer.

There are a lot of guesses, but I do not want a guess.   I measured the pH of Zone VI Fixer to be 5.5.  None of the other concoctions that I have tried matched this pH, nor did they lack a strong odor.  My original choice of Looten Acid Fixer had the closest pH coming in at 5.0, but has a strong odor, where the Zone VI Fixer has little odor at all.  I still found myself going in circles.ZONE VI PRINT & FILM FIXER

I finally got tired of having to run the vent fan on high to get away from the smell.  Time to put on the apron, roll up the sleeves, and do more research.  This time I decided to investigate the Kodak F-24 formula.   Why I bypassed this one before is beyond me, but I did, and it was a mistake.  There is an alternative mixture that is suppose to be ‘low-odor’ that substitutes Citric Acid for the Sodium Bisulfite of the original Kodak formula.  This mixture still had a very strong smell.  So much for the alternative, low-odor mixture!

Next, I mixed up a two liter batch of the original F-24 formula, and surprise. . . it smells just like Zone VI Fixer.  Next to no odor at all.  I measured the pH. . . well whaddya know. . . it was exactly 5.5, just like Zone VI.  Next I needed a stability test.  I put two liters of F-24 in a four liter jug and let it set for a week.  No change!  That does it for me.  So far as I am concerned, there is no difference.

Wow!  Have I solved the great mystery?  Could it be that Zone VI Fixer is nothing more than Kodak F-24?  I have changed our FORMULAS AREA to reflect the formula for F-24 Fixer since it is now our chosen formula for paper.  Note, that the only difference in the new formula is the addition of 10 grams of Sodium Sulfite per liter to the original Looten Acid Fixer formula.  Not that difficult, but it does make a difference.  Even if F-24 is not the exact same formula as Zone VI, it is plenty close enough for me.  I will add that Gordon Hutchings also recommends F-24 for film and paper in “The Book Of Pyro.”   So, now you know what I have learned about fixer.  

There is one more thing to be aware of; be very careful with the temperature of the water when mixing Sodium Thiosulfate.  The most common Sodium Thiosulfate is the Pentahydrate (crystalline type) which requires 240 grams per liter.  You need water at about 100-125°F, because it is extremely endothermic and will rapidly cool the water as it dissolves.  This I knew from experience.  What I didn’t know is that Sodium Thiosulfate Anhydrous (fine grain like table salt), which requires 152 grams per liter, should never be mixed in water above 90°F, because it will decompose and form a precipitant.   Just so you know, if using Sodium Thiosulfate Pentahydrate (large crystals) use hot water.  If you are using the Anhydrous (fine grain) type, mix at about 80-85°F.

CASE CLOSED. . . at least for me.  I have found what I was looking for.  If you were a Zone VI Fixer user and are looking for a suitable, easy replacement, this should work just fine.  Now, back to making photographs. . . and. . . I can turn that vent fan down to low again!

JB

Kodak F-24

  • Water (at about 125°F)…………………750.0 ml
  • Sodium thiosulfate, crystalline………240.0 grams
  • Sodium sulfite, desiccated……………10.0 grams
  • Sodium Bisulfite………………………..25.0 grams
  • Water to make……………………………1.0 liter
Note:  If anhydrous thiosulfate is used, the water temperature should not be over 90°F (80-85°F) to prevent decomposition.


Posted by JB Harlin in Darkroom, Formulas, How-To, Photography, 0 comments

PYRO STAINING FILM DEVELOPER

PyroCat HDI had written about my experiments with Pyro Staining Developers back in October of 2010, and that should make it very clear that I have chosen my favorite film developer.  Take a look at my previous post, “THE PYRO-CAT IS OUT OF THE BAG.”  Of all of the Pyro Staining Developers I tested, PyroCat-HD by Sandy King has proven to be, hands down, the best of the best.   If you are seriously looking for the finest all-around film developer, I would strongly suggest you take a serious look into PyroCat-HD.

Sandy King has done his research and formulated an excellent developer.  Also, he has a new web site that is outstanding.  I was pleased to find that he has a section dedicated to his technical writings which contains his original article on Pyro Developers.  If you are seriously thinking about working with Pyro Developers, I would highly recommend you take a look at the article,  “AN INTRODUCTION TO PYRO STAINING DEVELOPERS, WITH SPECIAL ATTENTION TO THE PYROCAT-HD FORMULA” by Sandy King.

There is no need for me to go into the details of my experiments with Pyro Developers since I have covered what I learned in my previous BLOG post.  I would also recommend the above mentioned article by Sandy King, which covers a lot of what you need to know about Staining Developers.  All I can add is that  PyroCat-HD is the only developer we now use.  Maybe you should try it yourself?

JB

Posted by JB Harlin in Darkroom, Film, How-To, Photography

MORE CROPPING

I had made an earlier post on the merits of cropping your image and the subject has come up again.  I will stick to my original thoughts on the process of cropping.  Use it if necessary!

CROPPINGI ran onto an article by David Vestal published in an old Photo Techniques magazine from 2002 that seems to sum things up very well.

“Some people say that we should never crop photos.  They’re wrong.  When cropping will help the picture, it’s better to crop it than to leave it uncropped.  If it doesn’t help the picture, then why bother?  But it is an option, and it’s not a moral issue.  We don’t need anyone’s permission.  If you do it, do it well.”  *

I couldn’t have said it better. . . thank you Mr. Vestal!

JB

* David Vestal, Advanced B&W Printing, Photo Techniques Magazine, 2002

Posted by JB Harlin in Commentary, Darkroom, Photography

SELENIUM TONING

SELENIUM TONEREveryone has their personal way of doing most anything.   I have sorted through what works for me and it may not be the only way to do things, but it is the way I have refined and standardized my working habits.  (I hate the term ‘workflow’ sounds way too digital for me.)  What I have tried to do is explain how I work in the darkroom.  You can use my methods as a starting point and determine what works best for you.

Selenium toning of finished prints is a given for what we do.  Every print is toned in selenium, for permanence, a slight shift in print color, and to enhance tonal range.  We have used numerous dilutions of toner and what works for one paper and developer combination, may not work for another.  When it comes to the dilution and time, you have to experiment.

Here is how we selenium tone prints.  Not sure exactly where all of this came from.  Some from Ansel Adams, others from Fred Picker.  Never the less, here is our standard procedure.

Prints are developed, stopped in acid stop, then fixed in an acid sodium thiosulfate fixer for four (4:00) minutes.  The finished prints are rinsed in running water for five (5:00) minutes or so, then transferred to an archival washer.   The washer is used as a holding bath during a printing session that may last all day.

Once printing is finished, each print is evaluated and may receive further processing by some selective bleaching.  After bleaching, the prints are washed again in running water and again end up in the archival washer for storage.

At this point it is time to start toning.  We use three trays when selenium toning.  The first contains plain hypo (Hypo), the second selenium toner at some predetermined dilution (Toner), and the third tray is hypo clearing agent (HCA).

Prints are removed two at a time and placed, back to back, in the Hypo tray for about four (4:00) minutes.   This is your second fix.  The Hypo is an alkaline fix and is necessary to prevent stains, since any acid in the toning solution will result in undesirable stain.  If you use an acid first fix as we do, be sure to wash well before placing into the Hypo.  You do not want to carry any acid into the alkaline Hypo.

After the plain Hypo, prints are drained and transferred to the Toner tray.  Start the timer. . . Toning times vary.  We adjust the Toner dilution to yield a Toning time between two (2:00) to about four (4:00) minutes.   The Toner tray requires continuous agitation by tipping front to back and side to side.  As soon as the prints are in the Toner tray, two more prints from the washer are added to the Hypo tray.  The prints in the Hypo tray are used as a reference to judge the amount of change that is happening in the Toner tray.

When the prints in the Toner tray have reached the desired tone, they are drained and moved to the HCA tray.  The prints in the Hypo are moved to the Toner and two new prints are added to the Hypo.  When the HCA tray gets its second set of prints, the set that has been in the longest are rinsed in running water, then moved back to the washer.

This is a daisy chain process that continues until all of the prints have been process and are back in the washer.  The idea is to fix the prints for about four (4:00) minutes in the Hypo. . . Tone for two to four (2:00-4:00) minutes. . . then about four (4:00) minutes in the HCA.  These times may vary, and is not that critical.  You need to second fix, in Hypo, for no less than three (3:00) minutes and HCA for the same amount of time.

Once all of the prints are back in the washer, wash as usual. For us, our tested time is about one hour.  Be sure to test your washer for optimum wash time.  You will find the mixtures we use posted in the FORMULAS page here on this BLOG.

This is a whole lot more complicated to explain than to actually do.  It is a rhythm you pick up as you work through the prints and is really quick and easy.  One word of caution; once you begin to selenium tone your prints, you will never be satisfied if you don’t.

JB

Posted by JB Harlin in Darkroom, How-To, Photography