14
Jul
2015

 We have just updated the FORMULAS area here on the jbhphoto.com BLOG (click the link at top of the page). What you will see is mostly cosmetic with a few corrections here and there. The formatting of the older area was made of screen grabs of notes and was not that well organized. Hopefully it is now a little more tidy.
Very little changes in the realm of the wet darkroom and film photography. There are no fads. . . no here today, gone tomorrow. . . no high-tech gadgets. . . no amazing updates. Traditional film photography is a craft you learn; fine tune; then use. The bottom line is the finished fine print. Traditional film photography is very old fashion and grounded in down-to-earth proven techniques, that once learned are the backbone of the art form. Bottom line; not a lot to stand in line or camp on the street to be the first for some new-fangled gadget or upgrade. Once you master the technique, there are no excuses not to produce finished work. Film photography is a craft; you learn it; then you use it; for the rest of your life; and you pass on what you have learned.
In our Formulas area you will find the mixtures we use. Nothing very special about anything we do, and it would be a good assumption you will see little new there. Take what you can make work for you; leave anything else for the next interested photographer.
JB
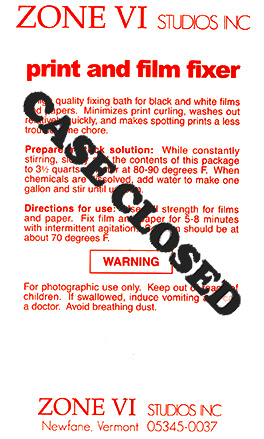 I had written earlier about the demise of Zone VI chemicals and how it has now become necessary to mix our own chemistry from raw supplies. Take a look at the previous post titled, “ROLLING YOUR OWN FIXER.” Since that post I have done quite a bit of research and testing. I am convinced that the fixer formula we chose is not exactly a direct replacement for the old reliable Zone VI product. Not that what we have been using is not a good fixer, it just is not the same. Fred always said, “Different is not the same.”
I have mixed up several concoctions, but have always come back to the Looten Acid Fixer for its simplicity and close match of pH. I kept bypassing some of the more well known formulas for some reason, possibly because everyone says they have a very unpleasant odor. I don’t believe any could be any worse than the Looten Acid Fixer we have been using. . . this stuff will take the hair out of your nose.
I want to use an acid fixer for paper, because that is what I have used for years. All I wanted to do was find a 100% replacement for the Zone VI Fixer I have used for as long as I can remember. Zone VI Fixer was stable and it had little to no odor. I have searched all over and have never found the exact published formula used by Zone VI.
I looked through all of the old Zone VI Newsletters and finally resorted to watching the Picker videos. Finally in the printing video Fred talks about his fixer being Kodak F-6. The only problem is that the Zone VI Fixer I have used for years always came in a single bag as dry chemical. If you check the formula for F-6 you will find it contains 28% Acetic Acid. I am no chemist, but as far as I know, 28% Acetic Acid only comes in liquid form. Plus, F-6 is a hardening fixer. I have no reason to believe that Zone VI is a hardening fixer, let alone all instructions for F-6 say that the hardener, Potassium Alum, must be dissolved separately and added after all other ingredients have been completely dissolved. Again, the Zone VI Fixer came in one bag containing only dry chemical. So, I really do not believe that F-6 is the correct formula for what was sold as Zone VI Fixer.
There are a lot of guesses, but I do not want a guess. I measured the pH of Zone VI Fixer to be 5.5. None of the other concoctions that I have tried matched this pH, nor did they lack a strong odor. My original choice of Looten Acid Fixer had the closest pH coming in at 5.0, but has a strong odor, where the Zone VI Fixer has little odor at all. I still found myself going in circles.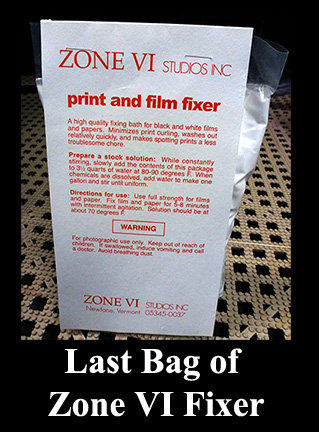
I finally got tired of having to run the vent fan on high to get away from the smell. Time to put on the apron, roll up the sleeves, and do more research. This time I decided to investigate the Kodak F-24 formula. Why I bypassed this one before is beyond me, but I did, and it was a mistake. There is an alternative mixture that is suppose to be ‘low-odor’ that substitutes Citric Acid for the Sodium Bisulfite of the original Kodak formula. This mixture still had a very strong smell. So much for the alternative, low-odor mixture!
Next, I mixed up a two liter batch of the original F-24 formula, and surprise. . . it smells just like Zone VI Fixer. Next to no odor at all. I measured the pH. . . well whaddya know. . . it was exactly 5.5, just like Zone VI. Next I needed a stability test. I put two liters of F-24 in a four liter jug and let it set for a week. No change! That does it for me. So far as I am concerned, there is no difference.
Wow! Have I solved the great mystery? Could it be that Zone VI Fixer is nothing more than Kodak F-24? I have changed our FORMULAS AREA to reflect the formula for F-24 Fixer since it is now our chosen formula for paper. Note, that the only difference in the new formula is the addition of 10 grams of Sodium Sulfite per liter to the original Looten Acid Fixer formula. Not that difficult, but it does make a difference. Even if F-24 is not the exact same formula as Zone VI, it is plenty close enough for me. I will add that Gordon Hutchings also recommends F-24 for film and paper in “The Book Of Pyro.” So, now you know what I have learned about fixer.
There is one more thing to be aware of; be very careful with the temperature of the water when mixing Sodium Thiosulfate. The most common Sodium Thiosulfate is the Pentahydrate (crystalline type) which requires 240 grams per liter. You need water at about 100-125°F, because it is extremely endothermic and will rapidly cool the water as it dissolves. This I knew from experience. What I didn’t know is that Sodium Thiosulfate Anhydrous (fine grain like table salt), which requires 152 grams per liter, should never be mixed in water above 90°F, because it will decompose and form a precipitant. Just so you know, if using Sodium Thiosulfate Pentahydrate (large crystals) use hot water. If you are using the Anhydrous (fine grain) type, mix at about 80-85°F.
CASE CLOSED. . . at least for me. I have found what I was looking for. If you were a Zone VI Fixer user and are looking for a suitable, easy replacement, this should work just fine. Now, back to making photographs. . . and. . . I can turn that vent fan down to low again!
 I have always been an advocate of vertical integration. The more you can do yourself, the better control you have of the outcome. For many years I used prepackaged photo chemicals and have never had a problem. But, as the traditional darkroom and the materials used become more and more an alternative process, commercially available photo chemicals are getting harder to find. Some favorite chemicals have vanished. An old favorite, the Zone VI line of print developer, fixer and hypo are now gone from Calumet. I recently witnessed 8 bags of print developer and 2 bags of print and film fixer selling for $127.50 on eBay. That is well over double the original cost from Calumet.
The bottom line is, you can mix your own photo chemicals. Sometimes, if you purchase bulk raw chemicals, you can even save a few dollars. Another plus to mixing your own is the fact that you have 100% control. If something goes wrong, you know who to blame. You can also modify the formula and experiment. Mixing your own photo solutions is not hard. It is not rocket science and you do not have to be a chemist. If you can follow a recipe and bake a cake, you can mix your own chemistry for the B&W darkroom.
The first thing you need to understand is that in order to mix your own photo chemistry you will be handling CHEMICALS. If you are not comfortable with this thought, do not even go there. But, remember that you are surrounded with chemicals. . . the entire planet is made of them. If you take proper precautions and are careful, there is nothing to fear. I am not a chemist, so I have little understanding of deep details and I have even less inclination to study chemistry. Do as I do, assume that everything you handle in the way of raw chemicals are toxic. Do all mixing in a well-ventilated area. Clean up spills immediately. Avoid breathing airborne powders. Always wear gloves and purchase a respirator with proper filter. A little common sense goes a long way.
 As I said before, for me, mixing photo chemicals is nothing less than following a recipe.

For liquids, I use an appropriate size graduate, and for small quantities, a pipette is the easiest way to make accurate measurements. You can use a pipette pump to make loading and measuring easier, or just dip the pipette into the container and hold your thumb over the end. Remember to always thoroughly wash the pipette after use and always use a clean pipette when going from one chemical container to the next. If the pipette is not properly cleaned, you will cross contaminate your chemicals.
Always follow the chemical formula. Most all formulas are mixed in water and there should be a temperature specified to insure the chemicals dissolve. Always mix in the exact order as called for in the formula. Add each ingredient slowly and continually stir until each is completely dissolved before adding the next. This is where a magnetic stirrer comes in handy. Take your time. Do not rush the process. Some chemicals take some time to completely dissolve.
 I use distilled water for all stock solutions. I always use distilled water for stock solutions and processing film. Unless your tap water has known problems, it should be fine for mixing printing chemicals.
Once properly mixed, store each formula in a clean bottle with a plastic cap. Never use metal caps, some chemicals will cause them to rust and contaminate the solution. Brown glass is best for developers and plastic should be fine for most others. Be sure to label each container as to its contents and also include the date mixed. Most all stock chemicals are good for three months, some much longer.
There are many published formulas. Some popular commercial formulas are proprietary, but in many cases there are alternative, similar formulas that are published. By applying a little experimentation, you can tailor your photo mixtures to suit you. Search the Internet for formulas and pick up a copy of “The Darkroom Cookbook” Third Edition by Steve Anchell.
 As most know by now, we use staining film developers. To be specific, we use the classic PyroCat HD formula from Sandy King. This developer gives us the type of negative we like. Keep in mind that creating art, no matter what may be your chosen medium, is a very personal thing. What works for me may very well not be at all acceptable to you. My father used to say, “that is why they paint cars different colors.” Personally I do not care for red cars.
All of that said, I have experimented with numerous staining developers and have chosen the one that works best for us. Along my journey of research I have found many opinions and myths that I have found to just not be true. Everyone seems to have an idea of what they believe to be true, but few have actually gone to the trouble to, as Fred Picker would say, TRY IT.
One area of great debate when it comes to staining developers is what stop and fix is appropriate. I find that this is not that great an issue and even John Wimberley agrees. Just in case you have not heard of John Wimberley, he is the father of modern Pyro developers. Even Gordon Hutchings the father of PMK, and author of “The Book of Pyro” was preceded by Wimberley and his first modern formula, WD2H. From an article titled “PyroTechnics Plus: Formulating a New Developer” in Photo Techniques magazine, March/April 2003, Wimberley has the following to say about Stop Bath and Fixer:
“Myths abound concerning the correct stop bath and fix to use with pyro, but it is not a critical issue. Either an acid or plain-water stop bath may be used, and any standard or rapid fixer is acceptable. . . However, avoid hardening fixers. I recommend the manufacturer’s minimum recommended time to avoid the possibility that sodium sulfite in the fixer might weaken the dye mask.”
 So. . . everyone has their preferred brands, methods, techniques and such. I have mine for sure. As Fred Picker said, “if you have been around for twenty years or more and haven’t formed any opinions, what have you been doing?” I miss Fred!
There seems to be a lot of paper developer formulas floating around. My wife and I have tried our share of so-called ‘magic’ formulas. We have been down the Amidol road, and don’t get me wrong, Amidol is a great developer but it is far from magic. Amidol is about the best I have found for Azo. Yes we do print on Azo, in fact, we have a stock of it on hand. I would just like to go on the record as not being a person that subscribes to the idea there are magic bullet formulas. There is what works for you and that can be anything that suits your way of seeing. Anyone that has a one-size-fits-all attitude, usually has something to sell.
We have had our frustrations with Amidol developers. And I am not convinced that it is the best, certainly not the only, developer suitable for Azo or any other paper. In a side-by-side test my wife and I determined that Amidol was our developer of choice several years ago. There is a subtle edge there that is not something you can put into words, but there is a difference we decided worth exploring. But Amidol is expensive and can be frustrating to use at times. Yes, we have tried all of the popular formulas. I have just not been too impressed with the results I have obtained at times. What I was searching for was a cold-tone developer. Not only for Azo, but for the other printing papers we use. At times Amidol was still giving a green cast on Azo. Not bad but annoying and required lengthy toning in selenium to offset. I like a cold, neutral tone for most of what I print and the Amidol formulas just wasn’t consistent enough for me. I was not happy with how things were working. It was time to do some research.
I found a lot of interest on the Internet about a Pyro base paper developer formulated by Donald Miller. Mr. Miller named his developer Pyro Plus Paper Developer (PPPD) and after reading about this formulation I was inspired to give it a try. Believe me it takes some inspiration to get me to try something new, but I was frustrated with Amidol and I needed some good news for a change.
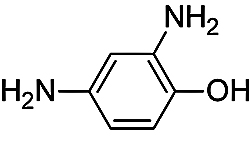
From all of the discussions about PPPD I found one thing was clear; there were numerous variations to the formula. The original published formula called for both Pyrogallol and Pyrocatechol. Now this is where things get a little confusing. I don’t recall where I found the particular variation that I tried, but there was a suggestion from somewhere to replace the Pyrogallol with Citric Acid. Not sure where I found that, but that was the formulation that I first tried.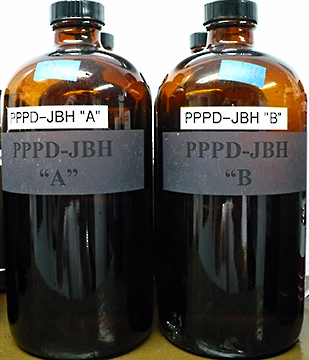
From what I gathered, adding the Pyrogallol and changing the amount of Potassium Bromide makes a more warm-tone developer. I was not interested in warmer, I wanted a cold, neutral developer. To my surprise the variation I tried worked very well. It more than met my requirements, and so far, has yielded very neutral cold tone results on the Azo we have on hand. No more green tint, just what I wanted! It has also proven to be excellent with all other papers we use. And, for those that are economy minded, Pyrocatechol is much cheaper than Amidol.
PPPD keeps very well in an open tray once mixed, but should be dumped at the end of a printing session. I have never had it to die in the tray from oxidation. It does die from exhaustion, just like most any other developer. I would estimate that after about twenty 8×10 prints per liter, you should start looking to mix some fresh developer.
This particular formula also keeps well as a premixed two-part stock solution. Part ‘A’ is mixed 1:1 with part ‘B’ for use. I found that by mixing one liter of both part ‘A’ and part ‘B’ and storing it in full brown glass bottles it keeps at least six months. At least at this point in my experiments that is as long as I have stored the stock solutions. I keep three to four one liter bottles mixed and on the shelf in the darkroom. When we go to print, you just dump a bottle of part ‘A’ and part ‘B’ into a tray and away you go.
I really like this developer and my wife is using it also. So if I am asked what developer I am using, I say now days it is my variation of Donald Miller’s PPPD. My bottles are marked PPPD-JBH for my personal favorite formula.
Oh. . . almost forgot. . . I guess if you have read this far you are interested in the version of PPPD we are using. Here is the formula that we have found to work very well with every paper we use, including Azo. Maybe it will work for you. . . maybe not. The only way to find out is to, as Fred Picker would say, “TRY IT!”
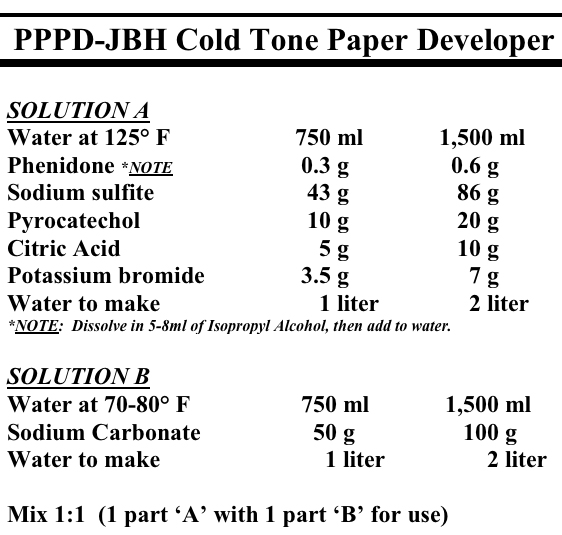
Please note that this developer contains chemicals that could be hazardous. Practice safe handling procedures when mixing chemicals. Wear gloves or use tongs when working with PPPD. In fact, it is a good idea to wear gloves when using any print or film developer.
Keep in mind this is a cold-tone developer. If you search the Internet you will find more information on other variations of the PPPD formula. Supposedly adding Pyrogallol and varying the amount of Potassium Bromide makes this a warm-tone developer, but I have not tried it, since I was not interested in warmer print tone.
I would like to personally thank Donald Miller, and all the others involved for laying the groundwork and publishing this formula, and its numerous variations, for Pyro Plus Paper Developer. Anyone wishing to experiment with PPPD, or seeking more information, try an Internet search for Pyro Plus Paper Developer.
http://unblinkingeye.com/Articles/PyroPlus/pyroplus.html
 Back in February 2009 I posted an entry titled “WHO USES PYRO?” and ended it with this statement, “I have about reached a conclusion as to which formula best suits what we do. . . and. . . I may just write about what I found at a later date. . .”
One thing I can say for certain is that for us, and let me be very clear about this, I repeat, FOR US and the way we work, most any staining developer out performs any non-staining developer we have used. It was just a matter of finding the right developer that suited us and one that would allow us to produce prints that have the presence and feel that best suits our vision.

After working with several of the more popular staining film developer formulas we have finally chosen our favorite. There was a lot of research and comparisons, followed up with field testing in order to ascertain what best fit our needs. I defined the main criteria and judged each developer on how well each performed in each area. Here is a short list of the main points:
• the formula had to be published
• we considered how we work
• what we expect from the negative and developer combination
• ease of use
• consistency of the developed film
• stability of the developer formula
• stain color
• general stain and stain density
• the look, feel, and overall print quality
• last, but not least, the cost
I prefer to always be able to mix my own chemicals from scratch. This became my first issue, since I do not want to depend on the availability of the developer from an outside source. I am a strong believer in vertical integration. Also, if I want, I can modify the formula, and I always know who to blame if something goes wrong.
One thing I have learned is that Pyrogallol is cranky. Nearly all of the formulas we tried that were based on Pyrogallol, at one time or another, under certain circumstances, gave inconsistent and sometimes unpredictable results. The problems could have been caused by any number of variables. We tray process all sheet film using the shuffle method. Some of the Pyrogallol formulas showed signs of aerial oxidation in the tray at the end of the developing cycle, while others did not. The biggest problem was that every Pyrogallol formula we tried, performed erratically and at one time or another, produced an occasional unevenly developed negative. One formula was especially sensitive to wash time. The longer you left the film in the washer, the more the general stain increased and the film went from a near neutral color to deep green. Never did understand what caused that. I am sure it was something that I did, but I do not like to have to deal with something that is that sensitive to slight variations of process.
 One thing I did learn was that Pyrocatechin is a much more stable and user friendly developing agent. The Pyrocatechin formulas showed little to no aerial oxidation in the tray after a processing run. No matter what I did, the negatives have not shown any uneven development or any other problems. I prefer to have the confidence that even if something is a little different during processing, it will not cause inconsistent results with the finished negative. In other words, I like to have a little wiggle room.
One other quick observation has to do with the general stain color. I know there has been a lot of discussion about the stain color and again this is what we have found to work best for us. Through our experimentation we quickly learned that green negatives do not work well for us. We print on numerous different papers, and use both graded and variable contrast materials. There is no one magic paper! The right paper is the one that works for any particular negative you are printing. We have found, that for us, the more neutral to brown stained negatives work the best. That is just us. . . if you find otherwise, then use what works for you.
With all of that behind us and a notebook full of test data, I can say it is time to stop the experimenting and get on with what is important, creating photographs. We have now chosen our favorite standard film developer. Pyrocat HD by Sandy King has proven to be the best choice for the way we work. What else can I say. It works. . . works consistently. . . and meets all of our expectations.
I would like to thank Sandy King for all of the research and work he has put into this formula. If you are not familiar with Pyro developers and Pyrocat HD, click HERE to learn more.