B&W Paper

DON’T THROW OUT OLD PHOTO PAPER

DON’T THROW OUT OLD PHOTO PAPER
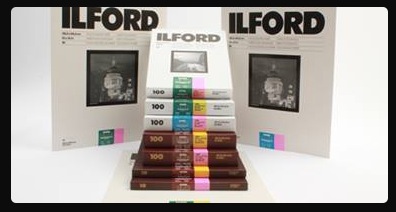
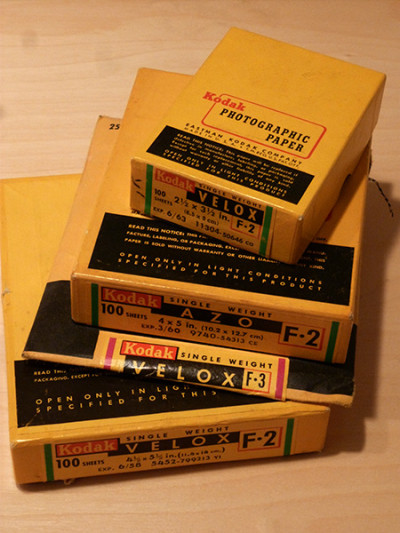
There seems to be a lot of people interested in the traditional wet darkroom these days. As many abandon their darkrooms, others are just getting started. I have seen numerous transfers of darkroom materials, chemicals and hardware to newcomers interested in the wet darkroom. . . a lot of times for FREE. There is a lot of old printing paper coming out of storage and being either tossed in the garbage or passed on (without any guarantee what so ever) to those that are just starting out. Certainly a lot of this old paper is fogged to some extent. . . but all may not be lost. If you find yourself in possession of several thousand sheets of a really great paper, depending on the amount of fog, you just may be able to make excellent prints, despite a little general degradation.

DON’T THROW OUT OLD PHOTO PAPERPaper fog, as a rule shows up as a general darkening of the processed paper, thus making pure white in the print an impossibility. You can easily test for paper fog. . . see my previous article, “MEASURING PAPER FOG” for my method for testing paper.

Success is very dependent on the image you are printing, but in most cases, fog can be eliminated in the highlights and whites of the print by simply doing a little selective bleaching. Even deep shadows can be livened up with a little work with a bleaching mixture and a brush. Selective bleaching is not difficult and here is more info from a previous post titled, “A LITTLE SELECTIVE BLEACHING.”

If the whole print requires overall livening up, you can bleach the entire print in a tray.   Look up the formula for Farmer’s Reducer. You may find that you have to over-print the image (print a little too dark) and then bleach it back upward (lightening the image) to restore the image sparkle. You will just have to experiment and find what works best for each print.

Realize that if the paper has severe fog or a mottled, spotty fog, this method will not be of much help. Also keep in mind that even severely fogged paper can sometimes be fixed out and used for other processes. Many carbon transfer printers used old, fixed out paper for their finished images. Old, fogged paper should not be thrown out without first, at the very least, trying to find if it is in some way useable. You never know. . . that free, old out-of-date paper may be a really good deal after all!

Velox

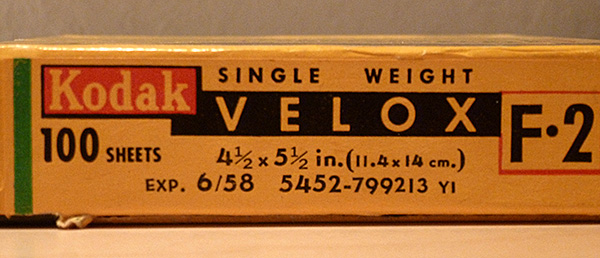
4×5 Contact Print on vintage Velox paper, expiration date of 1958

If you have a lot of fogged paper that you paid little to nothing for, why not give bleaching a try. I have successfully pumped life back into paper that had expiration dates on the box that make it nearly as old as me!

JB

Posted by JB Harlin in B&W Paper, Darkroom, Film, Photography, The Darkroom Workshop

ZONE VI; THE END

Zone VI Print DeveloperIt has finally happened!  I have used Zone VI chemicals for well over twenty five years now.  Though we have moved on to different formulations for finished prints, we have continued to use Zone VI Print Developer for proofing.  That is. . . until now.   I mixed the last bag for proofing our 2015/2016 trip and that is that.  This has been a looming change that has been in the back of my mind for several years now and it finally came time to do some testing.  OH Drat. . . TESTING!!!

Remembering a conversation from years back someone, somewhere, said that Zone VI Print Developer was just D-72. . . or maybe Dektol?  There is one sure fire way to find out. . . “TRY IT” as Fred would say.  And that is exactly what I did.

I mixed a liter batch of D-72 and used the last of the Zone VI Print Developer in a side-by-side test.  First I exposed two sheets of our proofing paper, set to Grade #2, to a Stouffer 21-Step Wedge.  Processed one sheet in each developer and finished as usual.  Both developers were diluted 1:3, all temperatures were matched and the Zone VI Compensating Developing Timer was used on each.

After the test sheets were dry, I measured them with an XRite 810 densitometer and plotted the curves with the BTZS Plotter app.  I knew from the numbers they would be a near match and the resulting graph shows very little difference.   That pretty much settled that.  (NOTE:  In the plot, the black line is D-76 and  the red is Zone VI.)

D-71 vs Zone VI Graph
There was only one more test required to convince me, and that was making a real proof.  I chose a familiar negative and exposed two more sheets of paper using this negative.  Each sheet of paper was developed in the same fashion as the step wedge prints and finished as usual.  The two proofs were a near identical match.  The Zone VI was very slightly less contrasty, but that could have been due to the fact that the developer was old.  The main thing I was looking for was to be sure the color of the two proofs were the same.  They are, to my eye at least, exactly the same color.  (NOTE:  The proofs below, on the left is the D-72 and on the right is the Zone VI.)

All that was left to do was to make a new paper grade test to confirm the enlarger VCCL settings required to print a grade #2 and that was the end of the testing.

FYI;  Here is how to calibrate a VC enlarger, “USING BTZS TO CALIBRATE A VARIABLE CONTRAST COLD LIGHT” originally published in the Sep/Oct 2007 issue of View Camera Magazine.  I have added the formula for D-72 to the FORMULAS area of the jpbhphoto.com BLOG.

Zone VI & D-72 Proofs
It’s a sad day but finally Zone VI, as a supplier of darkroom chemistry for us, is gone forever.  The good news is, it is possible to mix your own developer and achieve the same results that we have become accustom to over the years.  Proper proofing is the control and the verification that your technique is working as you think it should.  It is important to keep the proofing process as consistent as possible.  I believe we are good to go without Zone VI now.  Thanks Fred for all you did for traditional film photography!

JB


Posted by JB Harlin in B&W Paper, Darkroom, Photography

THOMAS DUPLEX SAFELIGHT & SOX

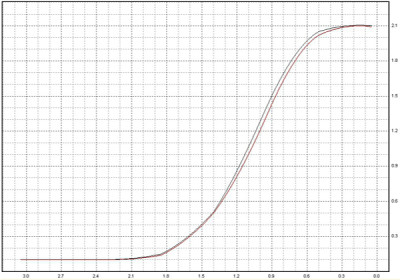
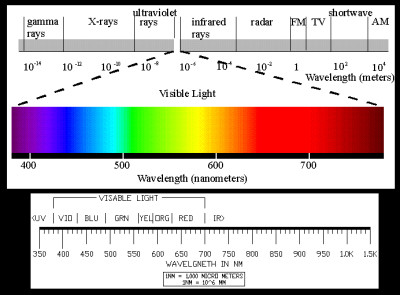
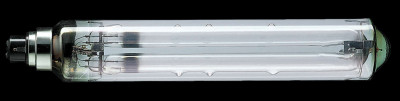
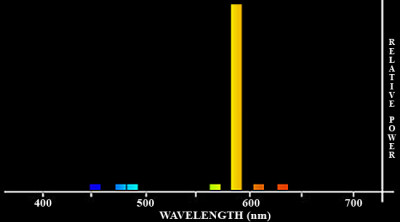
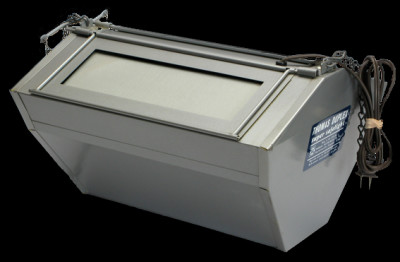
Had an interesting discussion the other day with a group of photographers about the Thomas Duplex Super-Safelight.  This is one of the best safelights you can own.  They are bright, powerful and will fog your paper before you can say Look Out!  Honestly, these things are designed to light a very large darkroom, I would say, far beyond the size that most of us are accustomed to having the privilege of owning.  They come with several glass-mounted filters that are designed for different darkroom uses, but there seems to be a lot of confusion as to what filters to use and how this all works.

So, let’s begin by trying to better understand just how the Thomas Duplex Super-Safelight works.  This is really an ingenious device that uses technology designed for something completely different.  If you have ever looked inside of the unit you will see a strange looking glass lamp.  This is the heart of the Super-Safelight. . . a Low Pressure Sodium lamp. . . designated in the industry as an SOX lamp.  Without getting into a lot of very technical talk, this SOX lamp is an extremely bright light producing device. . . you get a lot of light per watt of electricity used.  But there is a trade-off. . . the spectral output of the lamp is extremely narrow.  In the simplest terms, there is a lot of light, but it is just one color.  How this narrowband light is generated and the details of the lamp itself are way too complicated for this discussion.  For the photographer, how to use the lamp is much more important.  You do not need to know how to build a car from a block of metal to drive it.  If you are really. . . really. . . really. . . interested in the technical stuff, here is a LINK.  Also an Internet search will turn up even more technical info.

Spectrum

Electromagnetic Spectrum

SOX18

Low Pressure Sodium Lamp

What we photographers are really interested in is the spectral output of the lamp.  The SOX lamp produces a virtually monochromatic light, averaging about 589.3nm wavelength.  I know, more of that technical talk.  What is important to know is that this wavelength of light from the SOX lamp is outside the main spectral sensitivity of B&W printing papers.  This is what makes the Super-Safelight unique.

So, roughly speaking, we can say that graded papers are mostly blue sensitive, and VC papers are mostly sensitive to blue and green light.  Again, roughly speaking, graded papers are mostly sensitive to about 450-500nm wavelengths.  While VC papers are roughly most sensitive to about 400-570nm wavelengths.

Now with a rudimentary understanding of the SOX lamp spectral output, it becomes obvious that it is well suited for use in a photographic safelight.  The thing is, these lamps put out so much light that they are a danger to photographic printing papers.  If you look at the spectrum, you will also notice there are other wavelengths in the blue and near green that can cause fog.  A proper cutoff filter will remove them.

SOX Lamp Spectrum

Spectral output of SOX Lamp

Even with the greatest spectral output beyond the main sensitivity range of the papers, if you expose the paper to too much light you will get fog.  You have to attenuate the SOX lamp output even further.  I have made my own filters for my Thomas Duplex Super-Safelight and it is not that difficult, nor is it expensive.  I have another post on this BLOG that deals with the proper cutoff filter and using ND filters to tame down the light output.  You will find the post titled, “THOMAS DUPLEX SUPER SAFELIGHT FILTERS” contains the details of how to make your own B&W filters.

You will also note in this previous post that I have replaced the lamp in the Super-Safelight we use.  The stock unit comes with a 35 watt (SOX35) lamp, which in reality is way too much light for the small darkroom.  The thing is just way too bright for our darkroom which is 9 1/2 x 16 feet.  Realize that there is no practical way to electrically dim the lamp.  So, I did what I usually do with most everything around here; I looked to modify how it works.

Doing a little research I found that the smallest SOX lamp available was 18watts (SOX18).  That is what I wanted; less wattage; less light!  If you choose to do this, keep in mind that the ballast and capacitor are specific to the lamp.  If you want to change the lamp wattage, you have to purchase the appropriate ballast and capacitor.  If you are not comfortable working with electricity, please ask for help, or do not attempt this.  But, if you decided to move to the lower power lamp, there isn’t much to it.  You simply swap out the ballast, the capacitor and the lamp.

Ballast & Cap

SOX Magnetic Ballast & Capacitor

Using the SOX18 lamp will greatly decrease the light output of the Super-Safelight.  This coupled with the use of the proper cutoff filter and ND filters will allow you to tame the light output to a manageable level in the smaller darkroom.

NOTE:  One more thing; the stock Thomas Duplex Super-Safelight uses the older magnetic ballast and external capacitor.  This is what I used and this was near 20 years ago.  Now you can purchase an electronic version of the ballast but I have absolutely no experience with them, so you are on your own there.

Now you know how the Thomas Duplex Super-Safelight works, and hopefully how to best use it in your darkroom.  Do Not Forget to TEST to be sure your safelight is SAFE!

JB

Posted by JB Harlin in B&W Paper, Darkroom, How-To, Photography

A NEW ILFORD MULTIGRADE FIBRE BASE FAMILY

More good news about Ilford traditional products.

PRESS ROOM STORY

BORN, ESTABLISHED, DEVELOPED! … A NEW ILFORD MULTIGRADE FIBRE BASE FAMILY
4th December 2013

BORN, ESTABLISHED, DEVELOPED! … A NEW ILFORD MULTIGRADE FIBRE BASE FAMILY
ILFORD PHOTO announce a new range of variable contrast Baryta Fibre Base papers, a completely new and improved MULTIGRADE FB and a new COOLTONE FB paper to complement the existing MULTIGRADE FB WARMTONE.

For 20 years the best selling ILFORD MULTIGRADE IV FB paper has been the product of choice for creative photographers and printers the world over. BORN following extensive R&D, significant improvements have been made to the product that is now renamed ILFORD MULTIGRADE FB CLASSIC. The new paper is available in Glossy and Matt surfaces and offers sharper images, improved maximum density and shorter exposure times. The new MULTIGRADE FB CLASSIC has also been developed to better respond to traditional toning techniques than the product it replaces.

More info here: http://www.ilfordphoto.com/pressroom/article.asp?n=174
and here: http://www.ilfordphoto.com/products/producttype.asp?n=5&t=Photographic+Papers

Posted by JB Harlin in B&W Paper, Darkroom, Photography