Selective bleaching is a technique that uses a very dilute solution of Potassium Ferricyanide, which is brushed on specific areas of a print to lighten the tone and increase contrast. It must be done very judiciously and anyone practicing this technique must be prepared to ruin a few prints. But, with a little patience and practice, bleaching is a powerful tool in the darkroom. Selective bleaching can open up an entirely new avenue of expression. Here is an example from a recent printing session.
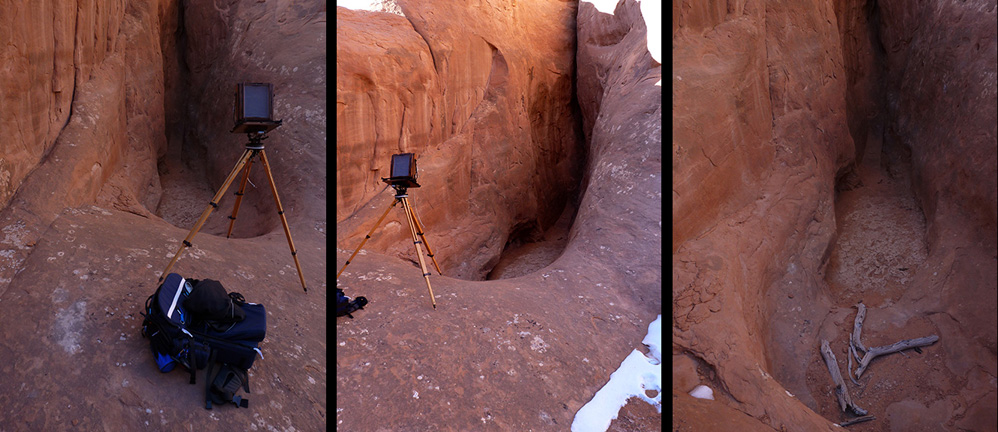
First, here is the subject; a blind cave between two large sandstone fins in Arches National Park.

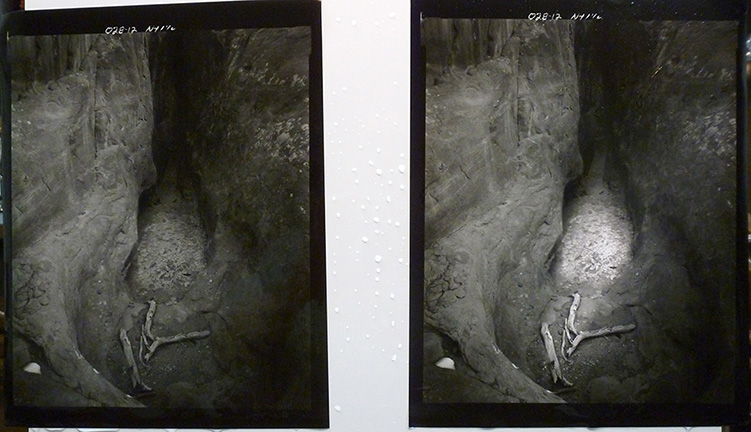
Next, the printing session; the negative printed quite easily, without any manipulation. It is quite interesting, but lacked depth and was somewhat depressed, especially at the bottom. Also the wood and cracked mud needed to be lighter to draw the eye and enhance the feeling of depth. Here is a side by side comparison of two prints, one before, the other after selective bleaching. . . (this is a quick snapshot of the wet prints on the viewing stand before toning)

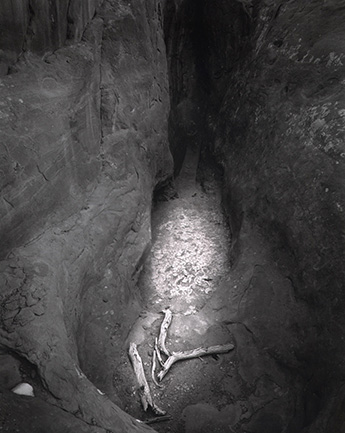
Finally, the finished print; we selenium tone every print we make, not only for permanence, but for the slight tonal shift and deepening of the contrast of the image. Here is the finished dry print. Note the change in color and contrast after selenium toning.

I will not get into the technique employed, since selective bleaching is deceptively simple and is beyond the scope of this short article to adequately explain. As I said before, be prepared to ruin a few prints. This is another tool you can add to your arsenal of darkroom techniques. . . remember, it is always about the finished print.
JB
