JB & SUSAN HARLIN UPCOMING EVENTS

Here is our current calendar of upcoming events.  More information available by clicking on the item in the ticker above.  We invite everyone interested in film photography to join us, though we specialize in LF and ULF, we love all film.  Hope to see you at one of our gatherings!

 
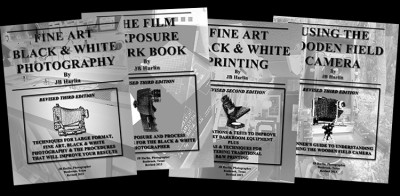
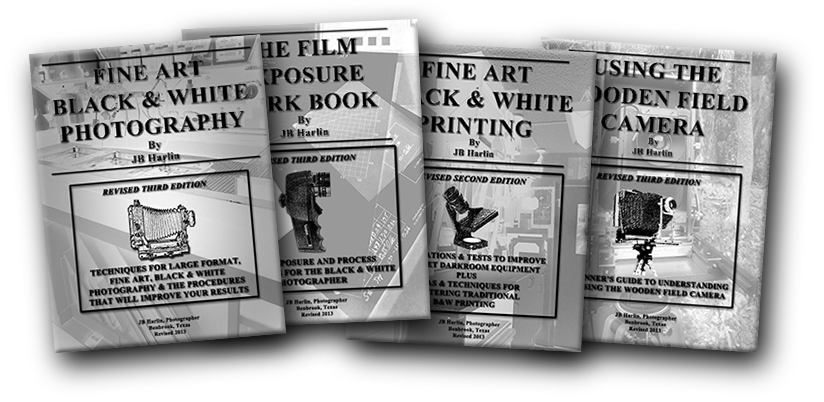
NEW UPDATED & REVISED E-BOOKS AVAILABLE FOR IMMEDIATE DOWNLOAD TO YOUR COMPUTER!


Posted by JB Harlin in AT THE TOP, D/FW LF GROUP, Events, Film, Photography

ARE YOU PHOTO READY?

Photo Ready

What would you do if you were asked to show a sampling of your photographs? I am sure you would jump at the chance. . . but. . . what if you were told you would be showing prints? No computer screen, no projection. Now what would you do?

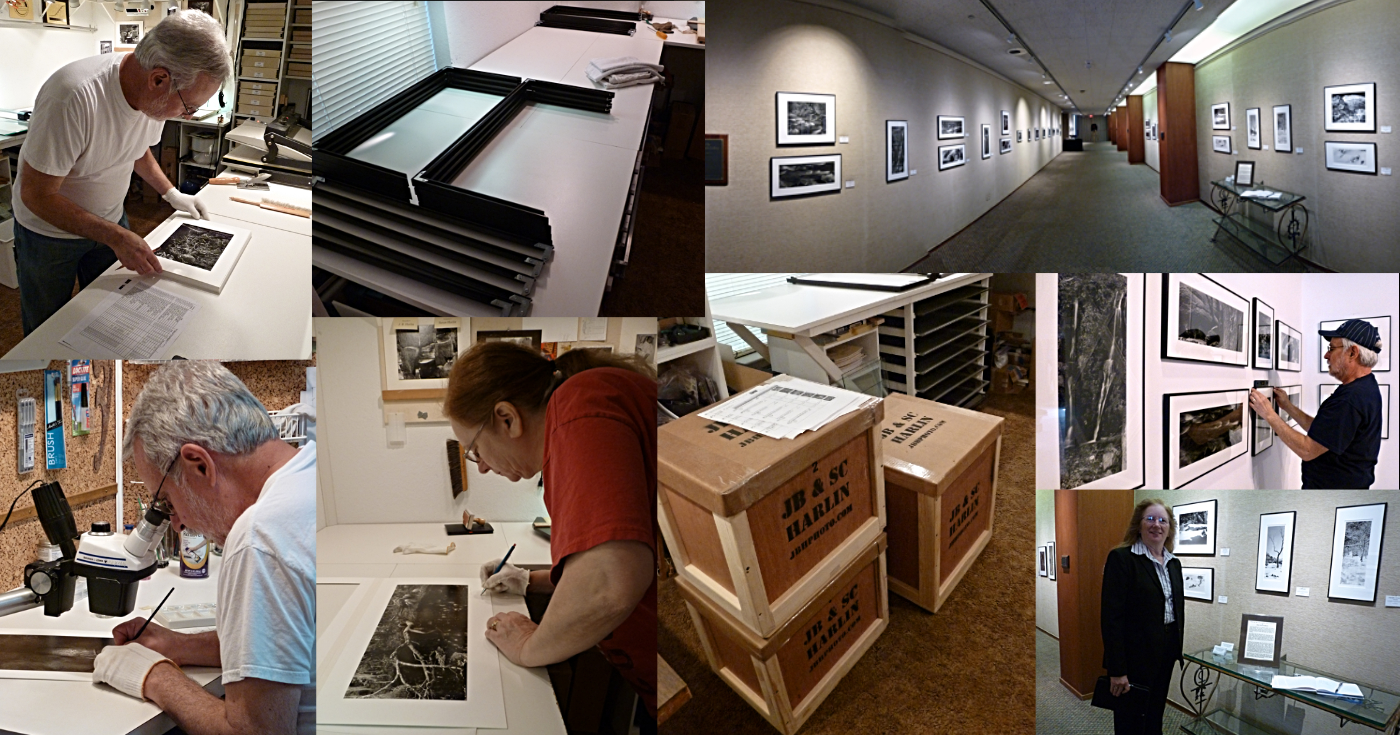
What if today, right now, you were asked to have ten of your photographs ready to be displayed in an exhibition in thirty days. Could you do it? Do have ten photographs that you would put on public display? If so, do you have finished prints ready? Are they, at a minimum mounted? Could you have them dust spotted, mounted with an over mat and framed in a month?

Have you ever had to prepare for an exhibition of your work? Do you have any idea of what is involved in preparing for an exhibition of your work? Do you have the materials on hand? Have you ever framed your work for formal display? Do you have a mat cutter? Have you ever cut your own mats? Yes you can buy precut mats, but do you know where to get them? Do you have frames and glazing? Do you know where to purchase suitable frames? What frame would you choose?

It is not a trivial task and I would venture to say it will take you at least three times as much effort and time than you would expect. I don’t care what your photographic medium is. It matters not if you are traditional wet darkroom, hybrid or all digital; do you have finished prints you can show if asked? Not that you would run into this situation but, could you deliver in thirty days or maybe less?

We always have mat board on hand. In several sizes. We cut our own custom over mats; have frames and glass on hand; have presentation cases filled with mounted photographs ready to be shown on a moment’s notice. We like to be prepared. We did one exhibition of our work which included over 100 framed photographs. I can guarantee that took longer than thirty days to prepare.

The idea is, if you put your time, skill and money into your work, why not have it in a finished state, ready for display? You never know when you may be asked. Think about it.

JB


E-Books

Posted by JB Harlin in Commentary, Photography, Presentation

DUST. . . Still A Four Letter Word!

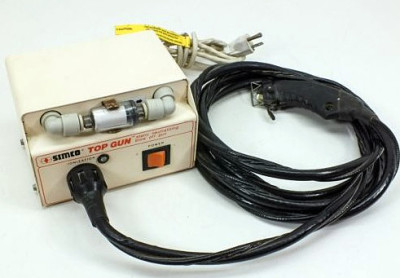
Simco F10 Top Gun

If you shoot film, you know that dust is one of your biggest enemies.  It gets into everything and is nothing but a nuisance.  I have written before about controlling dust around your camera and film holders, see these articles; “DUST. . . A Four Letter Word!” and “Wax on. . . Wax Off.”  
 
There is another Dust battle you have to deal with when handling and printing the finished negatives that requires as much, if not more attention to the problem.  Static attracts dust to the film like a magnet.  You can eliminate or greatly reduce the dust on the negative using compressed air, but there is even more you can do.  If you use an ionizing device you can greatly reduce the static charge, which helps in removing dust and helps keep it away.
 
Dust is not only a problem with film, it is also a big problem in manufacturing.  Ever notice how clean your new phone or TV is when you take it out of the box the first time?  There are numerous commercial devices used in the manufacturing process to help control the static charge that attracts dust.  These devices are on the expensive side, since they are specialized tools designed for commercial use.  The good news is, since they are used so much, they appear on the used market at much more tolerable prices.

We have two Simco F10 Top Gun Static Neutralizing Blow Off Guns.  (I know, get your mind out of the gutter, this is what the manufacture calls the device. . . see photos.)  We installed one in the darkroom years ago.  It worked so well, we added another in our work room where we mount, mat and frame.  This model has been replaced, but you can find them on eBay.  The unit is simple to use.  All you need is a source of air (a compressor) and a standard grounded electrical outlet.  They do work well.
 

One problem with the Simco unit is the hose and electrical umbilical.  It is long, about 10 feet and difficult to handle.  I solved that by building a spring-loaded retractor attached to the ceiling.  This keeps the umbilical out of the way and the device easily accessible when needed.

As I said, you will need a compressor with a regulator to furnish air to the Simco unit.  I keep the system pressure at about 40psi and you will need to add a filter to your air source.  We have a compressor in the garage which has a filter on its outlet.  Air is piped in via piping in the attic, then there is another filter at each Simco unit.  You do not want water or oil in your air lines.

We use the Simco Top Gun units every time we print or mount and frame prints.  They have become an integral part of the way we work.  Anything you can do to eliminate dust will help you in keeping print spotting to a minimum.  These units are also great for helping eliminate dust when mounting and framing.

Also worth mentioning is the Chapman ionizing antistatic brush.  I am not sure if they are still made, but Zone VI, Kodak and others sold these at one time.  We have a Chapman model and use it from time to time.  The unit has a soft camel hair brush attached to a high voltage supply via a long cord.  This is a good alternative if you do not want to have to use a compressor as with the Simco unit.  We both used the Chapman brush until we found the Simco units.  The ionizing brush works well, but nothing beats having compressed air combined with an ionizer.

Just remember; DUST IS A FOUR LETTER WORD!

JB

Posted by JB Harlin in Darkroom, Film, How-To, Photography

THE PROPER PROOF; AN IMPORTANT STEP

‘Before making a print, let me remind you again that you must first make the proper proof in order to select the negative for printing.’


‘Please do not short cut this step.  An outstanding print is always the product of an outstanding negative.  No one can positively translate negative densities – as seen on a viewing table – into emotional values.  You must see the way it prints.  The proper proof identifies the qualities of the negative.’

-Fred Picker, ZONE VI WORKSHOP; The Fine Print In Black & White Photography,  Amphoto, Garden City, NY, 1974, p. 44-

Proper ProofWhile working on all of the negatives from our last trip, and a couple of local outings, I began thinking about proofing and just how important the proof is to the fine art photograph.  I guess I take a lot of what I do for granted and seem to believe that everyone else understands the process.  This may not be all that true and maybe it would be a good idea to emphasize in a little more detail the importance of proofing.

I gained the most in my creative photographic endeavors when I discovered Fred Picker and his little book titled “ZONE VI WORKSHOP.”  This little book is short and sweet, yet packed with a lot of information.  You might say it is deceptively simple and short.


I believe the above quoted paragraphs from the chapter titled “THE FINE PRINT” pretty much sums up one of the most important steps in the photographic process.  You have to see what you have captured on the film before you can decide to make the finished fine print.  The proper proof is your absolute verification as to the validity of the negative.  It is your guide, your control and provides the necessary information for the next step. . . the finished print.

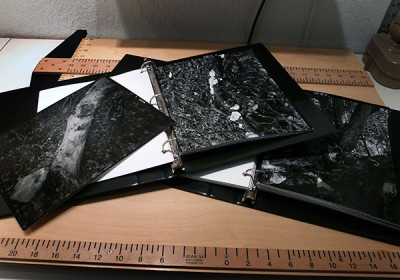
We proper proof and file our proper proofs into 3-ring notebooks.  This is where the second half of the creative process begins.  (The first step is finding something worthy of capturing on film.)  I highly recommend you proper proof every negative you make.  This way you will know what your are doing and what you have to work with.  The proper proof will also reveal any shortcomings or problems you may have with your equipment or technique.  As Fred says, “Please do not shortcut this step.” I agree and feel it is a very important step in the creative photographic process.

Are you interested in learning more about the art and craft of black & white photography and Proper Proofing? We have created an e-book series especially for you. Within in the pages of “The Film Exposure Work Book” you will learn how to preform your own film tests and how to make proper proofs. You will find more information at our BOOK STORE.

JB & Susan


Posted by JB Harlin in Commentary, Darkroom, Film, Photography

DON’T THROW OUT OLD PHOTO PAPER

DON’T THROW OUT OLD PHOTO PAPER
There seems to be a lot of people interested in the traditional wet darkroom these days. As many abandon their darkrooms, others are just getting started. I have seen numerous transfers of darkroom materials, chemicals and hardware to newcomers interested in the wet darkroom. . . a lot of times for FREE. There is a lot of old printing paper coming out of storage and being either tossed in the garbage or passed on (without any guarantee what so ever) to those that are just starting out. Certainly a lot of this old paper is fogged to some extent. . . but all may not be lost. If you find yourself in possession of several thousand sheets of a really great paper, depending on the amount of fog, you just may be able to make excellent prints, despite a little general degradation.

DON’T THROW OUT OLD PHOTO PAPERPaper fog, as a rule shows up as a general darkening of the processed paper, thus making pure white in the print an impossibility. You can easily test for paper fog. . . see my previous article, “MEASURING PAPER FOG” for my method for testing paper.

Success is very dependent on the image you are printing, but in most cases, fog can be eliminated in the highlights and whites of the print by simply doing a little selective bleaching. Even deep shadows can be livened up with a little work with a bleaching mixture and a brush. Selective bleaching is not difficult and here is more info from a previous post titled, “A LITTLE SELECTIVE BLEACHING.”

If the whole print requires overall livening up, you can bleach the entire print in a tray.   Look up the formula for Farmer’s Reducer. You may find that you have to over-print the image (print a little too dark) and then bleach it back upward (lightening the image) to restore the image sparkle. You will just have to experiment and find what works best for each print.

Realize that if the paper has severe fog or a mottled, spotty fog, this method will not be of much help. Also keep in mind that even severely fogged paper can sometimes be fixed out and used for other processes. Many carbon transfer printers used old, fixed out paper for their finished images. Old, fogged paper should not be thrown out without first, at the very least, trying to find if it is in some way useable. You never know. . . that free, old out-of-date paper may be a really good deal after all!

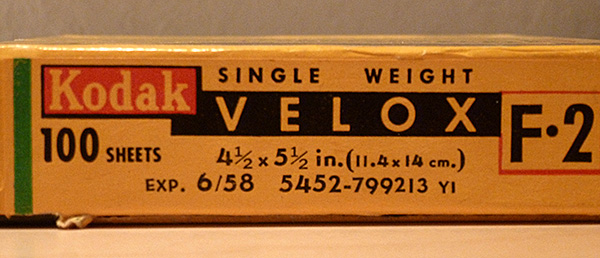
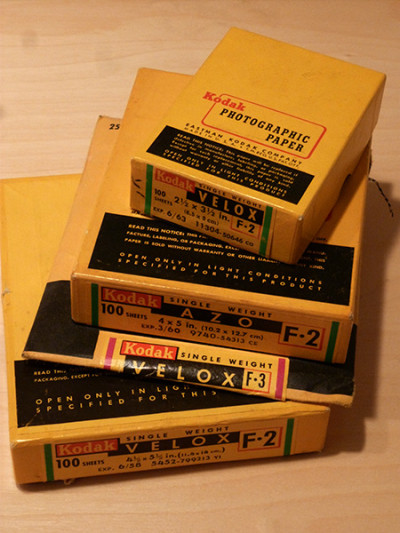
Velox

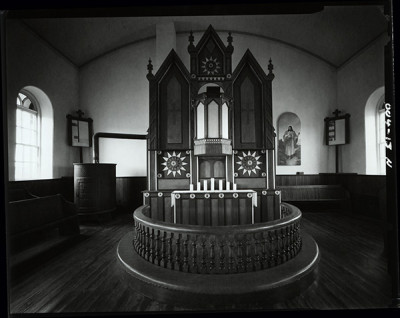
4×5 Contact Print on vintage Velox paper, expiration date of 1958

If you have a lot of fogged paper that you paid little to nothing for, why not give bleaching a try. I have successfully pumped life back into paper that had expiration dates on the box that make it nearly as old as me!

JB

Posted by JB Harlin in B&W Paper, Darkroom, Film, Photography, The Darkroom Workshop

PENTAX DIGITAL METER SCALE MODIFICATION

I have been going through and updating this blog site and I have found several entries I have never posted. This is a project that was completed way back in 2007. Enjoy this blast from the past!
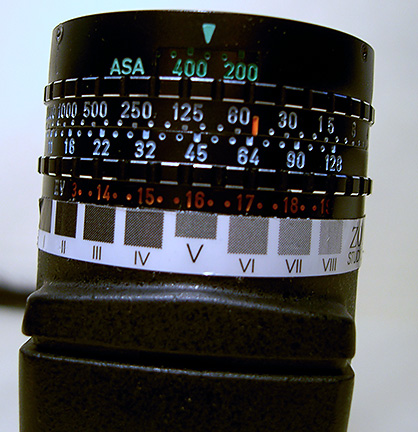

Pentax Digital Meter ModSo, I know that I really should spend more time talking about photography, but it is so much easier to talk about equipment and modifications. . . so. . . here we go again.  I know I have said several times before that little around here has not been modified in some way.  I have to say that my Pentax Digital Spot Meter is about my number one tool when photographing.  Maybe I should say it is my only tool that has a battery.  No wonder Paul Horowitz chose it to modify for Zone VI.  I like everything about it, except the Zone Dial.  Now don’t get me wrong here, the old Zone VI Zone Dial was plenty useable.  It was just that the label was not that durable and though we had purchased replacement Zone scales, I wanted something that was more rugged.   So, this is how it all started.  I just wanted to make a better label.  And, another complaint I had was that part of the Zone Scale was covered by the meter barrel.


What I wanted was a more durable scale, and the ability to see the entire scale from Zone I to Zone X against the EV numbers on the dial.  I had an idea about the scale and I thought I might open up the barrel of the meter a little.  Turns out the scale was not that difficult, but in order to open up the barrel on the meter required I machine an entire new part.

First I needed to design a new meter scale and see how it would fit.  The nice thing about doing your own modifications is you can design for the way you think.  I set off first laying out a Zone Dial that I liked.  I wanted a few symbols to jog my memory without clutter.  I wanted to see ten full stops.  It would include markers for N as well as N+1 ½ and N-1 ½, so I would not have to do any counting of Zones or EV numbers, just dial up whatever you want with little thought or counting.  I also added a marker for Zone III to remind me of deep shadows and one at Zone IV for lighter shadows.  Of course I added my name, website and copyright and there it was.  I did the artwork in TurboCad and laid out the spacing to match the EV dial on the meter.  I printed out a paper model and proceeded to check for fit and functionality.

Next I needed to rework the rear part of the meter barrel.  I first thought I could modify the original, but it became obvious that if I were to cut away metal on the factory part, I would then have to strip the original anodize and re-plate.  That usually does not work too well, so I opted to just make an entire new ring.  This wasn’t that hard to do.  The lens barrel is easily removed and the rear part that I needed to modify was simple machining.  All I had to do was measure the original and make the replacement, adding my modification.  I turned out the new part and made several test fits to make sure everything worked as planned.  Once I was satisfied with the new ring, it was just a matter of some black anodize and assembly.  I should note that we have four of these meters and I modified all of them at the same time.

I ordered some light sensitive, adhesive backed, aluminum that is mostly used for trophies and name plaques.  I have used this material for panels on prototype devices before.  This would serve as my new meter dial.  I printed out a negative on clear film and this was used to expose the metal plate.   After development, I had my dials ready to be cut to size.  All that was left at this point was positioning the dials onto my new, opened up, meter barrel and one more project was done.

Zone System Dial

This was another one of those projects that was a little more involved than originally anticipated, but turned out to be well worth the effort.   I did the modifications in 2007 and our meters have seen a lot of use since.   My slightly encoded Zone Dial has worked very well, allowing me to work quickly and hopefully with fewer mistakes.  Like I have said before, I like to keep things as simple as possible when working.  Too much technical chatter gets in the way of creativity.  I would rather do the technical work in the shop so I can get on with making my art without too much distraction.

JB

Posted by JB Harlin in DIY, How-To, Photography

CUSTOM PANO PRINTING EASELS

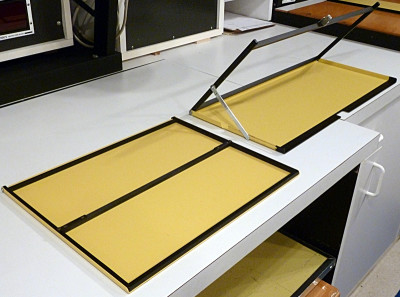
Custom modified 5.5 x 14 & 8 x 20 printing easels

Seems the more you do the more you need to do.  Or, maybe more accurately, the more you do unique things, the more custom hardware you need.  Either way, seems there is always some project that needs to be addressed.

Susan started working in the pano format exclusively about 11 years ago.  She shoots only 4×10 and 8×20 film.  This means she enlarges her 4×10 negatives to mostly 5 1/2 x 14 or 8 x 20.  She cuts 11 x 14 and 16 x 20 paper in half when she prints.  Not much of anything exceptional there, except you need some sort of non-standard printing easel when making such prints.  For years now she has been using a modified 16 x 20 Saunders Speed Easel and an adjustable easel for 5 1/2 x 14.  Thing is, these easels are very large and the way our 8×10 enlarger is setup, you have limited baseboard area.  What she wanted was a custom easel for the 8 x 20 for sure and something similar to her modified 16 x 20 using an 11 x 14 Speed Easel.

 
This is not that difficult of a machining project. . . just requires a little thought, some metal and the magic ingredient. . . time!  Oh, and a couple of spare Saunders Speed Easels to perform a modification upon.  We did find the easels on eBay, and I had ordered the material. . . finally I found the time.
 
For the 8×20 easel the idea was to cut down the hold-down border to the correct size, then cut the base to match.  This would make a custom 8 x 20 Speed Easel.  The actual re-fabrication was not too difficult.  It took more time measuring to make sure things worked out to the right print border size, since this is a cut once type of project.  I machined a new cross bar for the hold-down, made sure it was a good fit and drilled and tapped the ends.  Next I cut off the unneeded portion of the stock hold-down, drilled the side bars and assembled the new 8×20 border hold-down.  It all fit just about right.
 
Next I needed to cut off the unneeded portion of the base of the easel.  I carefully measured and marked the needed cut.  The bandsaw did the rest.  A little dressing with a large flat file and the new base was almost done.  Since the larger Speed Easel has a locking mechanism to keep it closed, I needed to add a relief in the base to clear the latch.  That required a little more bandsaw work, followed by some finishing up in the vertical mill and all was well.

Once everything was test fitted, all that was left was a little painting.  Since all of the easel is steel, it is a good idea to discourage rust.  I lightly sanded the newly fabricated border hold-down and gave is a luxurious coat of self-etching flat black primer. . . done.  The base was a little different.  I really didn’t want to repaint the whole thing and finding paint that matched the Saunders yellow was not really an option either.  I decided to mask off the end where I had removed the excess base about one inch inward and only paint that portion with the black primer.  That way I would get the bare edge of the exposed metal covered and it would not look that bad.

All that was left now was to wait for paint to dry and then assemble.  I did have to remove the anti-skid rubber feet from the cutoff piece of the base and glue them to the new 8 x 20 easel.  That was it. . . all done. . . ready to use.

For the 5 1/2 x 14 easel modification, I took a much simpler approach.  Since the original 11 x 14 easel was small, there was no problem using it on the enlarger base.  So, no need to cut the entire easel down to a smaller size.  All I really needed to do was machine a new cross bar to cut the easel size in half.  I also worried that if I did cut the easel down that the border bar assembly would not have enough weight to hold the paper flat.

I cut a new cross bar from a length of 0.25″ square steel bar and machined up a couple of bracket pieces from aluminum to hold it in place.  A little drilling and tapping and six #4-40 truss head socket cap screws and all was ready for some finish work.  The new divider bar, along with the brackets were cleaned and given a coat of flat black self-etching primer.

I know this is not a project for the average person to attempt with only a few hand tools.  This is not complicated, but does require a degree of precision and tools suited to the task.  There are those times you have to build what you need.  This is one of those things I do to relax and unwind.  I offer this little project as an example of what can be done.  If you decide to modify your easel, do proceed with caution.

JB

Posted by JB Harlin in Darkroom, DIY, How-To, Photography

EXHAUSTION; OR, IS THIS STILL GOOD?

Fixer does not soon become “exhausted” in the sense that it can’t dissolve more silver salts. Instead, the trouble is with silver/sulphur complexes that build up as the hypo is used. They can’t be washed out of paper. One of Alfred Stieglitz’s sins was that in spite of excellent training in photographic sciences at the Berlin Technische Hochschule under the great Wilhelim Vogle (whose discoveries made orthochromatic and panchromatic film possible), Stieglitz told the young Ansel Adams that a gallon of fixer is good for thousands of prints. He thought that Kodak’s advice to change the hypo frequently was just corporate greed-anxiety to make big profits selling more dirt-cheap hypo. No doubt that’s why some Stieglitz prints are turning funny colors.*
* Photo Techniques Magazine, “Advanced B&W Printing” 2002, “Photo 303, The Pratt Institute Handouts” by David Vestal, p.40

EXHAUSTION
Nothing lasts forever. And, this is even more true when it comes to photographic chemistry. The question is, how long does the chemistry used in the darkroom last once mixed and what is the exhaustion rate? I firmly believe that trying to milk photographic chemistry for every last little bit is a recipe for disaster. Think of it this way. You have invested a lot of time and money by the time you get into the darkroom. Is it really worth it to try and save a few dollars by pushing your luck with chemistry that may not be up to par? Honestly, the least expensive item you use in the photographic process is the chemistry and water. Why scrimp, and risk disaster?

We calculate the exhaustion rates of all chemical formulas we use. It is very important to know the capacity of the film developers you use. If you try and stretch the chemistry beyond its useful capacity you will ruin your film. Same thing happens with the fixer. Printing paper is the same, except if you make a mistake you can always start over. But with film there is no do-over.

We very closely watch the capacities of the chemistry we use. The basic rule in our darkroom is to assure that we seldom go beyond 50-60% capacity. Film developers are used one-shot, making sure to use an adequate volume of chemistry for the number of square inches of film being developed. Film fixer is ran to 50-60% capacity then discarded. The same criteria is used when printing. Paper developer is used to maybe 60-70% capacity then discarded. Paper fixer is never used more than 60% of capacity.

In our darkroom there are few chemicals that are not discarded after a darkroom session. The only fixer we keep is the rapid fix used for film and it is discarded at 50-60% capacity. The only other chemistry we keep is Selenium Toner. All chemistry is labeled with the date it was mixed. Those that are kept for reuse are marked with the number of sheets of film or paper it has seen.

There is no need to run the risk and facing the consequences of exhausted chemistry when it comes to your photography. As said before, the chemistry is the least expensive item you will use in the whole photographic process, from film to the finished print. It is not worth the possible disaster that scrimping can cause. It is important to know the capacities of every formula used and never run any to full exhaustion. Nor is it a good practice to keep mixed solutions too long. Some formulas deteriorate rapidly once mixed. Know your chemistry and use it wisely!

JB

Posted by JB Harlin in Darkroom, Film, How-To, Photography, The Darkroom Workshop

Photo Arts Xchange 2019

Photo Arts Xchange

What can you say about your photographic vision? Not your mechanical technique, nor the hardware you use, nor special processes. We are talking about what inspired, motivated and drew you to make a photograph. What was your intention, your vision? What drove you to commit to finishing a print for presentation? This was the driving motivation for Steve Sherman in creating the first annual Photo Arts Xchange (PaX) gathering in Rocky Hill, Connecticut this past weekend.

Steve contacted Susan and I in June and proposed an idea for a different kind of event for serious photographic artists. This was a new and fresh concept that we both immediately knew we had to be part of. Rather than trying to explain the mission of PaX in too much detail, here is an excerpt from the PaX web site;

Photo Arts Xchange is a collaboration of lifelong committed photographers. Our goal at first is to create a long weekend of image sharing with only a brief mention of tools and technique with the majority of focus on Concept and Content of one’s imagery. . .

To be clear, this weekend event is not a vehicle to sell your books & videos or fill workshops, rather an event to give back the knowledge that each of us has been blessed to acquired as a result of an uncommon commitment to a chosen genre of photography.

PaX is unique in that it is not a review, workshop, nor a technical event. It is about the art of photography. A closer look at those things that are not pure science, but are the real heart and soul of a finished image. An exploration of the art of photography, not the craft.

Those of us that were part of the planning and execution of PaX have been overwhelmed by the experience. We all agree that we were in total mental overload from the sheer volume of exquisite imagery we were exposed to in the two days of sharing and discussing what makes each of us tick artistically. We believe we have been extremely successful in creating an event that encourages creative minds to explore their vision and to share that vision and enlighten others to the really difficult part of art. . . that inner voice that says here is something you need to say. . . something you can only say with an image.

Susan and I feel we are extremely fortunate to be a part of the founding of PaX and we are looking forward to PaX 2020. We would like to thank everyone that attended. And a special heart felt thanks to Steve and those that worked very hard to make PaX 2019 such a success.

We can only imagine what next year will be like!

JB & Susan

https://www.photoartsxchange.com

Posted by JB Harlin in Events, Photography, Presentation

WHAT TO DO ABOUT THE EDGES

WHAT TO DO ABOUT THE EDGES

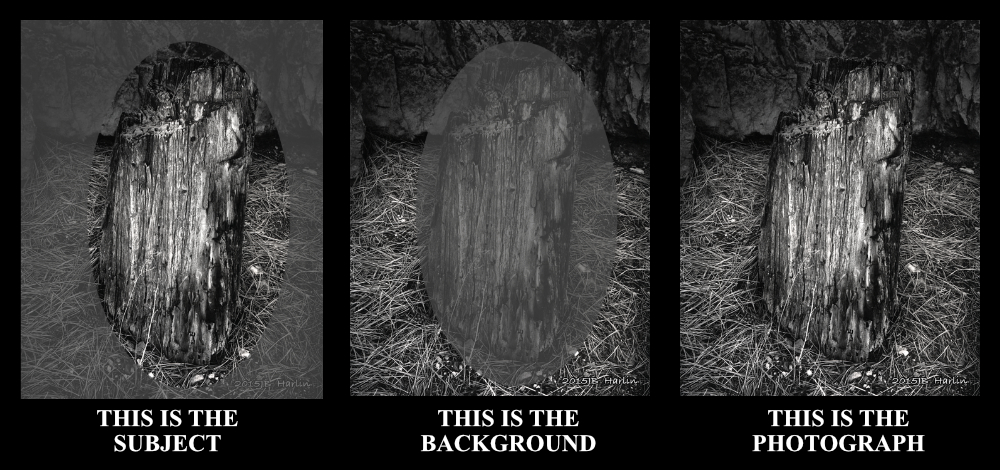
When looking for a suitable photographic subject, the subject should be the focus of the finished print. You want the viewer to be drawn to what you have chosen. Problem is, it is easy to become obsessed with that subject and blind to its surroundings. Have you ever taken a photograph of something or someone and been surprised when you see that in the finished print there is some nasty, distracting object somewhere in the background? Or maybe at the edge of the frame something shows up that really ruins your creative intention. How can this happen? I believe it is because you are mentally so focus on the subject that you completely ignore the surroundings. This is something you will learn to pay attention to after a few failures.

I learned this lesson years ago the hard way. This is why failures are important. You need to analyze your mistakes and learn not to repeat them. There is no great loss in failing. Failure can be especially important if you learn from your error. The idea is to analyze the problem and not keep repeating the same mistake. I find myself constantly scanning the edges of the frame when composing on the ground glass. I have even noticed, mostly unconsciously that I find myself scanning the edges of the frame when watching a movie. I know the director intentionally wants you to focus on the subject of the scene. Yet I am always looking at the background and what surrounds that subject. The movie set is there to establish the mood and to give the illusion of a place and time. I am fascinated by how much time is spent on the surroundings in a really well made movie. Most people completely ignore the objects surrounding the actors. I find I am always paying very close attention to those things that are not suppose to be obvious or are suppose to be ignored. This is a mindset that is learned over time.

It cannot be stressed enough that the edges of the photographic frame are important. How important? They could be much more important than the chosen subject itself. It’s your job as the photographer to make sure everything in the photograph works together. Interestingly enough, the subject is the subject and it usually takes care of itself. It’s those nasty little distractions that surround the subject that can make or break a really great photograph. Personally I find that once I have zeroed in on my main subject, I tend to spend a lot of time working with the surroundings.

Remember, you can always move the camera. If moving is not an option, you can try another lens. For fine tuning, you also have camera rise/fall and shift. The idea is to never let something distracting in the background or at the edges become something that interferes with your creative intention. Use those elements at the edge to reinforce your subject.

My best advice is to spend a lot of time on the frame edges. You will not regret it!

JB

E-Books

Posted by JB Harlin in Commentary, Photography

PRESTO, MAGIC AND SECRETS

PRESTO MAGIC AND SECRETS

It seems that working in the darkroom is magic. Developing film has little visual magic, that is to say, you see no magic, because most all film processing is done in total darkness. The magic is reserved for when you turn on the lights. But, printing is a different story. Under the dim glow of the safelight you can actually see the printed image appear, seemingly from nothing. It is a magical experience to see the photograph develop right before your eyes. No matter how many times I process a print, it is still magic to see the transformation. There is something that is otherworldly about what happens in that tray of liquid. But is it really magic?

It is well understood that a magician performing slight of hand or an illusion has many secrets. If you knew how a magic trick was done, it would ruin the experience. So in the world of magic, there are many secrets. And the working magicians guard those secrets well. Though photography seems to be magical, there are no secrets. There are no secret formulas, techniques or mystical incantations used when making traditional photographs in the wet darkroom. If you dig deep enough, you will find just about everything you would ever want to know about photography. There are no hidden secrets, only the basics of the process. Once these basics are mastered, there are many variations and techniques one can apply to achieve their personal vision.

I can say without reservation that I have no secrets. What I have learned over the years is the product of finding those techniques that work best for me and applying them as I see fit. Working in the wet darkroom and with film is about starting with the basics. You need a firm foundation of craft upon which to build your creativity. Next you apply different refining techniques and utilize them as needed to suit your vision. And what is so interesting about this is, you can do the same. You have to find what works for you.

I can also say that I never stop learning. Every time I step into the darkroom I push the boundaries of my abilities. I strive to continually learn new things that work for me. Interestingly enough, nothing I do is particular to me. Everything I do is something I learned from someone else, or an article, or publication I found. There just are no secrets. It is a matter of rolling up your sleeves and expanding your proficiency by doing.

My best advice to the newcomer to traditional photography is to come to the realization there are no magic bullets. There are no short cuts. You will only master the art form through seriously and continuously striving to achieve the results that suit you. Never stop learning and expanding your abilities.

Sorry, prestidigitation will not work. Don’t waste your time looking for that magic shortcut. . . it doesn’t exist. But the good news is there are no secrets. You only have to roll up your sleeves and learn the process, the old fashion way. You can’t say PRESTO and pull a beautifully printed photograph out of your hat!

JB

E-Books

Posted by JB Harlin in Commentary, Darkroom, Film, Photography, The Darkroom Workshop